SpringBoot in 1 Hour for Absolute Beginners: The Big-Picture Learning Method

Learn SpringBoot in 1 hour using the big-picture-first method — from simple Java to enterprise apps.
Most beginners quit SpringBoot because they get stuck in an endless prerequisite loop. This article introduces a big-picture-first learning method: understand the Java → Spring → SpringBoot evolution, start with a minimal runnable project, and build confidence through hands-on practice rather than exhaustive theory — getting your first app running in about an hour.
Why Most Beginners Never Finish Learning SpringBoot
Many beginners diving into Java and its ecosystem fall into the same trap: they hit a concept, discover they need more prerequisite knowledge, keep backtracking, and eventually stall completely. This pattern is especially common among SpringBoot learners — students often burn enormous amounts of time on foundational concepts like "object-oriented programming," trying to run endless exercises just to "verify they've truly mastered it."
This "prerequisite knowledge trap" is well-documented in computer science education research. Human working memory is limited (psychologist George Miller's famous "7±2" rule), and when learners encounter too many new concepts at once, cognitive overload causes a sharp drop in learning efficiency. SpringBoot's tech stack has a naturally deep dependency chain: Java basics → Object-Oriented Programming → Design Patterns → Servlet/Tomcat → Spring IoC/AOP → SpringBoot Auto-configuration — and each layer can be explored infinitely deeper. The "Scaffolding" approach recommended by modern educational psychology is the antidote: give learners an actionable overall framework first, then fill in the details layer by layer, rather than forcing them to master every prerequisite before touching the main topic.
This is precisely why grinding on the basics is an inefficient way to learn. When you spend all your energy validating details, it might take half a year before you even touch a real enterprise-level SpringBoot project — and that's the root reason so many beginners quit halfway.
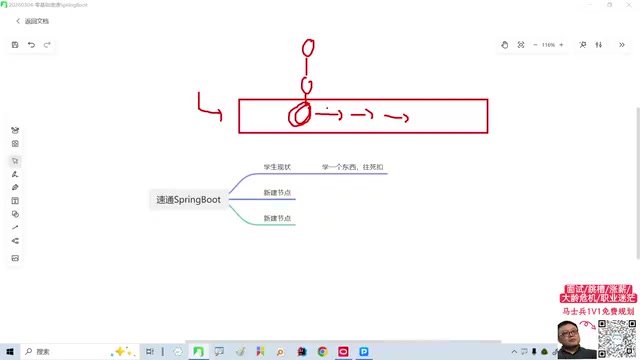
The Core Method: Grasp the Big Picture, Let Go of the Details
The key to breaking out of this trap is the big-picture-first approach. Instead of getting bogged down in every syntax detail, build a mental map of how the entire technology ecosystem fits together. The goal isn't to memorize APIs — it's to understand why the technology evolved the way it did. Why do we need Spring? And why did SpringBoot emerge on top of Spring?
This "start from the problem" mindset is essentially about helping beginners construct a cognitive framework. Once you understand the motivation behind a technology's evolution, the specific implementation details become much easier to absorb.
The Evolution Path from a Simple Java Project to SpringBoot
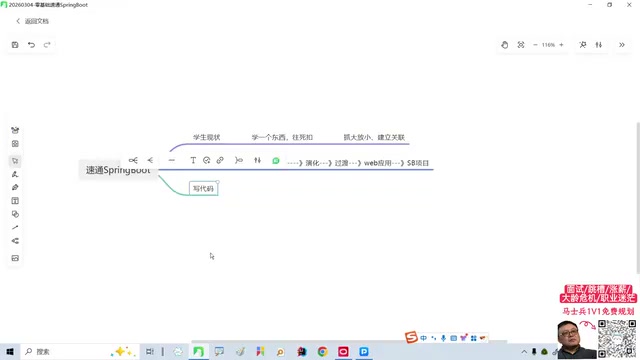
A well-designed SpringBoot beginner course shouldn't dump complex configurations on you from the start. Instead, it should begin with the simplest possible Java project and gradually evolve toward an enterprise-level application.
Understanding the Java → Spring → SpringBoot evolution is crucial for beginners to develop a holistic view of the technology landscape. Early Java EE (Enterprise Edition) development required writing massive amounts of XML configuration and boilerplate code, deployed on heavy application servers like JBoss or WebLogic — extremely inefficient. In 2003, Rod Johnson released the Spring Framework, which used two core mechanisms — Inversion of Control (IoC) and Dependency Injection (DI) — to transfer object creation and lifecycle management out of application code, dramatically reducing coupling between modules. However, Spring itself still required verbose XML configuration. In 2014, the Pivotal team introduced SpringBoot, whose core innovations were Convention over Configuration and the Auto-configuration mechanism. Developers no longer need to manually configure 80% of common settings, and an embedded Tomcat server allows applications to be packaged as executable JARs and run directly — reducing a web project's startup time from hours to minutes.

This incremental structure is especially beginner-friendly. Encountering too many unfamiliar concepts at once leads to cognitive overload, but starting from a minimal runnable project lets learners see immediate results, then layer on concepts one at a time — understanding why each step is needed — building a complete mental model of the entire technology chain.
The learning goal should also be pragmatic: by the end of your study, you should be able to get a SpringBoot project actually running. For beginners, the positive feedback from "getting that first project to work" is far more motivating than memorizing a pile of theory.
Setting Up: Choosing Your Development Tools
Before writing a single line of code, tool selection matters. Many beginners default to Notepad, but professional developers almost universally use an Integrated Development Environment (IDE) like IntelliJ IDEA.
The fundamental difference between an IDE and a plain text editor is this: an IDE integrates the entire development workflow — editing, compiling, debugging, version control, and dependency management — into a single tool. IntelliJ IDEA, released by JetBrains in 2001, is now the most widely used IDE in Java development. Its core strengths include semantic-analysis-based intelligent code completion (not just keyword matching), real-time error detection with quick-fix suggestions, powerful refactoring tools, and deep integration with the Spring/SpringBoot ecosystem — such as visual Bean dependency diagrams and automatic recognition of configuration properties. These capabilities dramatically improve development efficiency and reduce silly mistakes, making IDEA especially valuable for anyone serious about a professional development path.
A note on tooling: Some video tutorials suggest obtaining the Ultimate Edition through cracked or third-party channels — this carries both legal and security risks and is not recommended. In practice, JetBrains offers free official licenses for students and educators (apply with a school email), and open-source projects can also apply for free licenses. The Community Edition fully meets the needs of Java learning and SpringBoot development, making it the safer, fully compliant choice.
Hands-On: Creating Your First Java Project
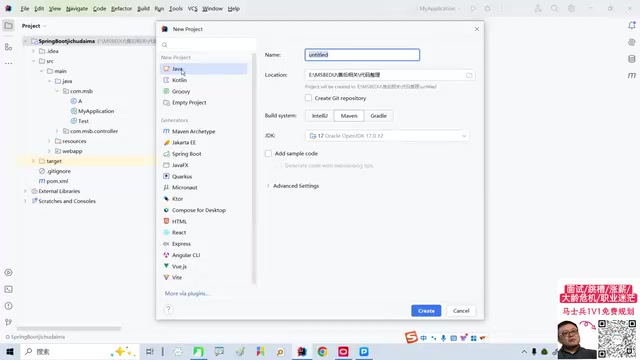
With your tools ready, it's time to get practical. Use IDEA's New Project wizard to create a basic Java SE project, configure your JDK version, choose a build system, and generate the project structure in the current window — the whole process takes just a few minutes.
Starting with a Class
The first thing to do after creating a project is to create a basic Class — the starting point of object-oriented programming.
A "class" is the core abstraction unit of Object-Oriented Programming (OOP): essentially a unified encapsulation of the data structure and behavior of a real-world concept. Java is a pure object-oriented language — almost all code must live inside a class. Understanding what problem classes solve matters more than memorizing the syntax: in procedural programming, data and the functions that operate on it are separate, and maintenance costs skyrocket as programs grow. Classes address this through Encapsulation (binding related data and methods together), Inheritance (enabling code reuse), and Polymorphism (supporting flexible extension). All three pillars are visible throughout SpringBoot: classes annotated with @Service or @Controller, for example, are essentially special object instances (Beans) managed by the Spring IoC container — understanding classes is a prerequisite for making sense of Spring's dependency injection mechanism.
Don't rush to memorize every syntax rule for classes. First understand what problem classes are solving, then learn how to use them. Going from a blank project to your first class may seem trivial, but it's the critical leap from "can't do it" to "can do it." For absolute beginners, the most important thing isn't learning everything at once — it's getting something running, getting it to work, and building your confidence.
Summary: The Right Learning Path Matters More Than Effort
The hard part of getting into SpringBoot was never the technology itself — it's the learning approach. Three points worth revisiting:
- Reject perfectionism: Don't try to achieve complete mastery of every foundational concept before moving on. Build the overall framework first; details can be filled in through practice.
- Understand the evolutionary logic: Knowing why each technology exists is more valuable than memorizing syntax. Grasping the Java → Spring → SpringBoot evolution — from Java EE's heavyweight configuration, to Spring's IoC/DI decoupling, to SpringBoot's "convention over configuration" automation — is the shortcut to getting productive quickly.
- Make "getting it running" your goal: Completing a working, runnable project creates the positive feedback loop that drives continuous learning.
For anyone genuinely looking to break into backend development, the recommended path is to steadily work through "simple Java project → Spring → SpringBoot" in that evolutionary sequence, using officially licensed development tools and reputable learning resources. The secret to avoiding detours was never finding some "legendary tutorial" — it's mastering the right learning methodology.
Key Takeaways
Related articles

Transformer²: Achieving Co-Design of Robot Morphology and Control with a Unified Architecture
Deep dive into how Transformer² uses a unified Transformer architecture to integrate robot morphology design and motion control into one model, enabling task-driven end-to-end co-design for embodied AI.

Tutorial: Installing Tailscale on a Jailbroken Kindle to Create a Private Network Node
Learn how to deploy Tailscale on a jailbroken Kindle, turning an idle e-reader into a private network node. Covers cross-compilation, power optimization, and risk considerations.
Tutorial: Installing Tailscale on a Jailbroken Kindle to Create a Private Network Node
Learn how to deploy Tailscale on a jailbroken Kindle to turn an idle e-reader into a private network node. Covers cross-compilation, power optimization, and risk considerations.