TRAE Editor + Figma MCP Hands-On Tutorial: Convert Design Files to Web Code in One Click
A hands-on guide to using ByteDance's TRAE editor with Figma MCP to auto-generate web code from designs.
This article covers the full setup process for ByteDance's AI-native editor TRAE, including download and installation, configuring the OpenRouter API to access international models, setting up Figma's official local MCP connection, and a hands-on demo showing how to automatically generate accurate web code from Figma design files via Figma MCP — ideal for beginners to follow along.
Introduction
TRAE (official site: trae.cn), a code editor developed by ByteDance, is emerging as a new option in the AI-powered programming space. Built on the VS Code core, TRAE falls into the "AI-native IDE" category — similar to products like GitHub Copilot and Cursor. Its core philosophy is to deeply integrate large language models into the coding workflow, rather than simply attaching them as plugins. ByteDance launched the domestic version of TRAE primarily to address the pain point of unstable access to overseas AI services for Chinese developers, while also providing native support for domestic LLMs like DeepSeek and Kimi. This article will walk you through the entire process — from installation and configuration to generating web code using Figma MCP — step by step, so even complete beginners can follow along.
Installing and Configuring the TRAE Editor
Downloading and Installing TRAE
Simply visit trae.cn to download — make sure you don't accidentally download the international version. During installation, if you see authorization permission requests, whether on Windows or Mac, grant all permissions. These permissions are essential for the AI features to work properly — operations like having the AI help you set up development environments depend on them.
After installation, the chat panel on the right side comes with several built-in domestic LLMs. If you need to use international models, you'll need to add a custom API.
Configuring the OpenRouter API
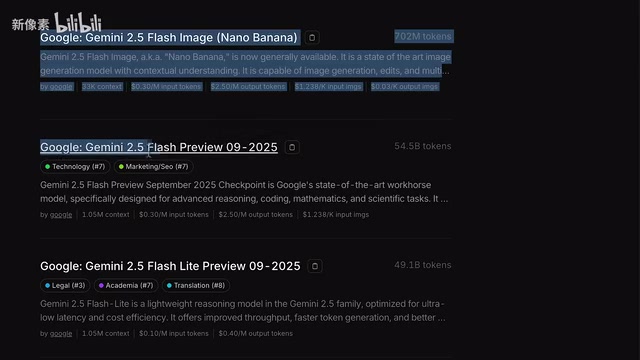
OpenRouter is an AI model aggregation routing platform — think of it as the "AWS Marketplace of AI." It unifies API interfaces from dozens of AI providers (OpenAI, Anthropic, Google, Meta, etc.), allowing developers to call any model with a single API Key and pay based on actual token usage. I recommend using OpenRouter as your API provider for a simple reason: it's an international platform with significant scale, and both domestic and international AI tools have good support for it. Plus, having a single billing account makes management easy, and cross-model comparisons become straightforward. Here are the configuration steps:
- Get your API key from the OpenRouter website
- Enter the key in TRAE's settings (the URL is pre-configured — you just need to fill in the key)
- If you need to add models beyond the presets, go to the OpenRouter website and copy the corresponding Model ID
Important note: OpenRouter Model IDs typically follow the format "provider/model-name," for example anthropic/claude-3.5-sonnet. When copying, make sure to click into the model's detail page and copy the full ID — don't just copy the model name. After adding, remember to switch to the newly added model in the chat panel (confirm that a checkmark appears).
Regarding model selection: more expensive models naturally perform better, but if you're in the learning and testing phase, mid-range models work fine. Among domestic models, DeepSeek and Kimi perform relatively well.
Configuring Figma MCP to Connect with TRAE
Understanding the MCP Protocol
MCP (Model Context Protocol) is a standardized protocol proposed and open-sourced by Anthropic in late 2024, designed to solve the "connection fragmentation" problem between AI models and external tools/data sources. Before MCP, every AI tool needed to develop a separate integration solution for each external service, making maintenance costs extremely high. MCP defines a unified client-server communication specification: the AI application acts as the MCP Client, external tools (such as Figma, databases, file systems) act as MCP Servers, and both sides exchange context information through a standardized JSON-RPC protocol. This makes "build once, reuse everywhere" possible — Figma only needs to maintain one MCP Server, and all MCP-compatible AI tools (Cursor, TRAE, Claude Desktop, etc.) can call it directly.
Choosing an Installation Method
TRAE's MCP marketplace includes a built-in Figma option (provided by Volcengine), but this may be an earlier third-party API version. If you use this version, you'll need to generate a new API Token in Figma's Settings → Security → Personal and enter it.
However, I recommend using Figma's official latest local MCP version. Here are the steps:
- In TRAE's MCP settings, select "Add Manually"
- Copy the Cursor version configuration from Figma MCP's official documentation (select all and paste)
- Confirm the addition

Key Prerequisites for Figma MCP
Figma's official MCP Server is essentially a lightweight service process running locally. It reads the currently open design file data through the Figma desktop client's local API interface. When the AI sends a request, the MCP Server serializes Figma's design tree (containing node IDs, AutoLayout parameters, style variables, component properties, etc.) into structured data and returns it to the AI model. Based on this working principle, Figma MCP's local version has several mandatory requirements:
- You must use the Figma desktop client (the browser version is restricted by the security sandbox and cannot expose local service ports)
- Enable the desktop MCP service: Find "Enable desktop MCP service" in Figma's top-left settings menu and check the box
- A Pro or Education plan is required: The free plan cannot use this feature (Figma includes advanced API capabilities as part of its paid features)
After configuration, refresh the MCP status — a checkmark indicates a successful connection. If it doesn't work, try closing and reopening Figma. Also, remember to add MCP to your agent for it to be callable.
Hands-On: Generating Web Code from Design Files with Figma MCP
Step 1: Prepare a Working Folder
Before starting, build a good habit: create a new folder on your desktop, then drag it into TRAE (on Mac, you can drag it directly onto the app icon). All generated code will be saved in this folder.
Step 2: Copy the Figma Design File Link
In Figma, select the target Frame, right-click and choose "Copy Link" (shortcut: Command+L) to copy the link.
Step 3: Let AI Auto-Generate the Code
In the TRAE chat panel, enter a prompt like:
Use Figma MCP to generate the page. Pay attention to AutoLayout's layout and parameter settings. Retrieve all design parameters from MCP — don't improvise. [paste link]

The AI will automatically invoke MCP's various permissions: fetching variables, getting context, retrieving layer node IDs, etc. You can see it obtaining node IDs, exporting PNG screenshots, and performing other operations, confirming that MCP is working properly.
Step 4: Verify the Accuracy of Generated Results
After generation, verify parameter accuracy by right-clicking and inspecting elements. For example, if the design file specifies 24px spacing, the generated code should also show 24×24 — perfectly consistent.

However, be aware that the AI occasionally "improvises" — for instance, automatically adding shadow effects that don't exist in the design file. This requires manual inspection and correction.
Iterative Updates After Design Changes
AutoLayout is an automatic layout system introduced by Figma in 2019, with a design philosophy that directly corresponds to the CSS Flexbox model. The AutoLayout properties set by designers in Figma have a high degree of semantic mapping with CSS properties: Figma's "Horizontal gap" maps to CSS gap, "Fill container" maps to flex: 1, "Hug contents" maps to width: fit-content, and min/max width constraints directly correspond to min-width / max-width.
Related articles
 Tutorials
ChatGPT Plus Subscription Guide: Are GPT-5.5, image-2, and Codex Worth the Upgrade?
A detailed look at ChatGPT Plus features — GPT-5.5, image-2, and Codex — with a Plus vs Pro comparison and a complete step-by-step subscription guide for users outside the US.
 Tutorials
Harness AI Engineering in Practice: Using Claude Code to Master Enterprise-Level E-Commerce Development
Deep dive into Harness AI Engineering: master enterprise e-commerce development with Claude Code using the Rules, Skills, Wiki, and Changes framework.
 Tutorials
Cursor + Codex Dual-IDE Collaboration: A Practical Methodology for Open-Source Project Customization
A complete methodology for open-source project customization based on real-world experience, detailing the Cursor+Codex dual-IDE workflow, seven-stage process, MVP validation, and AI source code reading techniques.