Claude Code + CC Switch Installation & Configuration Guide (Terminal + VS Code)

Complete tutorial for installing and configuring Claude Code with CC Switch from scratch.
This tutorial covers the full installation and configuration of Claude Code in three core parts: first, installing the Node.js runtime and globally installing Claude Code via npm; second, configuring a proxy API through CC Switch to reduce costs, including setting API addresses, obtaining tokens, and managing multiple configurations; finally, covering terminal usage (such as /model for switching models) and VS Code integration to achieve a configure-once, use-everywhere development experience.
Claude Code: A Powerful AI Programming Assistant
Claude Code is one of the most popular AI programming assistants available today. Developed by Anthropic based on the Claude large language model — Anthropic was founded in 2021 by former OpenAI core members, with a focus on AI safety research. The Claude model series is known for its powerful long-context understanding capability (supporting 200K tokens) and code reasoning ability, performing particularly well in complex code refactoring and multi-file comprehension scenarios. As a command-line tool, Claude Code can directly read the local file system, execute terminal commands, and interact deeply with developers, making it more like a "hands-on programming partner" — which is why many developers call it a "workhorse." However, the official API pricing is relatively high, so many people choose to use proxy APIs combined with the CC Switch tool to control costs. This tutorial will guide you step by step from scratch through the complete installation and configuration of Claude Code, covering both terminal usage and VS Code integration.
Prerequisites: Installing the Node.js Runtime Environment
Claude Code runs on Node.js, so the first step is to get Node.js installed.
Node.js is a JavaScript runtime environment built on the Chrome V8 engine. Since its release in 2009, it has become foundational infrastructure for modern development toolchains. npm (Node Package Manager), which is installed alongside Node.js, is the world's largest open-source software registry, hosting over 2 million packages. It's recommended to choose the LTS (Long Term Support) version — this is the officially recommended stable version that receives 30 months of long-term maintenance support, making it suitable for toolchain use.
Head to the Node.js official website and download the version corresponding to your operating system. For Windows x64, for example, download the installer and click Next through the guided setup. During installation, pay attention to the installation path — if the default path isn't where you want it, remember to click the change button to adjust it.
Once installation is complete, open a terminal (Windows users can search for CMD in the search bar) and enter the following command to install Claude Code:
npm install -g @anthropic-ai/claude-code
The -g flag here means global installation, which means the tool will be installed to a system-level directory and can be called directly from any terminal path, rather than being limited to a specific project directory.
After successful installation, type the claude command. If you see the normal startup interface, everything is working properly.
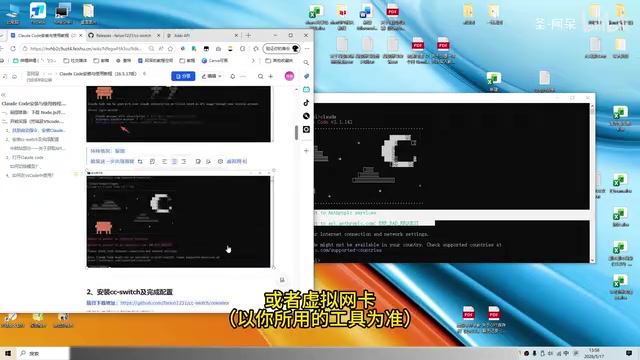
Tip: If you encounter errors during installation, it's most likely a network issue. Try enabling a global proxy, or seek help in relevant technical communities.
CC Switch Installation & API Configuration Details
Anthropic's official API uses a per-token billing model, and the input/output costs for mainstream models like Claude 3.5 Sonnet can add up significantly for heavy users. A proxy API (also called a mirror API or relay API) is a forwarding layer set up by third-party service providers who obtain API access through bulk purchasing or special channels, then resell it to developers at lower prices. These services are typically compatible with the OpenAI API format — you only need to modify the Base URL and API Key to connect.
Note: Using proxy APIs carries certain risks — your data passes through third-party servers, so you need to evaluate privacy compliance. Service stability also depends on the third-party operator. It's recommended to use these for non-sensitive projects and to choose reputable service providers.
This is where CC Switch (also called CNB Switch) comes in. CC Switch is essentially an environment variable management tool: when Claude Code starts up, it reads configuration items like ANTHROPIC_API_KEY and ANTHROPIC_BASE_URL from system environment variables to determine the connection target. CC Switch provides a graphical interface for users to manage multiple API configurations and automatically modifies the corresponding environment variables when switching, eliminating the tedious process of manually editing configuration files.
Download and Install CC Switch
Go to the CC Switch release page and download the installer for your operating system. Windows users should look for the .msi format file to download and install. Launch the software after installation is complete.
Configure the Proxy API Connection
After opening CC Switch, follow these steps to complete the configuration:
Step 1: Enter the Configuration Page
Find the plus button in the API configuration area of the software interface and click to enter the configuration page.
Step 2: Fill in Basic Information
- Configuration Name: Enter anything you like — just make it easy to identify
- Website URL: Enter the address of your proxy API service
- API Address: Usually the same as the website address
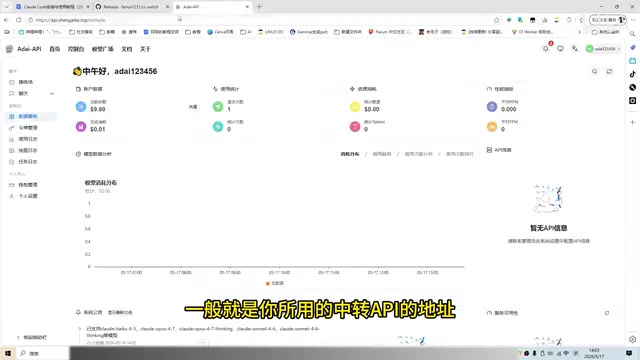
Step 3: Obtain the API Key (Most Critical)
- Go to the token management page on the proxy API platform
- Click "Add Token"
- Set the token name to anything you like
- The token group must be set to the group corresponding to Claude Code — this is the proxy platform's routing strategy. Different groups correspond to different backend model routing rules. Selecting the wrong group will cause requests to be forwarded to the wrong model endpoint, resulting in model call failures
- Submit and copy the generated API Key
Step 4: Complete the Configuration
Paste the copied API Key into the corresponding input field in CC Switch, leave the remaining options at their defaults, and click "Add" to finish.
Managing Multiple API Configurations
If you've added multiple API configurations, you need to manually switch to the one you want to use. If there's only one configuration, the system will select it automatically.
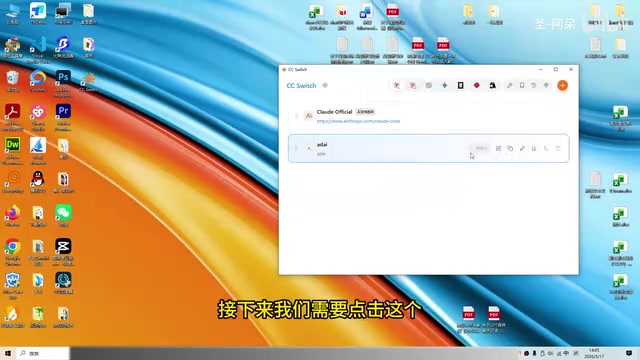
After configuration is complete, it's recommended to run a model test first. If it returns normal results, the configuration is correct.
Using Claude Code in the Terminal
Once configuration is done, type claude in the terminal to launch Claude Code. The first time you launch it, you'll need to authorize the necessary permissions. After authorization, you can start interacting.
How to Switch Models
A question many developers care about: How do you switch models during use?
The method is simple. In the Claude Code interactive interface, type:
/model
This slash command will list all currently available models — just select the one you need.
VS Code Integration with Claude Code Tutorial
Besides using it in the terminal, Claude Code can also be integrated directly into VS Code for a smoother development experience.
VS Code's extension system is built on the Language Server Protocol (LSP) and Extension API, allowing third-party developers to deeply integrate various tools. The official Claude VS Code extension reads the same system-level configuration (environment variables or configuration files) as the terminal Claude Code, achieving a "configure once, share across platforms" experience. VS Code's Webview API allows extensions to render a complete chat interface in the editor sidebar, while the workspace API provides context about currently open files, letting the AI perceive the code content you're editing — this distinguishes it from simple inline completion tools and makes it better suited for codebase-level understanding and interaction.
Installation Steps
1. Install VS Code
If you haven't installed it yet, go to the VS Code official website to download and install it.

2. Install the Claude Extension
- Open VS Code
- Click the Extensions icon on the left sidebar (shortcut
Ctrl+Shift+X) - Search for "Claude"
- Find the official extension listed first and click Install
- Click "Trust" to grant the necessary permissions
3. Confirm Successful Installation
After installation, a Claude icon will appear in the upper right corner of VS Code, indicating the extension is ready.
Getting Started
Click the Claude icon in the upper right corner, and the extension will automatically open the interaction panel. If you've already configured the settings in the terminal previously, the extension will use them automatically.
Related articles
 Tutorials
ChatGPT Plus Subscription Guide: Are GPT-5.5, image-2, and Codex Worth the Upgrade?
A detailed look at ChatGPT Plus features — GPT-5.5, image-2, and Codex — with a Plus vs Pro comparison and a complete step-by-step subscription guide for users outside the US.
 Tutorials
Harness AI Engineering in Practice: Using Claude Code to Master Enterprise-Level E-Commerce Development
Deep dive into Harness AI Engineering: master enterprise e-commerce development with Claude Code using the Rules, Skills, Wiki, and Changes framework.
 Tutorials
Cursor + Codex Dual-IDE Collaboration: A Practical Methodology for Open-Source Project Customization
A complete methodology for open-source project customization based on real-world experience, detailing the Cursor+Codex dual-IDE workflow, seven-stage process, MVP validation, and AI source code reading techniques.