Claude Code Skill Installation Guide: Four Steps from Search to Setup

A complete four-step guide to finding, installing, and mastering Claude Code Skills
This article provides a detailed walkthrough of the Claude Code Skill installation and usage process. Skills are essentially modular prompt engineering encapsulations based on the CLAUDE.md configuration file mechanism. The four steps are: search GitHub for high-Star projects; paste the repository URL into Claude Code for AI-assisted installation (distinguishing between project-level and user-level, with a mandatory full restart after installation); have AI generate usage examples; and use progressive questioning to deeply understand the Skill's capability boundaries and best practices.
Many people see various Claude Code Skill recommendations on social media but don't know how to install or use them. This article walks you through installing and using Skills in Claude Code from scratch, helping your AI programming tool reach its full potential.
What Is Claude Code Skill? Why Is It Worth Installing?
A Skill is essentially a set of predefined instructions and rule files. Once installed in Claude Code, the AI performs more professionally and efficiently in specific scenarios. For example, there are Skills dedicated to video production, others for frontend development—they're like "professional plugins" for your AI.
From a technical implementation perspective, Skills rely on Claude Code's CLAUDE.md configuration file mechanism. When you install a Skill, you're actually writing a set of Markdown-formatted instruction files into the project's .claude/ directory or the user's home ~/.claude/ directory. Claude Code automatically reads these configuration files as system-level context injected into the conversation each time a session starts, thereby changing the AI's behavior patterns and professional capabilities.
CLAUDE.md is a configuration protocol unique to Claude Code, inspired by the design philosophy of project-level configuration files like GitHub's README.md and Cursor's .cursorrules. This mechanism falls under the broad category of "Context Engineering"—controlling output quality by carefully organizing the context information fed to large language models. Unlike traditional System Prompts, CLAUDE.md supports hierarchical organization (project-level, user-level, and even directory-level) and is stored in plain-text Markdown format, allowing developers to edit and version-manage it with any text editor. This design makes AI behavior configuration transparent, auditable, and collaborative.
This is completely different from traditional IDE plugins that extend functionality through compiled code—Skills are essentially a form of "modular encapsulation of prompt engineering" that guides large language models to perform more professionally in specific domains through carefully designed instruction sets. This modular encapsulation represents an important trend in AI toolchain evolution during 2024-2025. Previously, developers had to manually input complex prompts in every conversation to guide AI behavior, which was not only inefficient but also hard to keep consistent. Modular encapsulation packages verified best prompt practices into reusable components, similar to how software development evolved from "copy-pasting code" to "using package managers to install dependency libraries." Cursor's Rules, Windsurf's Workflows, and GitHub Copilot's Custom Instructions are all different implementations of this trend.
The good news is that Skills aren't some advanced technology. Installation and usage are both very simple—once you master the correct method, you can get everything set up in just a few minutes.
Step 1: Find Your Target Skill on GitHub
Currently, mainstream Claude Code Skills are basically all hosted on GitHub. The search process is very intuitive:
- Go to github.com
- Enter the Skill name you want in the search box (e.g.,
Hyperframes) - In the search results, select the project with the highest Star count
Star count is equivalent to user "likes." Higher Stars indicate better project quality, more users, and lower chances of running into issues.
Beyond Star count, you can evaluate a Skill project's quality by looking at several dimensions:
- Fork count: How many people have copied the project for secondary development. A high Fork count means the project is attractive enough for other developers to build their own versions from it
- Issues section activity: Whether people are actively reporting problems and discussing. A healthy open-source project typically has active Issue discussions rather than complete silence
- Time of last commit: Whether the project is still being maintained. If the last code commit was months ago, it might mean the project has stopped updating
- Number of Contributors: How many developers have contributed. Projects with multiple collaborators are usually more reliable than single-maintainer ones
A high-quality Skill project typically features active community maintenance, clear documentation, and continuous version updates.

After entering the project page, scroll down to see the README document. This document is written by the project author and contains the Skill's feature introduction, installation methods, and usage examples. If it's in a foreign language, just use your browser's built-in translation feature to convert it.
Most Skill READMEs will have a "Quick Start" section that lists recommended installation methods. For example, the common NPX command installation:
npx @anthropic/skill install hyperframes
NPX here is a package execution tool in the Node.js ecosystem, automatically installed with npm 5.2+ versions. Unlike npm install, npx's core advantage is "use and discard"—it temporarily downloads and executes the specified package without leaving any permanently installed traces on your system. This approach avoids version conflict issues from globally installing CLI tools and ensures you're always using the latest version of the installer.
NPX has become the mainstream method for Skill installation largely because of Node.js's dominance in frontend and full-stack development. Node.js's package manager npm has over 2 million public packages, making it the world's largest software registry. NPX's "use and discard" mode also has a hidden advantage—it automatically resolves and executes the entry file specified in the package's bin field, so users don't need to understand the package's internal structure to correctly run the installation script. For users unfamiliar with the Node.js ecosystem, you just need to ensure Node.js is installed on your system (version 18.0 or above recommended), and the npx command will automatically be available without any extra configuration.
The documentation typically also notes which AI programming tools the Skill is compatible with, such as Claude Code, Cursor, Gemini CLI, Codex, etc. If not specifically noted, it generally defaults to being compatible with all mainstream tools.
Step 2: Let AI Install the Skill for You with One Click
Command-line installation might be a barrier for some users. Here's a simpler method: just let Claude Code handle the installation for you.
Specific steps:
- Copy the Skill's repository URL from GitHub (the URL in your browser's address bar)
- Open Claude Code
- Paste the URL and add: "Help me install this Skill into my current project"

Claude Code will automatically read the repository contents, analyze the current project structure, and complete the installation. After installation, it will also tell you exactly which sub-skills were installed. For example, the Hyperframes skill package actually contains 15 sub-skills.
Difference Between Project-Level and User-Level Installation
There's an important concept to understand here:
| Installation Level | Scope | Use Case |
|---|---|---|
| Project-level | Only available in the current project; becomes unavailable when you switch projects or open a new session | Skills needed only in a specific project |
| User-level | Available in any project, any session | General-purpose, frequently-used Skills |
These two installation levels correspond to different file storage locations under the hood:
- Project-level Skills are written into the
.claude/directory under the current project's root. These files are typically included in Git version control, so team members who clone the project automatically get the same Skill configuration—ideal for team collaboration scenarios. This approach aligns with the philosophy of project-level configuration files like.editorconfig(unified editor configuration) and.eslintrc(unified code style checking)—ensuring consistent development experience within teams by including tool configurations in version control. However, note that if Skill configurations contain sensitive information (such as API keys), they should be added to.gitignoreto prevent exposure. - User-level Skills are stored in the
~/.claude/directory under the operating system's user home directory (macOS/Linux:~/.claude/, Windows:C:\Users\username\.claude\). These configurations follow the user account and aren't tied to any specific project.
Claude Code merges both levels of configuration when loading. When conflicts exist between the two, project-level configuration takes priority over user-level. This priority design follows the "proximity principle"—configurations closer to the specific project should be prioritized because they more likely reflect that project's specific needs. When having Claude Code install, simply tell it clearly which level you want.
You Must Restart Claude Code After Installation
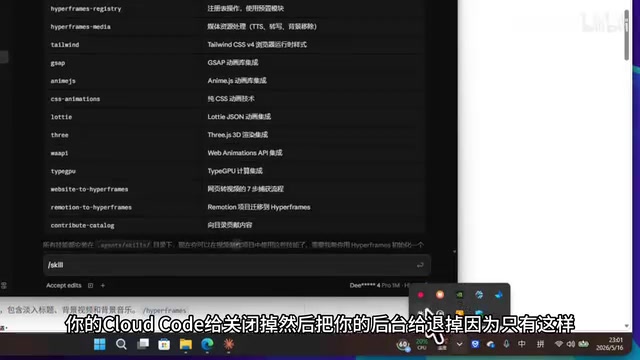
Many people overlook this step: After installing a Skill, you must completely close Claude Code, including making sure background processes are fully exited. The newly installed Skill will only load and take effect after a restart.
The restart is needed because Claude Code performs a complete configuration file scan and context initialization process at startup, compiling all CLAUDE.md file contents as part of the system prompt. This initialization process executes only once during startup and doesn't dynamically monitor file changes during runtime.
Claude Code uses a Daemon Process architecture to maintain session state, which is a common design pattern in modern CLI tools. The daemon process runs continuously in the background, responsible for maintaining long connections to the Anthropic API, caching conversation history, and managing local configuration state. The advantage of this architecture is reduced cold start time—when users close the terminal window and reopen it, they can quickly restore their previous working state. But the side effect is that configuration file changes aren't detected in real-time. Similar designs are widely used in development tools like TypeScript's tsc --watch and Webpack's Dev Server, which all require restarts after configuration changes to take effect.
If you only close the terminal window without completely exiting the background process, the old configuration cache will continue to be used. On macOS, you can confirm whether Claude-related processes have fully exited through Activity Monitor; on Windows, you can check through Task Manager. A more reliable approach is to run claude --version or a similar command in the terminal to confirm the process has completely terminated before restarting.
Step 3: Master the Correct Way to Use Skills
After installation, how do you use them? There are two ways to get usage guides.
Method 1: Read Example Prompts on GitHub
Go back to the GitHub project page. The README usually has an "Example Prompts" section. The author will list several typical usage patterns, such as cold start, warm-up, format-specific, iterative, and other scenarios.
The general usage format is: a descriptive text + slash command, such as /hyperframes.
Slash Commands in Claude Code are a shortcut instruction mechanism, similar to slash commands in Slack or Discord. This interaction pattern can be traced back to the command systems of the IRC (Internet Relay Chat) era, later popularized by Slack in 2015, becoming the standard interaction paradigm for modern collaboration tools. When you type a command starting with / in a conversation, Claude Code searches for the corresponding command definition file in installed Skill directories and injects the preset prompt templates and parameters into the current conversation context.
From a technical implementation perspective, each slash command corresponds to one or more Markdown template files that can contain variable placeholders, conditional logic, and directives referencing other files. When a command is triggered, Claude Code's command parser renders the template into complete prompt text, then injects it into the current conversation's context window. The advantage of this mechanism is compressing complex multi-step prompts into a single short command while ensuring consistency and completeness with every invocation. Some advanced Skills also support parameter passing in slash commands, such as /hyperframes --style cinematic, allowing users to retain some customization space within standardized workflows.
Method 2: Ask AI to Teach You How to Use It (Recommended)
A more efficient approach is to ask directly in Claude Code:
"How should I normally use this skill? Give me some prompt examples."
Claude Code will automatically read the Skill's documentation and then compile a complete set of prompt examples. This method is usually more detailed and better suited to actual usage scenarios than reading GitHub documentation directly. The reason AI-generated usage guides tend to be more practical than raw documentation is that Claude Code can simultaneously perceive your current project's tech stack, directory structure, and existing code, thereby translating generic Skill usage into customized suggestions specific to your project.

Step 4: Deep-Dive into Skill Details Through Progressive Questioning
Don't rush to use a Skill right away after getting it. Spending a few minutes understanding its details can double your subsequent usage efficiency.
Taking a video production Skill as an example, you can progressively dig deeper like this:
Question 1: "Do I need to give you a subtitle file? Or is just the script enough?"
- The AI might offer multiple approaches: plain script, subtitle file, script with specified delimiters, etc.
- Ultimately you'll learn that the simplest approach is to just provide the script directly
Question 2: "Does generating narration audio require calling an API?"
- Understand whether the Skill relies on cloud APIs or local models
- If it's a local model, you just need to download it in advance—no extra API Key needed
Question 3: "Can I use my own recorded audio instead of auto-generated audio?"
- Understand the Skill's flexibility and customization space
- For example, you might just need to place your audio file in the project directory to substitute it
This progressive questioning approach helps you quickly map out a Skill's complete capability boundaries and optimal usage patterns. The underlying logic of this method is consistent with the concept of "Exploratory Testing" in software engineering. Exploratory Testing was first proposed by testing expert Cem Kaner in 1983 and later developed into a complete methodology by James Bach and Michael Bolton, with the core principle being "simultaneously learning, designing tests, and executing tests."
Applying this concept to learning AI Skill usage, each round of questioning is a "test probe"—you update your mental model of the Skill's capabilities by observing the AI's answers, then design the next more precise question based on your new understanding. This method is more efficient than linearly reading documentation because it's goal-driven: you only dive deep into parts relevant to your use case rather than trying to memorize all features, forming a rapidly converging cognitive loop. In practice, usually 3-5 targeted questions are enough to build sufficiently deep understanding of a Skill, far more efficient than spending 20 minutes reading through complete documentation.
Four Steps to Master Claude Code Skill Installation and Usage
The entire workflow can be summarized as:
- Find the Skill → Search on GitHub, select the project with the highest Star count
- Install the Skill → Copy the repository URL, let Claude Code install it for you (note the difference between project-level and user-level)
- Learn the Usage → Have AI generate prompt examples—more efficient than reading documentation directly
- Dig into Details → Use progressive questioning to understand the Skill's capability boundaries and best practices
Once you've mastered this method, no matter what new Skill you encounter in the future, you'll be able to complete the entire process from installation to getting started in just a few minutes. The value of Skills isn't in how many you've installed, but whether you truly understand their capabilities and use them well in appropriate scenarios.
Key Takeaways
- When searching for Skills on GitHub, prioritize projects with the highest Star count for better quality assurance
- The simplest installation method is pasting the GitHub repository URL to Claude Code and letting AI handle the installation automatically
- Skills can be installed at project-level or user-level: the former is only available in the current project, while the latter is globally available
- After installation, you must completely restart Claude Code (including background processes) for the Skill to load properly
- Understanding Skill details through progressive questioning yields better results than jumping straight into usage
Related articles
 Tutorials
ChatGPT Plus Subscription Guide: Are GPT-5.5, image-2, and Codex Worth the Upgrade?
A detailed look at ChatGPT Plus features — GPT-5.5, image-2, and Codex — with a Plus vs Pro comparison and a complete step-by-step subscription guide for users outside the US.
 Tutorials
Harness AI Engineering in Practice: Using Claude Code to Master Enterprise-Level E-Commerce Development
Deep dive into Harness AI Engineering: master enterprise e-commerce development with Claude Code using the Rules, Skills, Wiki, and Changes framework.
 Tutorials
Cursor + Codex Dual-IDE Collaboration: A Practical Methodology for Open-Source Project Customization
A complete methodology for open-source project customization based on real-world experience, detailing the Cursor+Codex dual-IDE workflow, seven-stage process, MVP validation, and AI source code reading techniques.