Cline + Gemini CLI Tutorial: Use Gemini 2.5 Pro for Free AI Coding

Pair Gemini CLI with VS Code's Cline plugin to use Gemini 2.5 Pro as a free AI coding assistant.
Google's Gemini CLI lets developers use Gemini 2.5 Pro for free. Combined with VS Code's Cline plugin, you can invoke AI capabilities directly in your editor for coding, refactoring, and more. Setup takes just three steps: install Gemini CLI and log in with your Google account, select Gemini CLI as the Provider in Cline, and manually switch to the Gemini 2.5 Pro model. Be mindful of free quota limits and network proxy stability during use.
Google recently launched Gemini CLI, allowing developers to use powerful models like Gemini 2.5 Pro for free. Pair it with the Cline plugin in VS Code, and you can invoke Gemini's capabilities directly in your editor—writing code, looking up references, refactoring—all in one seamless flow. Here's a step-by-step guide to get everything configured.
What Are Gemini CLI and Cline?
Gemini CLI is an official command-line tool from Google that lets developers interact with Gemini models directly from the terminal. Its biggest appeal: individual developers can use high-performance models like Gemini 2.5 Pro completely free—no credit card required, no API Key application needed.
Gemini 2.5 Pro is a flagship multimodal large language model released by Google DeepMind in 2025, representing the latest iteration of the Gemini series. It excels in benchmarks for code generation, mathematical reasoning, and long-context understanding, supporting a context window of up to 1 million tokens—meaning it can process entire codebases in a single pass. Compared to OpenAI's GPT-4o and Anthropic's Claude 3.5 Sonnet, Gemini 2.5 Pro is highly competitive in programming tasks, with particularly notable advantages in multi-step reasoning and complex code refactoring scenarios. Google's decision to offer it free to individual developers is widely seen as a strategic move to compete with OpenAI and Anthropic for developer ecosystem share.
Cline is a highly popular AI coding assistant plugin for VS Code that supports multiple AI model backends. Recently, Cline added native support for Gemini CLI—users simply log in with their Google account to call Gemini 2.5 Pro for free through Cline, with no additional key configuration required.
Cline (formerly Claude Dev) is an open-source VS Code AI coding assistant plugin built around the core concept of an "AI Agent"—it doesn't just chat, but can actively read and write files, execute terminal commands, and browse the web. Through its abstracted Provider interface layer, it supports multiple backends including OpenAI, Anthropic Claude, Google Gemini, local Ollama models, and more. Cline differs from GitHub Copilot in positioning: Copilot focuses on inline code completion, while Cline acts more like an autonomous programming agent capable of executing complex multi-step tasks, making it ideal for cross-file refactoring, project scaffolding, automated debugging, and similar scenarios.
The benefits of combining the two are clear: you get full access to Gemini 2.5 Pro's capabilities right inside VS Code, completely free of charge.
Installing Gemini CLI and Completing Login Authentication
Install Gemini CLI
Open your terminal and run the official installation command to install Gemini CLI. After installation, you'll need to authenticate with your Google account.
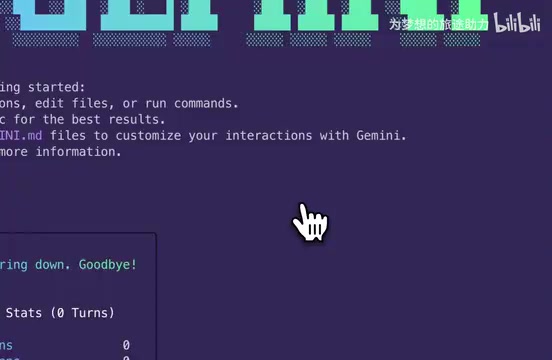
Gemini CLI uses OAuth 2.0 protocol for authentication, which is the standard authentication method for Google services. When you execute the login command, the CLI starts a temporary local HTTP server and opens your browser, guiding you through Google account authorization. Once authorized, the OAuth token is securely stored in your local configuration directory. The Cline plugin reuses this locally stored token to call the Gemini API, so you never need to manually copy-paste any API Key. This design both simplifies the configuration process and eliminates the security risk of key exposure.
Resolving Network Proxy Issues
If the login hangs for a long time without responding, it's most likely a proxy configuration issue. You need to:
- Check that your terminal proxy settings are correct (verify the
http_proxyandhttps_proxyenvironment variables) - Ensure your proxy can properly access Google services
- Re-run the login command after configuring the proxy
Once login succeeds, Gemini CLI is ready to go. Next, let's configure Cline in VS Code.
Configuring the Gemini CLI Provider in Cline
Install or Update the Cline Plugin
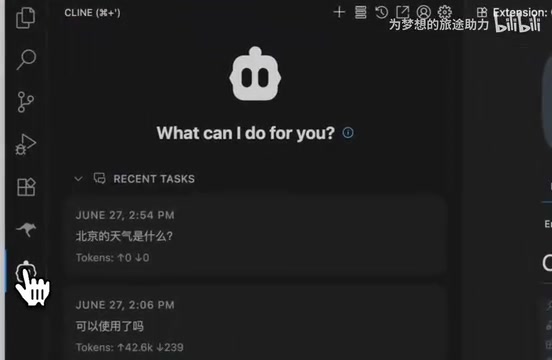
Open VS Code, search for Cline in the Extensions Marketplace, and install it. If you've already installed it, make sure to update to the latest version—older versions may not yet support Gemini CLI.
Set the Provider to Gemini CLI
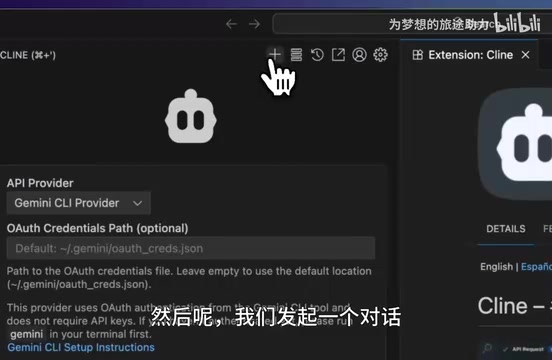
Go to Cline's settings interface and follow these steps:
- Click the Cline plugin's settings button
- In the Provider dropdown menu, select Gemini CLI
- Leave other settings at their defaults—since you've already completed account authentication in the terminal, Cline will automatically reuse your login state
- Click Save
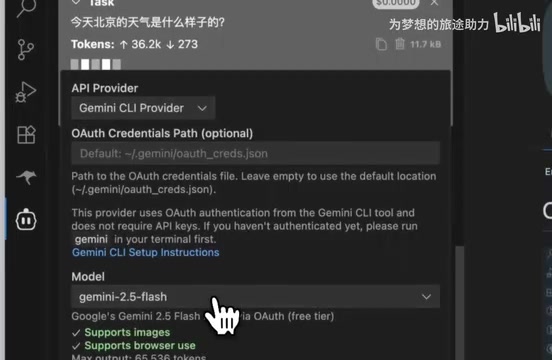
Manually Select the Gemini 2.5 Pro Model
After saving, the bottom of the interface will display the current model in use. Here's a common gotcha: Cline sometimes doesn't default to Gemini 2.5 Pro, selecting another version instead. Make sure to manually click the model selector and switch to Gemini 2.5 Pro to ensure you're using the most powerful version.
Testing the Configuration: Starting Your First Conversation
Send a Test Message
Once configured, try sending a message to verify everything works. For example, ask "What's the weather like in Beijing today?"
Understanding Cline's Permission Authorization Mechanism
Cline is fairly strict about permission management. When the AI needs to perform certain actions (like accessing a weather website to fetch data), it will first pop up an authorization request:
"To get today's weather in Beijing, I need to access a weather website. May I proceed?"
Only after you confirm "Yes" will the AI execute. This mechanism ensures security by preventing the AI from performing sensitive operations without your knowledge.
Switch to Act Mode for Proactive AI Execution
If you find Cline only offers suggestions without proactively executing operations, you need to switch to Act Mode. Find the mode toggle option in the Cline interface and click to switch.
Cline offers two working modes: Plan Mode and Act Mode. In Plan Mode, the AI only analyzes problems and provides suggested solutions without actually modifying files or executing commands—ideal for evaluating whether the AI's proposed approach is sound before committing. Act Mode grants the AI actual execution capabilities: it can create and edit files, run terminal commands, and even access web pages through a headless browser to gather information. This dual-mode design reflects the "Human-in-the-Loop" safety philosophy in human-AI collaboration—even in Act Mode, each sensitive operation still requires user confirmation.
After switching, Cline will automatically execute the query task and return results. In testing, the AI successfully retrieved Beijing's weather information for that day and reported it accurately, confirming that the configuration is working perfectly.
Usage Tips and Considerations
Confirm the Model Version Before Each Use
Cline occasionally auto-switches model versions. It's a good habit to glance at the model identifier at the bottom before starting work to confirm it's Gemini 2.5 Pro, avoiding unknowingly using a weaker model.
Be Aware of Free Quota Limits
While Gemini CLI is free, Google imposes rate limits and daily quotas on free users. If you use it heavily, you may encounter request throttling. When you hit errors, wait a moment and try again—it usually recovers quickly.
Specifically, Google implements multi-tiered rate limiting for Gemini CLI free users: requests per minute (RPM), daily total requests, and per-minute token throughput all have caps. These limits are returned via HTTP 429 status codes (Too Many Requests). For typical development tasks like code review and small-scale refactoring, the free quota is usually sufficient. However, for large-scale batch processing or sustained high-frequency calls, you'll want to consider upgrading to a paid Google AI Studio API Key—simply switch to the Google Gemini Provider in Cline and enter your API Key to unlock higher call limits.
Keep Your Network Proxy Stable
Normal usage requires stable access to Google services. It's recommended to add domains like google.com and googleapis.com to your proxy rules to avoid connection interruptions that could affect your experience.
Summary: Three Steps to a Free AI Coding Assistant
Cline's native support for Gemini CLI gives developers a zero-cost path to using a top-tier AI model. The entire configuration process boils down to three steps:
- Install Gemini CLI and log in with your Google account
- Select Gemini CLI as the Provider in Cline and save
- Manually switch to the Gemini 2.5 Pro model and start using it
For developers who want to experience Gemini 2.5 Pro without spending a dime, this is currently one of the simplest and most practical approaches available. Give it a try!
Related articles
 Tutorials
ChatGPT Plus Subscription Guide: Are GPT-5.5, image-2, and Codex Worth the Upgrade?
A detailed look at ChatGPT Plus features — GPT-5.5, image-2, and Codex — with a Plus vs Pro comparison and a complete step-by-step subscription guide for users outside the US.
 Tutorials
Harness AI Engineering in Practice: Using Claude Code to Master Enterprise-Level E-Commerce Development
Deep dive into Harness AI Engineering: master enterprise e-commerce development with Claude Code using the Rules, Skills, Wiki, and Changes framework.
 Tutorials
Cursor + Codex Dual-IDE Collaboration: A Practical Methodology for Open-Source Project Customization
A complete methodology for open-source project customization based on real-world experience, detailing the Cursor+Codex dual-IDE workflow, seven-stage process, MVP validation, and AI source code reading techniques.