Codex Beginner's Guide: From Installation & Configuration to Hands-On Development

OpenAI Codex is a local AI coding assistant that lets anyone build software using natural language.
This article introduces OpenAI's Codex — a local coding assistant built on the AI Agent paradigm. It can directly read and modify local files, transforming AI from an advisor into an executor. The guide covers the full installation and configuration process (including a cost-saving API relay approach and three-tier permission modes), then demonstrates Codex's power through two hands-on projects: building a Snake game and generating e-commerce banners — showing how complete beginners can develop software by simply speaking naturally.
What Is Codex? How This AI Coding Assistant Stands Apart
OpenAI's Codex (also known as Codex CLI) is a locally-running AI coding assistant that's fundamentally different from web-based ChatGPT.
The traditional AI workflow typically looks like this: copy your code → paste it into the AI → get a response → paste it back into your editor. Codex, on the other hand, can directly read and modify local files on your computer — essentially giving your project an "AI developer in residence."
Behind this difference lies two entirely distinct technical architectures. Codex employs an AI Agent mode with a complete "perceive-decide-execute" closed loop: it can read the file system, execute terminal commands, call external APIs, and dynamically adjust its next steps based on execution results. This architecture is known as ReAct (Reasoning + Acting), one of the core paradigms for production-ready AI engineering today. Conventional conversational AI is fundamentally a "Q&A machine" — interaction is one-directional and stateless. Codex bridges the reasoning capabilities of large models with the execution capabilities of the operating system, transforming AI from an "advisor" into a true "executor."
The practical implications are significant. Even with zero programming background, you can use everyday language to have AI help you:
- Build personal websites, mini-games, or simple apps
- Auto-generate Word documents, PowerPoints, and Excel spreadsheets
- Create e-commerce banners, research charts, and other commercial graphics
- Batch-modify and manage local files
For developers, Codex dramatically boosts coding efficiency. For non-technical users, it lowers the barrier to an unprecedented level — "speak plain language to build software" is no longer just a slogan.
Complete Codex Installation & Configuration Tutorial
Step 1: Download and Install Codex
The installation process isn't complicated, but there are a few details worth noting:
- Go to the official Codex page and download the installer
- After double-clicking the installer, Windows will complete the download through the Microsoft Store
- Download speed may be slow — just be patient
Once installed, the system will prompt you to log in with your ChatGPT account. At this point, you have two options: subscribe directly to an official plan (Plus at $20/month, Pro at $100/month), or take the API relay route. The latter is far cheaper — details below.
Step 2: Configure an API Relay (Recommended Cost-Saving Approach)
Using an API relay offers two benefits: prices are significantly lower than official subscriptions, and it bypasses network environment restrictions.
How API relays work: An intermediary server sits between the user and OpenAI's official servers. It receives user requests, forwards them to OpenAI, and returns responses along the same path. These services are typically deployed on overseas nodes and achieve price discounts through bulk API quota purchases. From a technical interface perspective, relay services are fully compatible with OpenAI's standard REST API specification, so Codex only needs to change the request address (Base URL) to switch seamlessly without affecting any functionality.
Here are the specific steps:
First, download a configuration tool called CCSwitch from GitHub. After installation, double-click to open it and select the Codex option.
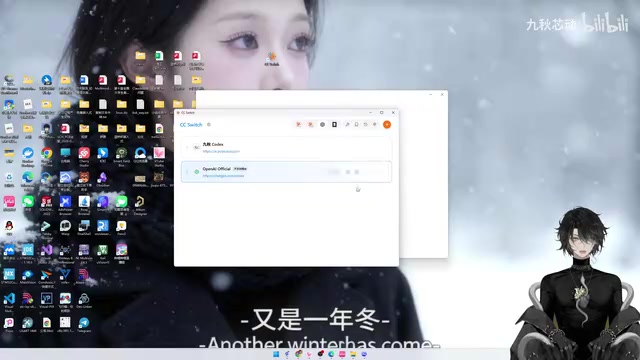
Then you need to fill in two key pieces of information:
- API Request URL: Think of this as telling Codex which "service station" to get its AI capabilities from
- API Key: Your personal "access pass"
After registering an account on the relay platform, you'll typically receive some free credits for testing. Paste the request URL provided by the platform into the corresponding field in CCSwitch. Here's a common pitfall: in the Codex configuration, you must manually append /v1 to the end of the URL. This is because /v1 is OpenAI API's version routing prefix — all model calls (such as /v1/chat/completions) are mounted under this path. Without it, route matching will fail and return a 404 connection error.
Step 3: Choose a Model and Permission Mode
Once configured, you can select the latest models like GPT-4.5 from the model list. Codex also provides three permission modes that control the AI's access to your files:
- Default Permission: The AI asks for your approval before every action
- Auto-Review: The AI decides which operations need confirmation and which can proceed automatically (recommended for daily use)
- Full Access: The AI executes all operations directly without ever asking
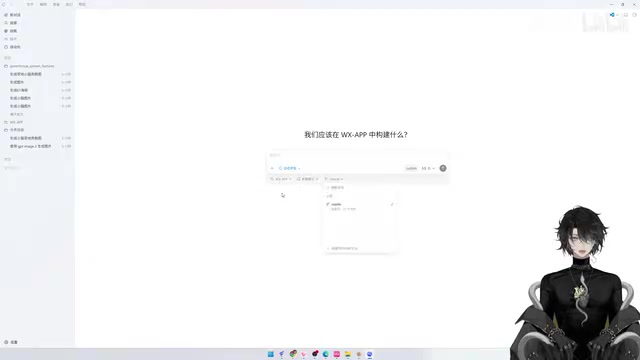
These three permission levels reflect the engineering practice of the "principle of least privilege" from the AI safety domain. When AI has the ability to directly manipulate the file system, any misunderstanding of instructions could lead to irreversible consequences like accidental file deletion or data overwriting. "Default Permission" is suitable for handling important projects or when first establishing trust. "Auto-Review" retains manual confirmation for high-risk operations (like deleting files) while auto-approving low-risk ones (like creating files), striking a balance between efficiency and safety. "Full Access" is appropriate for batch automation tasks whose requirements have been thoroughly verified. For everyday use, "Auto-Review" is recommended — it won't interrupt you constantly, nor will it let the AI go completely rogue.
Hands-On Project 1: Building a Snake Game with Natural Language
Create a Project Folder
First, create a folder called "demo" on your desktop as the project directory. Then add this folder to Codex:
- Click "Add Existing Document"
- Select the demo folder on your desktop
- Type your request in the dialog box
Generate a Complete Game with a Single Sentence
Type directly in the dialog box: "Create a Snake game in this folder," then click submit.
Codex immediately gets to work — you can watch it create files in the folder and write code line by line in real time. After a few minutes, a fully functional Snake game is ready: arrow keys for movement, the snake grows longer when eating food, hitting a wall or biting itself ends the game, and pressing the spacebar restarts — all basic features working perfectly.
Someone who has never written a single line of code just completed in minutes what a professional programmer might spend hours on. This is the efficiency shift that Codex delivers.
It's also worth mentioning that Codex supports parallel operations. While one task is still running, you can simultaneously start a new conversation to handle something else — no need to wait.
Hands-On Project 2: AI-Generated E-Commerce Banners
Codex's capabilities extend beyond writing code. Combined with image generation features, it can also produce commercial-grade visual assets.
Workflow
By adding an image generation Skill (plugin) to Codex, you can invoke image generation APIs directly within conversations. The underlying mechanism of the Skill system is the Tool Use framework: developers pre-define a set of "tools" (such as image generation APIs, search APIs, etc.), and the model can autonomously decide when to call which tool during reasoning, integrating the tool's returned results into the final output. Image generation Skills typically interface with image model APIs like DALL-E 3, extending Codex from a single code generation tool into a "super assistant" capable of coordinating multiple AI capabilities.
The actual operation requires just three steps:
- Upload a product photo (messy background is fine — the AI will handle it automatically)
- Describe your requirements, for example: "Based on this product image, generate three e-commerce banners suitable for a Taobao store display"
Related articles
 Tutorials
ChatGPT Plus Subscription Guide: Are GPT-5.5, image-2, and Codex Worth the Upgrade?
A detailed look at ChatGPT Plus features — GPT-5.5, image-2, and Codex — with a Plus vs Pro comparison and a complete step-by-step subscription guide for users outside the US.
 Tutorials
Harness AI Engineering in Practice: Using Claude Code to Master Enterprise-Level E-Commerce Development
Deep dive into Harness AI Engineering: master enterprise e-commerce development with Claude Code using the Rules, Skills, Wiki, and Changes framework.
 Tutorials
Cursor + Codex Dual-IDE Collaboration: A Practical Methodology for Open-Source Project Customization
A complete methodology for open-source project customization based on real-world experience, detailing the Cursor+Codex dual-IDE workflow, seven-stage process, MVP validation, and AI source code reading techniques.