Codex Desktop Relay API Configuration Tutorial: Run GPT-5.5 from Scratch

Configure a relay API to connect GPT-5.5 in Codex Desktop and generate games with one sentence
This tutorial provides a complete walkthrough for configuring a relay API to connect to the GPT-5.5 model from scratch, including installing Node.js with PATH configuration, setting up the CCNIW relay client, configuring API keys and verifying the connection, and modifying config.toml in Codex Desktop to switch to GPT-5.5. The tutorial emphasizes using AI assistants to troubleshoot errors, with the ultimate goal of generating complete programs using natural language.
Introduction
In the previous tutorial, we covered the basic installation and core concepts of Codex Desktop. This follow-up article focuses on configuring a relay API from scratch, walking you through connecting to the GPT-5.5 model step by step, and ultimately generating a complete space shooter game with a single sentence.
The entire process involves Node.js installation, CCNIW (relay client) configuration, key management, and Codex Desktop parameter tuning. Even if you're a complete beginner, you can successfully complete the setup by following these steps.
Environment Setup: Installing Node.js
Downloading and Installing Node.js
Node.js is a JavaScript runtime environment built on Chrome's V8 engine. Since its release by Ryan Dahl in 2009, it has become an indispensable part of the modern development toolchain. The V8 engine was originally developed by Google for the Chrome browser, with its core innovation being the direct compilation of JavaScript into native machine code rather than traditional line-by-line interpretation, improving JavaScript execution speed by orders of magnitude. Node.js extracted this high-performance engine from the browser, enabling JavaScript to run in server-side and command-line environments. Today, npm (Node Package Manager) hosts over 2 million open-source packages, forming one of the world's largest software ecosystems. Many AI tool command-line clients (including relay clients like CCNIW) depend on Node.js to run, making it the first building block of the entire configuration process.
First, open the relay's deployment documentation and follow the instructions to download Windows Terminal (if your system doesn't already have it). Next comes the critical step—installing Node.js:
- Go to the Node.js official website to download the installer
- During installation, make sure to check the "Add to PATH" option—this is crucial, otherwise the command line won't recognize Node commands later
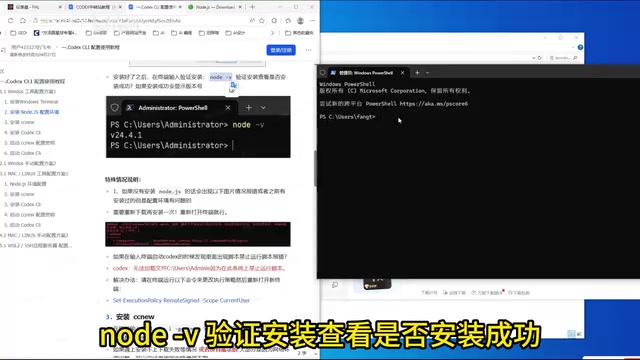
- After installation, open a terminal and type
node -vto verify the installation
Why is PATH so important? PATH is an environment variable that the operating system uses to locate executable programs, telling the system which directories to search for commands. When executing any command, the operating system sequentially scans each directory listed in PATH until it finds a matching executable file. On Windows, the PATH variable can be manually edited in "System Properties → Advanced → Environment Variables," but having the installer handle this automatically is obviously more reliable. If you don't check this option, the system won't be able to find the
nodeandnpmcommands, and all subsequent installation steps that depend on Node.js will fail. This is one of the most common pitfalls for beginners.
If the terminal returns a version number (e.g., v20.x.x), Node.js has been correctly installed on your system.
Installing and Configuring the CCNIW Relay Client
How Relay APIs Work
Before diving into the installation steps, it's important to understand the technical nature of relay services. A relay (API Relay/Proxy) is a proxy architecture that forwards user requests to target AI service providers. Since major AI services like OpenAI and Anthropic have access restrictions in certain regions, relays solve network connectivity issues by deploying servers in accessible regions and forwarding requests to the official APIs.
From a technical architecture perspective, relay implementations typically have two layers: the network layer handles geographic access restrictions by deploying reverse proxies (such as Nginx or Caddy) on overseas servers to forward HTTPS requests; the protocol layer maintains interface specifications fully consistent with the original API, including the same HTTP methods, request header formats, JSON request body structures, and response formats. This "transparent proxy" design means that from the client program's perspective, it's indistinguishable from calling the official API directly—you only need to modify the base_url (changing the request target from api.openai.com to the relay domain) and the API key, and the client program can seamlessly switch without any code changes. This is the fundamental reason why switching models later only requires modifying config.toml.
What to Do When You Encounter Installation Errors
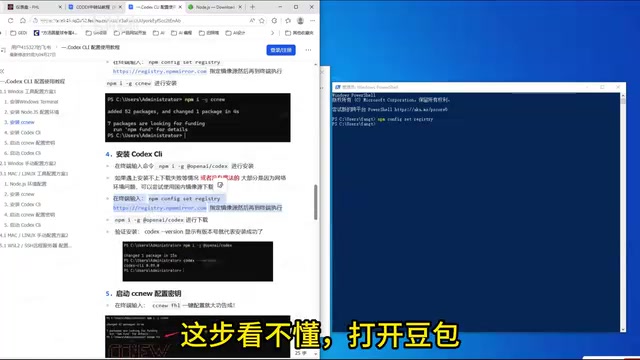
During CCNIW installation, many people encounter various error messages. Here's a very practical tip: Can't understand the error? Just copy the error message and paste it into Doubao (AI assistant) for analysis.
This method is effective because AI assistants have been trained on massive amounts of technical documentation, Stack Overflow Q&As, and GitHub Issues, enabling them to identify the vast majority of common installation error patterns. For example, EACCES: permission denied usually means insufficient permissions and requires running as administrator; MODULE_NOT_FOUND often points to improperly installed dependencies. Pasting the complete error stack (rather than just a screenshot) to the AI yields more accurate diagnoses. Doubao will tell you the cause of the error and specific fix steps—just follow the guidance to resolve the issue. This method applies not only to this tutorial but to any technical problem you encounter in the future.
Continuing the CCNU Installation
After fixing the errors, continue installing CCNU according to the tutorial documentation. Note that this step takes considerable time—the video uses 10x speed. In practice, please wait patiently and don't close the terminal window midway.
After installation, you need to restart PowerShell, then continue with the subsequent steps. Again, this step requires some waiting time.
Tip: Whenever you encounter steps you don't understand, open Doubao or another AI assistant for help—this is the most efficient learning approach for beginners.
Key Configuration and Connection Verification
Configuring the Relay API Key
After starting CCNIW, you need to configure the relay's API key. An API Key is essentially a randomly generated string used to verify the caller's identity and permissions with each API request. It's typically passed as an HTTP request header (e.g., Authorization: Bearer sk-xxxx), and the server validates the key's validity, remaining balance, and access permissions upon receiving a request. Secure key management is crucial—avoid hardcoding keys in code or uploading them to public repositories. Store them in environment variables or dedicated key management files instead.
- Log in to the relay platform, find and copy your API key
- Paste the key in CCNIW to complete the binding
- Open Windows Terminal and run the verification command to confirm the configuration
Starting Claude CLI to Test the Connection
After configuring the key, start Claude CLI (Command Line Interface) and attempt to have a conversation with the model. CLI (Command Line Interface) is a way of interacting with programs through text commands—it's lighter weight and easier to script and automate compared to graphical interfaces. In AI toolchains, CLI typically serves as the lowest-level connection verification tool—if the CLI can successfully receive model responses, it means the entire chain from local network to relay to AI service is functioning, laying the foundation for subsequent graphical tool configuration.
If you successfully receive a response, the entire API chain is working.
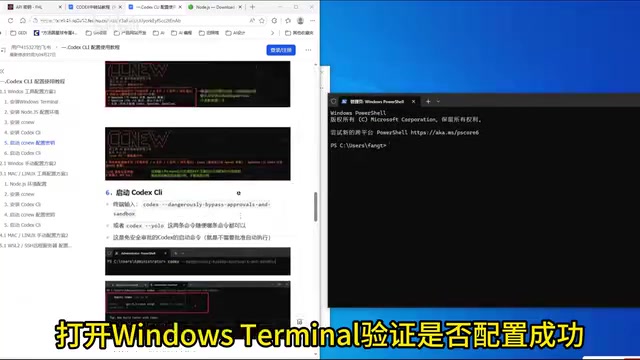
After successful verification, you can close the CLI and move on to Codex Desktop configuration.
Codex Desktop Configuration and Model Switching
Initial Setup and Sandbox Environment
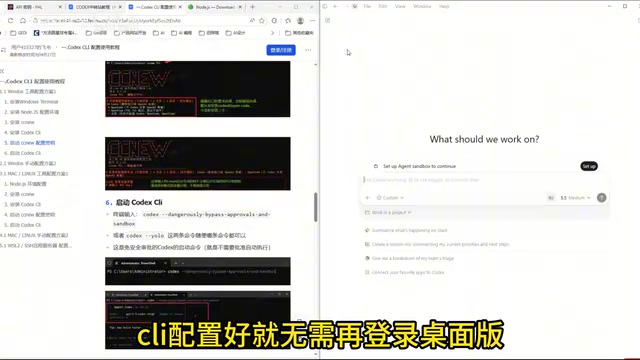
Open Codex Desktop. Since the key was already configured in the CLI, the desktop version doesn't require logging in again—it automatically reads the existing authentication information.
After entering the desktop version, complete the following initial setup:
- Sandbox configuration: Set up the sandbox environment according to the tutorial instructions to ensure code runs in an isolated, secure environment
- Parameter settings: Continue adjusting various parameters as per the tutorial
Why do you need a sandbox? A sandbox is a security mechanism that runs programs in a restricted, isolated environment. Its technical implementations vary, including containerization (e.g., Docker), virtual machines, and OS-level permission isolation (e.g., Linux's seccomp, macOS's App Sandbox). For AI code generation tools, sandboxing is especially important—AI-generated code cannot be guaranteed safe before execution and may include file system operations, network requests, or system calls. A deeper risk is "prompt injection attacks": maliciously crafted inputs could trick the AI into generating destructive code. Codex's sandbox prevents AI-generated code from causing unintended effects on the host system by limiting permission boundaries (such as only allowing access to specific directories, prohibiting external network connections, etc.), making it particularly friendly for beginner users.
Modifying config.toml to Switch to GPT-5.5
This is the core step of the entire tutorial—switching the default model to the latest GPT-5.5.
Before proceeding, here's some background on the TOML format: TOML (Tom's Obvious, Minimal Language) was created in 2013 by GitHub co-founder Tom Preston-Werner, designed specifically for configuration files. Compared to similar formats, TOML has unique advantages: unlike JSON, it supports comments (starting with #) and is easier for humans to read and manually edit; unlike YAML, its syntax rules are stricter, avoiding hard-to-debug parsing failures caused by indentation errors or special characters. TOML uses [section] markers for grouping and key = value for key-value pairs, with an intuitive structure. In Codex Desktop, config.toml serves as the core configuration file, including critical settings such as the API endpoint address (base_url), default model, timeout duration, and sandbox parameters.
Specific steps:
- Find the Notepad program on your system and open the
config.tomlconfiguration file - Go to the tutorial website and copy the provided
config.tomltemplate content - Replace all the original content in the configuration file with the template content
- Find the default model setting and change it to
gpt-5.5 - Save the file and restart Codex
Changing the model field to gpt-5.5 essentially tells the client to set the model parameter to the corresponding value in each API call, and the relay then routes the request to the appropriate model service. Based on OpenAI's model naming conventions, GPT-5.5 is an enhanced iteration of the GPT-5 series, with significant improvements in code generation, multi-step reasoning, and context understanding compared to its predecessor. It excels particularly at transforming natural language descriptions into complete runnable programs—which is exactly what enables the "generate a game with one sentence" demonstration that follows.
Related articles
 Tutorials
ChatGPT Plus Subscription Guide: Are GPT-5.5, image-2, and Codex Worth the Upgrade?
A detailed look at ChatGPT Plus features — GPT-5.5, image-2, and Codex — with a Plus vs Pro comparison and a complete step-by-step subscription guide for users outside the US.
 Tutorials
Harness AI Engineering in Practice: Using Claude Code to Master Enterprise-Level E-Commerce Development
Deep dive into Harness AI Engineering: master enterprise e-commerce development with Claude Code using the Rules, Skills, Wiki, and Changes framework.
 Tutorials
Cursor + Codex Dual-IDE Collaboration: A Practical Methodology for Open-Source Project Customization
A complete methodology for open-source project customization based on real-world experience, detailing the Cursor+Codex dual-IDE workflow, seven-stage process, MVP validation, and AI source code reading techniques.