Complete AI Comic Drama Production Guide: A 5-Step Practical Workflow from Script to Final Cut

Complete beginner-friendly workflow for producing AI comic dramas from script to final cut
This article systematically breaks down the complete AI comic drama production workflow from zero to final cut: start with LLMs for script, storyboard, and character design; generate keyframe images through multi-model comparison and upscale with ComfyUI; convert static images to dynamic video using models like Kling 2.6 with lip-sync dubbing; and finally assemble everything with sound effects in CapCut. The core philosophy is to focus effort on keyframe quality and master modular tool chain thinking.
Want to create AI comic dramas with cinematic quality but lack a complete production system? This article breaks down every core step of AI comic drama production—from scriptwriting, character design, and keyframe generation to video effects and voice dubbing—helping beginners master a reusable, end-to-end workflow.
1. Story Script: Building the Creative Backbone of AI Comic Dramas with Large Language Models
The first step in creating an AI comic drama isn't opening an image generation tool—it's telling the story clearly. Many people rush to use tools, only to end up with scattered visuals that lack narrative logic. The right approach is to use Large Language Models (such as DeepSeekAd, Doubao, Gemini, etc.) to transform inspiration into a script.
Large Language Models (LLMs) are generative AI systems built on the Transformer architecture, trained on massive text datasets. Models like DeepSeek, Doubao, and Gemini can handle screenwriting because they've learned extensive narrative structures, character development, and dialogue techniques during training. In practice, the quality of the "identity setting" (i.e., System Prompt) directly affects output quality—it essentially activates domain-specific knowledge weights within the model, enabling it to reason and generate from a specific professional perspective.
The process involves three steps:
Step 1: Generate the script. Give the LLM a clear identity setting (e.g., "You are a Chinese mythology animation screenwriter"), then specify the theme and duration requirements. For individual creators, keeping the duration around one minute is recommended to reduce production difficulty. Note that a script is the story itself, not a production manual—it should consist of complete narrative passages.
Step 2: Convert script to production storyboard. Tell the AI to transform the script into an animation production storyboard that includes shot numbers, shot types, camera movements, and narration. This step is crucial because shot types (wide shot, medium shot, close-up) and camera movements directly determine the direction of subsequent image and video generation. Shot types form the most fundamental visual language system in filmmaking: wide shots establish environment and atmosphere, medium shots show character relationships and actions, while close-ups focus on emotions and details. Camera Movement includes basic techniques like push-in, pull-out, pan, track, follow, and crane shots, each serving a specific narrative function—for example, a slow push-in implies tension, while a rapid pan creates impact. However, be aware that AI-suggested camera movements (like "rapid whip pan") are often difficult to achieve in AI-generated video. This is because current AI video generation models understand simple camera movements (like slow push-in, lateral tracking) fairly well, but still struggle to precisely control complex combined movements, requiring dynamic adjustments during production.
Step 3: Character design. Based on the storyboard content, have the AI generate descriptions of each character's appearance, clothing, and distinguishing features. These descriptions will directly serve as the prompt foundation for subsequent text-to-image generation.

A key principle: Both the storyboard and prompts need continuous adjustment throughout production—don't expect AI to deliver a perfect solution in one shot. Tutorials that claim "just follow the process" often overlook the extensive iteration involved in actual production.
2. Keyframe Generation: Multi-Model Comparison Strategy
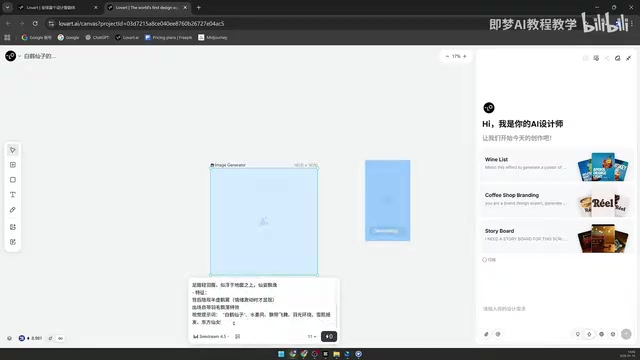
With the storyboard and character designs ready, the next step is generating keyframe images for each shot. Using an all-in-one AI platform (such as Lavalt) is recommended here, with the core advantage being the ability to simultaneously call multiple models for comparison—image models like Jimeng 4.5, Jimeng 3.0, Flux, and Midjourney, as well as video models like Kling 2.6, Sora 2.0, and Veo 3, can all be switched within the same interface.
Different image generation models are based on different technical architectures and training data, so each excels in different stylistic areas. Flux is based on Flow Matching technology and excels in photorealistic texture and lighting; Midjourney is known for its distinctive aesthetic style and artistic processing; the Jimeng series models are specifically optimized for Eastern aesthetics and Chinese animation styles. The so-called "gacha" effect occurs because diffusion models introduce random noise during generation—even with identical prompts, each generation produces slightly different results. Multi-model comparison essentially leverages different models' style preferences and randomness to maximize the probability of achieving the ideal image.
Character Image Generation
Copy the character descriptions from the LLM directly into the image generator, combined with style keywords (e.g., "3D Chinese animation style") and aspect ratio (9:16 portrait or 16:9 landscape), then select different models for comparison. In practice, Jimeng 3.0 often outperforms certain general-purpose models for Chinese animation style, while different models produce vastly different styles, requiring multiple "gacha pulls" to filter results.
Scene and Character Integration
A practical tip: You don't need to pre-generate scene images separately. In actual production, simply upload a character reference image and describe the scene through prompts, letting the AI automatically merge character and scene during generation—the results look more natural.
For ultra-wide-angle shots, if the subject takes up a large portion of the reference image, the AI tends to keep the subject large to maintain consistency, causing the "ultra-wide-angle" effect to fail. The solution is to explicitly state in the prompt that "the subject occupies a very small portion of the image," using natural language to constrain the AI's generation logic.
ComfyUI Image Super Resolution: Details Make the Difference
This is a critical step many people overlook. AI-generated images used directly for video production often lack sufficient clarity. The clearer the image, the better the resulting video quality.
ComfyUI is a node-based workflow graphical interface tool for Stable Diffusion, where users can drag and connect different functional nodes to build custom image processing pipelines. Unlike traditional WebUI, ComfyUI's node-based design gives users precise control over every step of image processing, and makes it easy to save and reuse workflows.
The core principle of image super resolution is using deep learning models (such as Real-ESRGAN, SwinIR, etc.) to perform intelligent interpolation on low-resolution images, not only increasing pixel count but also adding high-frequency detail information inferred by the AI—such as skin texture, individual hair strands, and eyelashes. This is fundamentally different from traditional bilinear or bicubic interpolation, which simply performs mathematical smoothing between existing pixels without actually adding new image information.
The specific operation uses ComfyUI's image upscaling workflow: copy the selected image, paste it into ComfyUI's Load Image node, and run the workflow. The upscaled result can show eyelash-level detail clarity, creating an obvious quality gap compared to the original. This step should be performed after every keyframe is generated—of course, you first select the best result from multiple generations, then perform the upscaling.
Creative Shot Generation Techniques
For creative shots (such as "another character's image faintly appearing in a character's pupil"), you can achieve this in stages:
- First generate a close-up of the character's face
- Use video generation to continuously push the camera toward the eyes, then screenshot at the right frame to get a high-definition eye close-up
- Upload two reference images simultaneously (full-body shot of the female lead + eye close-up), and describe in natural language: "The girl from image one faintly appears in the pupil of image two"
The word "faintly" is crucial here—without this modifier, the AI will crudely "paste" the character image into the pupil, producing an extremely unnatural effect. This actually involves an important technique in Prompt Engineering: using degree adverbs to control the intensity and blending method of AI generation, allowing the model to process things more delicately at the semantic understanding level.
3. Video Effects: From Static Keyframes to Dynamic Footage
Once keyframes are ready, video generation is actually the simplest step in the entire AI comic drama production process.
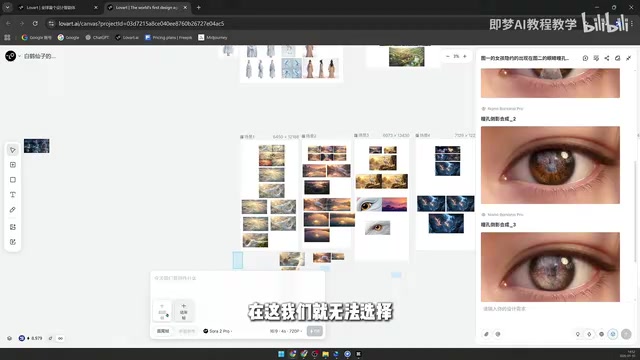
When choosing a video generation model, note that different models support first frame and last frame differently. For example, Kling 2.6 supports both first and last frame settings, while Sora2 Pro only supports first frame.
AI video generation models work based on diffusion models or autoregressive models, gradually generating coherent video frame sequences from noise. First Frame control means users can specify the content of the video's first frame, with the model generating subsequent motion from that starting point; Last Frame control additionally constrains the video's ending image, requiring the model to generate reasonable transition animation between two keyframes. Kling 2.6's support for both first and last frames essentially applies bidirectional constraints during generation, which is particularly important for shots requiring precise transitions (like transitioning from scene A to scene B). Sora2 Pro's first-frame-only support means the ending of the video has greater uncertainty.
Motion prompts should be concise and clear, describing only the subject and action (e.g., "crane flapping its wings and flying rapidly through the air")—there's no need for the level of detail used in image prompts. Once the images are done well, video generation follows naturally.
4. Editing and Dubbing: The Final Step to Bring AI Comic Dramas to Life
Video Assembly and Sound Effects
Arrange all generated 5-12 second video clips in narrative order in CapCut (Jianying). For sound effects, CapCut's built-in sound library can meet most needs—search keywords like "spell casting," "thunder," or "crane call" to find corresponding assets, then place them to match each scene.
Narration and Character Dubbing
Narration can be generated using Windows' built-in text-to-speech tool (search "CLI" to find the purple icon tool), selecting an appropriate preset voice for quick generation.
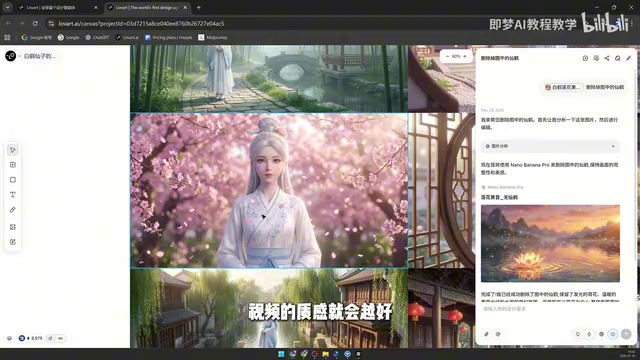
But character dubbing requires greater realism. A clever method: leverage Kling 2.6's lip-sync capability. When generating video, write the character's dialogue directly into the prompt (e.g., "The young woman shouts angrily: How dare you! Leave this place within three breaths"), and the model will automatically generate voice dubbing with matched lip movements and emotional tone, far surpassing standard TTS tools.
Lip Sync is a key technology in digital human and animation production. Traditional approaches require speech recognition to extract phoneme sequences, then drive facial skeletal animation through phoneme-to-viseme mapping tables—a complex pipeline prone to lip-sync mismatches. Kling 2.6 integrates speech synthesis (TTS) and lip-driving into the video generation process, with the model directly generating facial movement matching speech rhythm while understanding text semantics, including mouth shape changes, facial expressions, and subtle head movements. This end-to-end generation approach avoids error accumulation from chaining multiple modules, which is why it often achieves better naturalness than traditional multi-step processing.
5. Core Workflow Summary for AI Comic Drama Production
The complete pipeline for AI comic drama production can be summarized as:
- Large Language Model → Script → Storyboard → Character Design → Image Prompts
- All-in-one AI Platform → Multi-model comparison image generation → Select best keyframes
- ComfyUI → Image super resolution processing
- Video Generation Model (Kling 2.6 recommended) → Image-to-video + lip-sync dubbing
- CapCut (Jianying) → Assembly + sound effects + background music → Final output
The core philosophy of this workflow: Invest your effort in keyframe quality—video generation and editing are just the icing on the cake. Image clarity, composition, and style consistency are the key factors determining the final production quality. And throughout the entire process, continuous iterative adjustment—rather than one-shot generation—is the true reality of AI creation.
It's worth noting that this workflow reflects an important trend in current AIGC creation: modular tool chain composition. No single tool can cover everything from concept to final cut. Creators need to choose the most suitable tool for each stage and connect them through standardized intermediate outputs (text, images, video clips). Mastering this modular thinking is more important than becoming an expert in any single tool—because tools will continuously evolve, but the underlying logic of workflows remains universal.
Related articles
 Tutorials
ChatGPT Plus Subscription Guide: Are GPT-5.5, image-2, and Codex Worth the Upgrade?
A detailed look at ChatGPT Plus features — GPT-5.5, image-2, and Codex — with a Plus vs Pro comparison and a complete step-by-step subscription guide for users outside the US.
 Tutorials
Harness AI Engineering in Practice: Using Claude Code to Master Enterprise-Level E-Commerce Development
Deep dive into Harness AI Engineering: master enterprise e-commerce development with Claude Code using the Rules, Skills, Wiki, and Changes framework.
 Tutorials
Cursor + Codex Dual-IDE Collaboration: A Practical Methodology for Open-Source Project Customization
A complete methodology for open-source project customization based on real-world experience, detailing the Cursor+Codex dual-IDE workflow, seven-stage process, MVP validation, and AI source code reading techniques.