Complete Guide to the Codex Interface: Model Switching, Skill/Plugin Configuration, and PPT Generation in Practice

A systematic breakdown of OpenAI Codex's interface layout, permission settings, and usage tips.
This article provides a comprehensive guide to using OpenAI Codex, covering its three-section interface layout (left navigation, center workspace, right preview), three-level permission system (default/advanced/full access), model reasoning intensity selection (recommended high or ultra-high), and clarifying the easily confused concepts of "Skills" and "Plugins" — Skills are Markdown documents for standardized processes, while Plugins are external tool integrations.
Introduction
OpenAI's Codex is a powerful AI coding and content generation tool. As a specialized evolution of the GPT series models in the code domain, Codex was originally released in 2021 and served as the underlying engine for GitHub Copilot, with training data covering dozens of programming languages and massive open-source code repositories. With continuous iteration of its model architecture, it has evolved from a simple code completion tool into a full-pipeline AI programming assistant with multimodal understanding, tool invocation, and autonomous task planning capabilities. However, many people feel overwhelmed when they first open it, facing a screen full of buttons and options. This article will systematically break down Codex's interface layout, permission settings, and model selection, clarify the easily confused concepts of "Skills" and "Plugins," and walk you through a practical case — using Codex to generate a PPT — to get you up to speed quickly.
Codex Interface: Three-Section Layout Explained
Codex adopts a classic three-section layout, and understanding this structure is the first step to using it efficiently.
Left Side: Navigation and Management
The left sidebar handles all navigation functions, including:
- New Conversation: Start a brand-new task session
- Search & History: Quickly retrieve previous conversation content
- Plugin Invocation: Manage and activate various external tools
- Automation Configuration: Set up automated workflows
- Mobile Configuration: Newly added mobile adaptation options
The settings area in the lower-left corner displays your current login status — personal account or API login — with slight differences in feature permissions between the two.
Center: Core Workspace
The center area is the main battlefield for interacting with Codex. The "plus" button to the left of the input field supports uploading images and files — a basic operation. What deserves more attention is Plan Mode — when you're dealing with unfamiliar domains or need longer multi-turn conversations, it's highly recommended to enable Plan Mode.
Plan Mode is essentially a combined application of "Chain-of-Thought" and "Task Decomposition." In standard mode, the AI will directly attempt to generate a final answer; Plan Mode forces the model to first output a structured execution path — defining subtasks, dependencies, and expected outputs — before executing step by step. This is highly similar to the ReAct (Reasoning + Acting) framework: reason first, then act, with traceable decision rationale at each step. For complex tasks that are cross-domain and multi-step, Plan Mode can significantly reduce the probability of model "hallucinations" because it breaks a large problem into multiple verifiable smaller problems, making errors easier to detect and correct early on.
Right Side: Preview and Terminal
The right side is one of Codex's major highlights — the real-time preview panel. When generating web pages, documents, or running code, results are rendered directly on the right side, essentially functioning as a built-in mini browser. Compared to Claude Code, which requires opening a separate browser to debug after generating a web page, Codex's integrated experience is much smoother.
There's also a mini terminal at the bottom — you can even open Claude Code within this terminal, enabling a Codex + Claude Code combination — a setup that's very practical for complex projects.
Codex Permission Settings and Model Reasoning Intensity Selection
Three-Level Permission System
Codex provides three levels of permission settings, suitable for users at different stages:
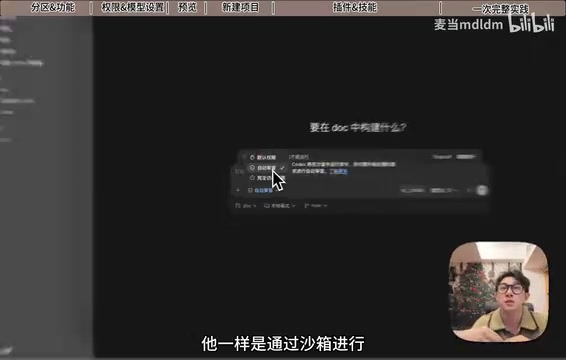
- Default Permission: Ideal for beginners. All instructions run in a local sandbox, with automatic review when permission requests are made — highest security level.
- Advanced Permission: Also sandbox-based, but at decision points requiring judgment, the AI can make autonomous choices, reducing interruptions from frequent confirmations.
- Full Access Mode: Equivalent to Bypass mode in Claude Code — the AI has the highest privileges to directly operate the system. More efficient, but comes with potential risks to your computer. Recommended only after you've mastered the tool.
Codex's Sandbox mechanism draws on OS-level containerized isolation technology, similar to Docker containers or macOS's App Sandbox. Under default permissions, AI-generated code and instructions run in a restricted virtual environment without direct access to the host machine's file system, network resources, or system-level APIs. This design follows the "Principle of Least Privilege" — granting only the minimum permissions necessary to complete the task. Advanced permission mode introduces a rule-based autonomous decision mechanism, where the AI can independently determine whether to execute certain operations within preset security boundaries, striking a balance between security and efficiency.
Model Selection and Reasoning Intensity Configuration
The model selection area on the right allows you to customize which model to use and its reasoning mode. Here's a key recommendation: keep reasoning intensity at least at "High" or "Ultra-High." Many people who think Codex underperforms have the root cause of setting reasoning intensity to "Standard," which drastically reduces effectiveness when handling complex tasks.
The reasoning intensity setting essentially controls the computational resources the model invests when generating each token, directly corresponding to the "reasoning effort" parameter in the OpenAI API. In "Standard" mode, the model uses shorter internal reasoning chains, suitable for simple Q&A or code completion; "High" and "Ultra-High" modes activate deeper chain-of-thought reasoning, where the model performs more rounds of internal "self-verification" before giving a final answer. This mechanism originates from the "slow thinking" architecture introduced in the o1 and o3 series models — trading more compute tokens for higher accuracy and logical consistency. For programming tasks requiring multi-step derivation, low reasoning intensity often causes the model to "take shortcuts," skipping critical boundary condition checks — this is precisely the root cause of why many users find the results poor. Keep the intelligence mode at default; it's not recommended to modify it casually.
The Difference Between Skills and Plugins: The Two Most Easily Confused Concepts in Codex
If you're logged in as a personal user, both "Plugins" and "Skills" entries will appear on the left side. They look similar but are fundamentally different.
Skills: Turning Repetitive Work into Standardized Processes
A Skill is essentially a Markdown document that defines the objectives, inputs, output formats, and execution steps for a specific task. Simply put, a Skill is an operations manual created after you've standardized your repetitive work.
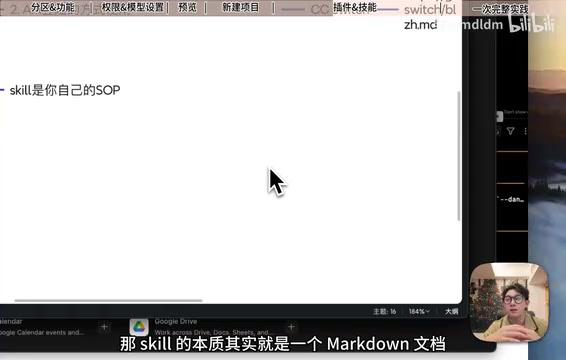
Codex's Skill mechanism is highly aligned in design philosophy with "Standard Operating Procedures (SOPs)" in enterprise knowledge management. Traditional SOPs document expert experience for team members to reuse; Codex Skills structure personal workflows into AI-understandable Markdown instruction sets, achieving "reusability of personal experience." From a technical implementation perspective, Skill files are essentially a type of "System Prompt Template" that gets injected into the conversation context when invoked.
Related articles
 Tutorials
ChatGPT Plus Subscription Guide: Are GPT-5.5, image-2, and Codex Worth the Upgrade?
A detailed look at ChatGPT Plus features — GPT-5.5, image-2, and Codex — with a Plus vs Pro comparison and a complete step-by-step subscription guide for users outside the US.
 Tutorials
Harness AI Engineering in Practice: Using Claude Code to Master Enterprise-Level E-Commerce Development
Deep dive into Harness AI Engineering: master enterprise e-commerce development with Claude Code using the Rules, Skills, Wiki, and Changes framework.
 Tutorials
Cursor + Codex Dual-IDE Collaboration: A Practical Methodology for Open-Source Project Customization
A complete methodology for open-source project customization based on real-world experience, detailing the Cursor+Codex dual-IDE workflow, seven-stage process, MVP validation, and AI source code reading techniques.