Cursor Beginner's Complete Guide: Three Conversation Modes and AI-Powered Coding in Practice

Cursor is an AI-native code editor with Agent/Ask/Manual modes for collaborative, automated project building.
Cursor is an AI-native code editor with a VS Code-like interface, featuring an integrated AI panel with three collaboration modes: Agent, Ask, and Manual. Agent mode lets AI autonomously create files, run commands, and fix dependencies — ideal for generating projects from scratch. Using a Python + Flask student management system as a hands-on example, the article walks through the full workflow from tech selection to deployment. The author emphasizes two key points: use Claude Sonnet for code generation tasks, and remember that Cursor writes code but cannot replace your local Python and database environment setup.
What Is Cursor: An AI-Native Code Editor
Cursor is a code editor built around AI at its core. Its overall interface closely resembles VS Code, but with an AI conversation panel integrated on the right side — transforming "writing code" from a manual process into a collaborative workflow with an AI model. For developers who want to leverage AI for automated programming, Cursor bridges the editor, the model, and file generation in one place, eliminating the need to constantly copy and paste between a chat window and an IDE.
Downloading it is straightforward: search for Cursor in any search engine, visit the official website, and download the installer for your operating system. Note that you must register an account before you can use it. Once installed, open a local folder as your workspace (for example, create a new Cursor Workspace directory) and you're ready to go.
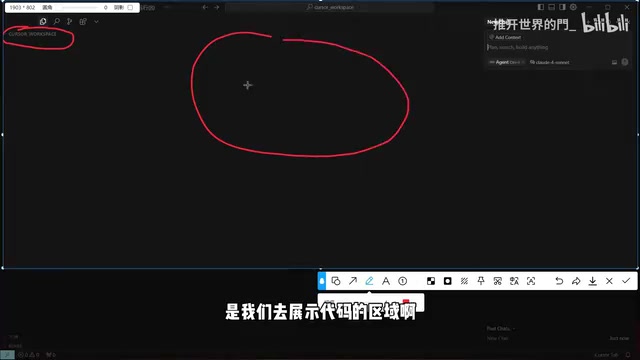
The interface has three main areas: the project file tree on the left, the code editor in the center (following the same layout as VS Code and similar tools), and on the right — the key differentiator from traditional IDEs — the AI conversation panel. The files on the left and the code in the center can both be generated through the AI panel on the right, so mastering how that conversation logic works is really all you need to get code "written" for you.
Three Conversation Modes: Agent, Ask, and Manual
Cursor's conversation panel offers three modes, each corresponding to a different depth of AI collaboration. This is the core concept every beginner needs to understand.
Agent Mode: Let AI Take the Wheel
The first is Agent mode. In this mode, the AI proactively handles your programming work — creating files, writing code, and executing commands. The entire workflow is managed by the model. If your goal is to have AI generate a complete project for you, this is the mode to choose.
Technically speaking, Agent mode means the AI model doesn't just generate text — it can also call tools (Tool Use), including reading and writing the file system, running terminal commands, and searching the codebase. The fundamental difference from a regular chat AI is whether the model has "hands": a standard conversational model can only output text, while a model in Agent mode can directly manipulate your project directory. This capability comes from the LLM's Function Calling / Tool Use interface. Cursor builds on top of that by wrapping specific tools like file operations and terminal execution, feeding execution results back to the model, and letting the model decide the next action based on those results — forming a "think → act → observe → think again" loop, commonly known as the ReAct (Reasoning + Acting) paradigm. Because of this, Agent mode consumes significantly more tokens than Ask mode and places higher demands on the model's reasoning ability. This is one reason the author recommends prioritizing Claude Sonnet in this mode.
Ask Mode: Just Ask, Just Answer
The second mode is Ask mode. It answers specific questions you ask without proactively creating files or taking over your coding process. When you simply want to consult on a technical approach or understand what a piece of code does, Ask mode is the better fit.
Manual Mode: Developer in Control
The third is Manual mode, which puts full coding control in the developer's hands. AI only offers reference-level suggestions. This is ideal for scenarios where you want to own every line of code and just need AI assistance on the side.
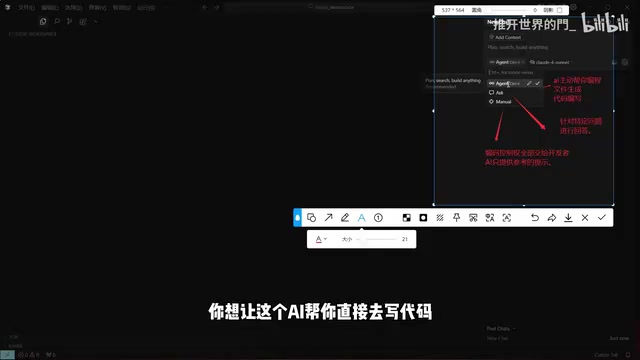
Regarding model selection, the right panel includes both free models and premium paid models. The original video's recommendation is direct: if the project is intended for a production environment, always default to Claude (the Claude Sonnet series) for code generation. The author considers it currently the strongest model for writing code, and relative to the cost of a real production project, the model fees are "negligible." For non-code-generation tasks like Ask mode, you can freely switch to other models.
Hands-On Demo: Building a Student Management System in Python
The author walks through a complete example, from technology selection to running the final project.
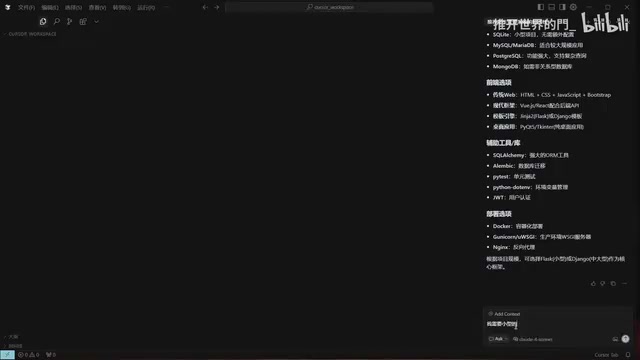
The first step is using Ask mode to consult on the tech stack: type "Develop a student management system in Python and recommend a tech stack." Claude quickly suggests a framework and narrows down the options based on the "small project" requirement. This step is essentially aligning direction with the AI before diving in.
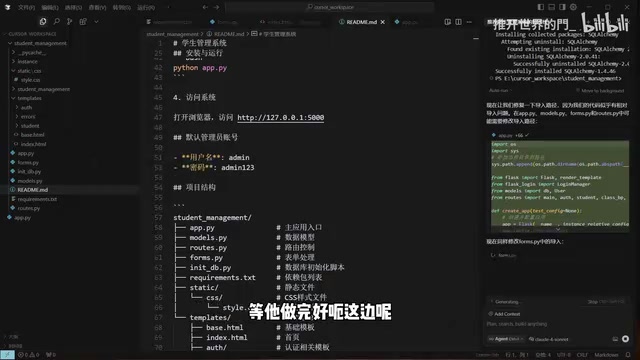
The second step is switching to Agent mode to have the AI generate the code. Cursor first plans the project structure, then builds it step by step through commands. There are two interaction details that beginners must pay attention to:
- Auto-run toggle: When the AI needs to execute commands (such as installing dependencies or running scripts), you can choose to be prompted each time or have everything run automatically. If you're comfortable handing the entire process to the AI, enabling auto-run prevents constant interruptions.
- Change confirmation: Newly generated files and modifications are highlighted in yellow/red, asking whether you want to save them. You can approve them one by one or wait until everything is generated and then "accept all" at once.
Throughout the process, the AI automatically created the directory structure, wrote the pages, generated the startup script, and produced the documentation. When a dependency version compatibility issue arose, it also automatically diagnosed and reinstalled the correct version. The author specifically points out that this kind of version compatibility problem might take an experienced developer half an hour to resolve — and an inexperienced one up to two hours — while the AI pinpoints and fixes it almost instantly.
Running Results and Feature Completeness
Once the project was built, the AI launched the Flask application with the server running at 127.0.0.1:5000. Paste the address into a browser and a working login page appears. You can log in using the generated credentials (e.g., admin / admin123).
Inside the system, the "Add Student" feature works correctly — filling in student ID, name, gender, date of birth, phone, email, and address all submitted successfully, and edit, delete, and view functions all work as expected. Two real-world minor issues came up during the demo: first, the student ID field has a 3–20 character length validation, but the error message is in English — you can ask the AI to change it to Chinese; second, features like "Grade Records" returned a Not Found error because they haven't been implemented yet.
The author explains this clearly: before generating, the AI listed which features were "implemented" and which were "pending." The demo only fully implemented the student management section. The remaining features are not beyond the AI's capabilities — writing everything would simply take too long for a demo, so they were skipped. In actual use, just give the AI the full requirements, wait half an hour to an hour, and it will fill in all the specified features.
Prerequisites: Environment Setup Is Non-Negotiable
One critical point that beginners often overlook is the runtime environment. The dependency installation and Flask server startup in this demo all relied on a pre-configured Python environment. If you want to reproduce the same results, you must first have the appropriate development environment set up — including a database environment. Whether you're using SQLite or MySQL, you need to install the corresponding components.
In other words, Cursor can help you write code, debug code, and fix bugs — but the local environment that code depends on still needs to be prepared by you. Understanding this prevents the common frustration of "the code was generated but it won't run."
SQLite and MySQL are two common relational databases with notably different use cases. SQLite is an embedded database that requires no separate server process — the entire database is a single local .db file, and Python's standard library includes built-in support for it with no additional installation required. It's ideal for small projects, prototyping, and demos. MySQL, on the other hand, is a client-server architecture database that requires a separate installation and running service, making it suitable for high-concurrency, large-scale production environments. For a small project like the student management system demonstrated here, SQLite is the lighter default choice — and it's a common configuration pattern with SQLAlchemy ORM in the Flask ecosystem. If you encounter a database connection error when reproducing this locally, simply confirm that your Python version is 3.x or above (which includes the built-in sqlite3 module) — no additional database service installation is needed.
Summary
Cursor's value lies in upgrading AI from a "Q&A assistant" to a "collaborator that can actually act." For beginners, mastering when to use each of the Agent, Ask, and Manual modes, making good use of the auto-run and change confirmation features, and setting up a basic local environment is all it takes to quickly build a runnable project from scratch. It won't replace a developer's understanding of requirements and environment — but it genuinely compresses tedious coding, debugging, and dependency troubleshooting into a fraction of the time.
Related articles

AI Visibility Metrics: Definitions Matter More Than Dashboards
AI visibility measurement tools are proliferating, but the lack of unified definitions makes data incomparable. This article analyzes the mismatch and explores why repeatable methodology matters more than dashboards, and how a shared vocabulary can make AI search measurement truly credible.

Tev Cracks Long-Horizon Agent Training with Dense Progress Rewards
Tev-Gym and progress potential reward shaping (PPRS) provide verifiable intermediate states and dense reward signals for long-horizon agents. Tev-27B matches closed-source models on ALE-CM and Terminal-Bench. This article analyzes its latent-world-first design, checkpoint strategy, and deployment limits.

Liquid AI Releases LFM2.5-24B-A2B: A 2B Active-Parameter MoE Built for On-Device Agents
Liquid AI releases LFM2.5-24B-A2B, an open-weights MoE model with 24B total and 2B active parameters for on-device agents, scoring 48.09 on LiveClaw and hitting 184 tokens/s on Apple M5 Max.