Figma MCP in Practice: Complete Tutorial for Connecting Design Files Directly to an AI Code Editor

Connect Figma designs to an AI code editor via MCP for automated design-to-code conversion.
This article provides a detailed walkthrough of connecting Figma design files to the Antigravity code editor using MCP (Model Context Protocol) within the Vibe Coding workflow. It covers the concept and role of MCP, installing the Figma desktop client, enabling the MCP service, creating and configuring an Access Token for authorization, and verifying successful communication — helping developers establish the critical link from design files to AI-powered automatic code generation.
In the Vibe Coding workflow, efficient communication between design files and code editors is a critical link in achieving "AI-automated coding." This article provides a step-by-step guide on how to connect Figma design files to the Antigravity code editor using Figma MCP (Model Context Protocol), enabling AI to directly read elements and specifications from your designs and laying the groundwork for automated code generation.
Background: What is Vibe Coding? Vibe Coding is an AI-assisted programming paradigm that emerged in 2025, formally coined by OpenAI co-founder Andrej Karpathy. Its core philosophy is that developers describe their intent using natural language, and AI handles most of the code writing — with humans playing the role of "director" rather than "executor." Under this paradigm, fully automated conversion from design files to frontend code has become one of the most representative real-world applications — and establishing communication between design tools and AI editors is the foundational infrastructure that makes this possible.
What is MCP? What Role Does It Play in Design-to-Code?
MCP stands for Model Context Protocol, a standardized protocol that enables AI models to communicate with third-party services. In the design-to-code scenario, MCP serves three core functions:
- Bridge: Connects Figma design files with the Antigravity code editor
- Data Transfer: Allows AI to read elements, layouts, styles, and other specification information from design files
- Accurate Reproduction: Based on the design information retrieved, AI can convert design files into high-fidelity frontend code
Without MCP, design files and code editors are like two isolated islands — AI cannot understand the designer's intent. With MCP, AI can "read" the design file and generate high-quality frontend code accordingly.
Deep Dive: Where Did the MCP Protocol Come From? MCP was officially open-sourced by Anthropic (the company behind Claude) in late 2024 as a standardized communication protocol designed specifically for AI applications. It solves the "last mile" problem between AI large language models and external tools and data sources. Before MCP, every AI tool needed to develop a separate integration layer for each external service, which was costly and difficult to maintain — for example, the same Figma integration might need to be implemented separately for Cursor, Copilot, Claude, and other AI tools. MCP defines a unified JSON-RPC communication specification, allowing any AI client that supports the MCP protocol to seamlessly connect with any MCP Server, truly achieving "integrate once, use everywhere." Currently, hundreds of mainstream tools including Figma, GitHub, Notion, and various databases have released official MCP Servers, and the ecosystem is expanding rapidly.
Prerequisites: Install the Figma Desktop Client
Before configuring MCP, you must first install Figma's Desktop App — the web version does not support MCP services. This is because the MCP Server needs to run within the local client.
Why Isn't the Web Version Supported? An MCP Server is essentially a lightweight process running locally that communicates with the AI client via standard input/output (stdio) or a local HTTP port. Due to the browser's security sandbox restrictions, it's impossible to launch or maintain such local processes in a web environment. Therefore, Figma's MCP functionality can only run in the desktop client, which has full system permissions — this is also a common requirement for most MCP Servers.
Download and Installation Steps
- Go to the Figma website, click the download area, and select the Desktop version
- Install it locally after the download completes
- Log in to your Figma account, and you'll be able to see all previously created design files in the client
The desktop client has the exact same features as the web version. Design files previously generated via AI in the web version can also be viewed and edited in the desktop client.
Organize Design Files into a Single File
Before formally configuring MCP, it's recommended to consolidate your design files into a single design file so that AI can read complete information in one go:
- Click the homepage and enter the Design module
- Use the Copy Design function to copy each page (e.g., homepage, detail page, etc.) into the same design file
- This way, AI can retrieve the complete design specifications in a single read during subsequent operations
Enabling the Figma MCP Service: Core Configuration Steps
Once your design files are ready, it's time for the core step — completing the MCP configuration on both the Figma and Antigravity sides.
Figma Side: Enable the MCP Server
- In the Figma desktop client, switch to the Model tab at the bottom
- Select a page, and find the MCP area in the right panel
- Click the Enable Desktop MCP Server button
- When you see the prompt "MCP service has been enabled," it means the setup was successful
This step is equivalent to launching a local MCP server process within the Figma client. It listens on a specific port and waits for connection requests from tools that support the MCP protocol, such as Antigravity. Once the connection is established, AI can query structured data from the design file — including node trees, style variables, and component properties — through the standardized MCP interface.
Antigravity Side: Install the Figma MCP Plugin
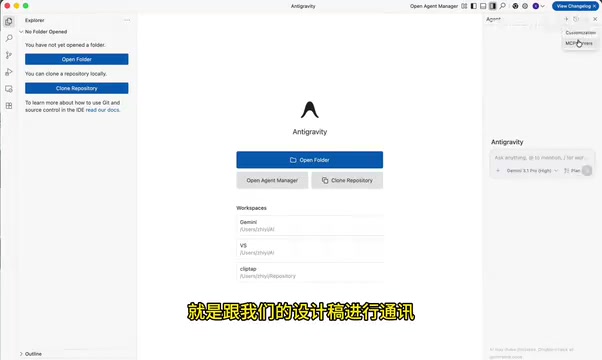
Open the Antigravity code editor and follow these steps:
- Click the Agent panel on the right, and find MCP Server in the three-dot menu
- Antigravity has multiple built-in MCP Servers; type Figma in the search box
- Find Figma Model MCP, click to view the description and installation instructions
- Click Install and wait for the installation to complete
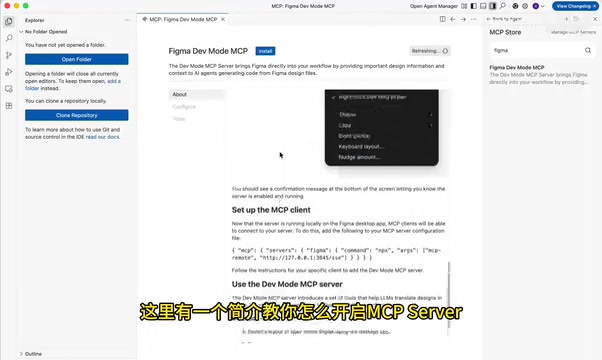
Once installed, Antigravity has the ability to communicate with Figma. However, there's one final step — Access Token authentication.
Creating a Figma Access Token and Completing Authorization
For security reasons, Figma does not allow any tool to freely read design files — authorization must be performed through an Access Token.
How the Access Token Security Mechanism Works Figma's Access Token uses the industry-standard Personal Access Token (PAT) mechanism, following the same design philosophy as platforms like GitHub and GitLab. A Token is essentially a cryptographically signed string that represents an access credential for a specific user within a specific permission scope. When Antigravity sends a request to the Figma API with the Token, Figma's server verifies whether the Token is valid, whether it has expired, and whether the requested operation falls within the Token's authorized permission scope. Setting a short expiration period (e.g., 7 days) and following the principle of least privilege (only checking "read design files" rather than "edit" permissions) serve as two important safeguards against Token misuse in case of leakage. The fact that a Token is only displayed once after generation is also a security consideration — the server only stores the Token's hash value rather than the plaintext, so it cannot display the original Token again.
Generating an Access Token
- Go back to the Figma client, click Homepage → Profile → Settings → Security
- Find the Create Access Token option
- Enter a Token name (e.g., "Antigravity-MCP")
- Set the expiration period (7 days is recommended; you can regenerate it after expiration)
- Configure scope permissions — make sure to check the relevant permissions for reading design files
- Click Generate and copy the generated Access Token
Tip: The Token is only displayed once after generation. Make sure to copy and save it immediately.
Configuring the Token in Antigravity
Once you have the Token, there are two configuration methods to choose from:
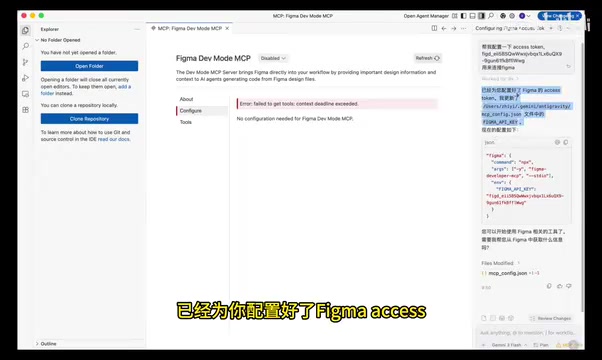
Method 1: Automatic Configuration via AI Command
Type a command directly in Antigravity's chat box: "Help me configure the Access Token to connect to Figma," then paste the Token. The AI will automatically complete the configuration.
Method 2: Manual Configuration File Entry
If automatic configuration by AI fails (e.g., a 403 permission error occurs), you can do it manually:
- Navigate to the project's configuration directory (Page directory)
- Find the MCP-related configuration file
- Paste the Access Token into the corresponding field
- Save the configuration
403 Error Troubleshooting Guide An HTTP 403 (Forbidden) error means the server received the request but refused to execute it — typically caused by missing or incorrect authentication information. In the MCP configuration scenario, there are two most common causes for a 403 error: first, the Token was not correctly written to the configuration file (e.g., extra spaces, line breaks, or written to the wrong field); second, the Token's permission scope does not include the requested operation. When encountering a 403 error, first check whether the Token value in the configuration file matches exactly what was generated, then confirm whether the Token's scope permissions include the "Read files" option.
In practice, you may encounter a 403 error during the first configuration attempt. This is usually caused by the Token not being correctly written to the configuration file. Manually checking and pasting the Token will resolve the issue.
Verifying Whether Figma MCP Communication Is Successful
After all configuration is complete, be sure to perform a communication test to confirm the connection is working properly:
- Go back to the Figma client and select the design file
- Right-click and select Copy Link to Selection to copy the design file link
- In Antigravity, send the command: "Can you read this design file?" along with the link
- Wait for the AI's response
If the configuration is correct, AI will return information similar to the following:
"Yes, I have successfully retrieved the Figma design file. It contains: theme, subtitle, core area, bottom navigation..."
Related articles
 Tutorials
ChatGPT Plus Subscription Guide: Are GPT-5.5, image-2, and Codex Worth the Upgrade?
A detailed look at ChatGPT Plus features — GPT-5.5, image-2, and Codex — with a Plus vs Pro comparison and a complete step-by-step subscription guide for users outside the US.
 Tutorials
Harness AI Engineering in Practice: Using Claude Code to Master Enterprise-Level E-Commerce Development
Deep dive into Harness AI Engineering: master enterprise e-commerce development with Claude Code using the Rules, Skills, Wiki, and Changes framework.
 Tutorials
Cursor + Codex Dual-IDE Collaboration: A Practical Methodology for Open-Source Project Customization
A complete methodology for open-source project customization based on real-world experience, detailing the Cursor+Codex dual-IDE workflow, seven-stage process, MVP validation, and AI source code reading techniques.