Gemini CLI Installation Guide: Complete Tutorial for Using Gemini 3 Free in Your Terminal

Gemini 3 is now free—here's a complete guide to installing and configuring Gemini CLI.
Google has opened Gemini 3 to all free-tier Gemini CLI users. This article provides a detailed walkthrough covering Node.js environment setup (version 20+ required), installing Gemini CLI via npm, logging into your Google account, and switching to the Gemini 3 model. Key reminders include keeping your proxy enabled throughout and activating TUN mode during login. The guide also demonstrates practical features like intelligent conversation and local file reading.
Google delivered a blockbuster "Christmas gift" at the end of 2025—Gemini 3 is now officially available to all free-tier Gemini CLI users. This means you don't need to deal with student verification or pay for a subscription to experience Google's latest flagship model directly from your command-line terminal. This article will walk you through installing and configuring Gemini CLI from scratch, along with practical tips to avoid common pitfalls.
What Is Gemini CLI?
Gemini CLI is a command-line application from Google that allows users to invoke Gemini series models directly in the terminal for conversations, file analysis, and more. CLI (Command Line Interface) is a way of interacting with computers through text commands. Compared to graphical interfaces (GUI), it has natural advantages in batch operations, script automation, and remote management. Unlike the web-based Gemini, the CLI version is better suited for developers and productivity enthusiasts—it can directly read local files, interact deeply with the system, and even perform fully automated computer management operations.
In recent years, CLI tools in the AI space have seen explosive growth—OpenAI launched Codex CLI, Anthropic released Claude Code, and Google's Gemini CLI is a key product in this wave. The core value of these tools lies in embedding large model capabilities directly into developers' daily workflows, eliminating the friction of constantly switching between browser and terminal.
Most importantly, Gemini 3 is now open to all free users, which is remarkably generous in an era where most large models charge for access. The large model competition in 2025 has reached a fever pitch, with OpenAI's GPT-5, Anthropic's Claude 4, Meta's Llama 4, and other models launching in succession, each competing fiercely in reasoning capabilities, multimodal understanding, and tool calling. Google's Gemini 3 has adopted a differentiated strategy of "free access + developer ecosystem" in this round of competition—lowering the barrier to entry through CLI tools and letting developers call the flagship model directly from their daily coding environment, thereby rapidly building user base and ecosystem stickiness. This strategy is consistent with Google's longstanding business logic of "scale first, monetize later."
Step 1: Install the Node.js Environment
Download and Installation
Gemini CLI runs on Node.js, so you first need to install the Node.js environment on your computer. Node.js is a JavaScript runtime environment built on Chrome's V8 engine that allows JavaScript code to run on servers or local systems outside of browsers. npm (Node Package Manager) is the default package manager for Node.js and the world's largest open-source software registry, hosting over 2 million packages. Gemini CLI is distributed as an npm package, making Node.js installation a prerequisite.
Here are the steps:
- Search for and visit the Node.js official website, then click the Download option at the top
- Choose a version number—the official requirement is version 20 or above; version 24.12 (stable) is recommended. The version 20+ requirement exists because Gemini CLI relies on newer Node.js API features, such as native fetch support and improved ES module system
- Select the appropriate installer for your operating system (Windows/Mac/Linux)
- Run the installer with all default settings—just click "Next" through the entire process
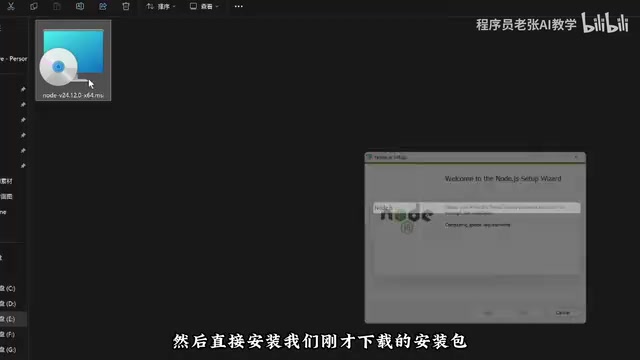
Verify the Installation
After installation, verify that Node.js was installed correctly:
- Windows users: Right-click the Start menu, select "Run," type
cmdto open the command line - Type
node -vin the command line and press Enter - If the displayed version number matches what you installed (e.g.,
v24.12.x), the installation was successful
This step is crucial—if the version number doesn't display properly, the subsequent Gemini CLI installation will fail.
Step 2: Install Gemini CLI
Run the Installation Command
Go back to the official Gemini CLI page, copy the installation command provided, then open PowerShell on your computer (note: not the regular cmd). Paste the command and press Enter to execute.
PowerShell is Microsoft's next-generation command-line tool and scripting language. Compared to the traditional cmd (Command Prompt), it supports object-oriented pipeline operations, a richer command set (called cmdlets), and deep integration with the .NET framework. When installing npm global packages, PowerShell handles environment variables and execution policies more reliably, which is why the official recommendation is to use PowerShell rather than cmd. If you encounter execution policy restrictions, you can resolve them by running Set-ExecutionPolicy RemoteSigned.
⚠️ Critical tip: Make sure to enable your proxy (VPN) before installation. Since Gemini CLI's installation source is hosted overseas, installation will most likely fail or time out without a proxy.
During installation, the cursor will keep blinking—this is normal. Just wait patiently. When you see the success message, Gemini CLI has been successfully installed on your system.
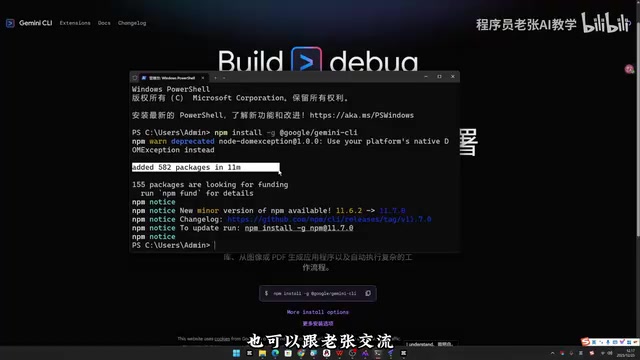
Some npm notice messages may appear during installation, such as suggestions to update versions. These are normal log messages and don't affect usage. If you encounter errors, you can copy the error message and paste it into an AI tool for analysis.
Verify the CLI Installation
Enter the following command to verify that Gemini CLI was installed successfully:
gemini --version
If it returns a version number, the installation is complete.
Step 3: Log In and Enable Gemini 3
Account Login
Type gemini in the terminal and press Enter. The system will prompt you to log in to your Google account. Select the first option and press Enter—it will automatically redirect to your browser for Google account authentication. This process is based on the OAuth 2.0 protocol—an industry-standard authorization framework that allows Gemini CLI to obtain access through a token mechanism without directly acquiring your Google password.
⚠️ Another pitfall: If authentication fails, it's most likely because TUN mode is not enabled. TUN mode is a virtual network device proxy method that operates at the network layer (OSI Layer 3). Unlike regular HTTP/SOCKS proxies that only handle traffic from browsers or specific applications, TUN mode creates a virtual network adapter that routes all application network traffic through the proxy tunnel. This is particularly critical for Gemini CLI authentication because the process involves OAuth 2.0 callbacks that may use non-standard ports or protocols. Regular proxy modes cannot fully cover these requests, causing the authentication flow to break. You need to enable TUN mode (global proxy mode) in your proxy tool to ensure all network requests are properly forwarded.
Switch to Gemini 3 Model
After successful login, the default model is Gemini 2.5. To switch to the latest Gemini 3, follow these steps:
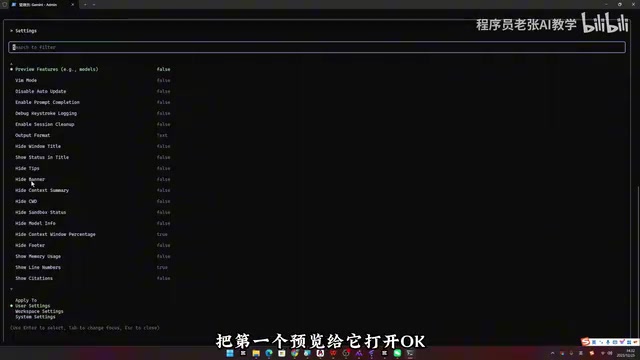
- Type
/settingsto enter the settings interface - Turn on the first "Preview" option
- Press Esc to return, then type
/modelto view available models - Gemini 3 should now appear in the list—select it and press Enter
Gemini CLI in Practice
Intelligent Conversation
After switching to Gemini 3, you can have natural language conversations directly in the terminal. For example, asking it to "act as an N8N automation content creator and suggest 10 short video topics" produces quick, high-quality responses:
- Money-saving hack videos with plot twists
- DeepSeek/ChatGPT automation integration tutorials
- Monitoring and alert system setup guides
- Lazy content distribution workflows
- Automated customer service and data security solutions
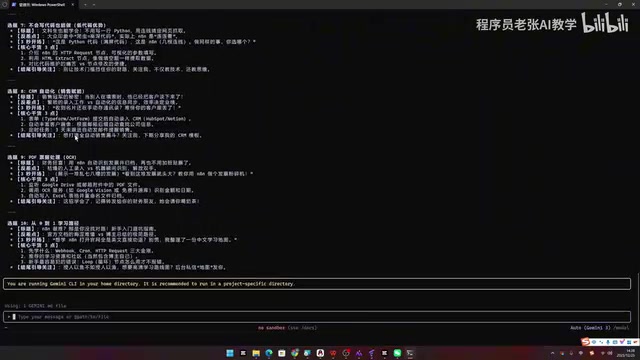
N8N mentioned here is an open-source workflow automation platform that allows users to connect different applications and services through visual node drag-and-drop, enabling automatic data flow and processing. It's widely used in content creation for automated distribution, data collection, and social media management. Combined with Gemini CLI, it can further boost automation efficiency.
In terms of response quality, Gemini 3 fully understood the context and provided creative yet practical topic suggestions, delivering an experience essentially on par with the web interface.
Local File Reading
A major highlight of Gemini CLI is its ability to directly read local files. Use the @ symbol followed by a file path to specify a file, for example:
@./document.pdf Read the content and organize the information inside
The system automatically locates and reads the specified file, then analyzes and organizes the content based on your instructions. In testing, it quickly identified the PDF's content themes and produced structured summaries with satisfying response speed.
However, note that there are data security considerations behind this feature. When users specify a file with the @ symbol, the CLI first requests user confirmation to authorize file reading, and the file content is then sent to Google's API servers for processing. This means file content leaves your local environment—users should exercise extra caution when handling sensitive data (such as business contracts or personal privacy files). Google states in its privacy policy that free-tier users' conversation data may be used for model training, which differs from the data handling policies of the paid API version.
More Features to Explore
Beyond basic conversation and file reading, Gemini CLI also supports fully automated computer management operations, meaning it can execute system commands, manage files, automate workflows, and more. This capability is known in the industry as "Agentic AI"—AI that doesn't just answer questions but proactively plans and executes multi-step tasks. For example, you can have Gemini CLI automatically create project directory structures, batch rename files, run test scripts, or even write and execute complete programs. For developers and automation enthusiasts, this is undoubtedly a powerful tool worth exploring in depth.
FAQ and Troubleshooting Summary
| Problem | Solution |
|---|---|
| Wrong Node.js version | Ensure version 20+; 24.12 recommended |
| npm install timeout/failure | Enable proxy mode and retry |
| Authentication failure | Enable TUN mode in your proxy tool |
| Can't find Gemini 3 model | Enable Preview option in /settings |
| npm notice during installation | Normal log messages; doesn't affect usage |
| PowerShell execution policy restriction | Run Set-ExecutionPolicy RemoteSigned to resolve |
Overall, Gemini CLI provides an excellent zero-cost way for regular users to experience Gemini 3. While the installation process involves command-line operations, following this guide step by step will allow even users without programming experience to complete it successfully. Google's free access strategy is undoubtedly a very sincere move amid the fierce competition in the large model space today.
Related articles
 Tutorials
ChatGPT Plus Subscription Guide: Are GPT-5.5, image-2, and Codex Worth the Upgrade?
A detailed look at ChatGPT Plus features — GPT-5.5, image-2, and Codex — with a Plus vs Pro comparison and a complete step-by-step subscription guide for users outside the US.
 Tutorials
Harness AI Engineering in Practice: Using Claude Code to Master Enterprise-Level E-Commerce Development
Deep dive into Harness AI Engineering: master enterprise e-commerce development with Claude Code using the Rules, Skills, Wiki, and Changes framework.
 Tutorials
Cursor + Codex Dual-IDE Collaboration: A Practical Methodology for Open-Source Project Customization
A complete methodology for open-source project customization based on real-world experience, detailing the Cursor+Codex dual-IDE workflow, seven-stage process, MVP validation, and AI source code reading techniques.