Gemini CLI Installation & Usage Guide: Free Access to Gemini 3 Pro for Coding

A practical guide to installing Gemini CLI and using Gemini 3 Pro for low-cost AI-powered coding.
This article introduces Google's command-line AI coding tool Gemini CLI, which offers functionality similar to Claude Code at a lower cost. It covers Node.js environment setup (v20+ required), one-minute installation via npm, logging in with Google One AI Premium and enabling Preview Model to switch to Gemini 3 Pro, and concludes with a hands-on demo generating and iterating on a login page using natural language and the @ file reference feature.
Why Choose Gemini CLI
In the AI coding tools arena, developers have more choices than ever — but the financial pressure keeps growing. Claude Code subscriptions are expensive and occasionally come with account ban scares, while OpenAI's top-up threshold isn't cheap either. That's where Google's Gemini CLI shines — with a Google One AI Premium membership (roughly a few dozen dollars per year), you get access to top-tier models like Gemini 2.5 Pro and Gemini 3 Pro, plus the ability to write code directly from the command line. The value proposition is hard to beat.
Gemini CLI is positioned similarly to Anthropic's Claude Code — both are command-line-based AI coding clients. It lets you chat with large models directly in your terminal, helping you create files, modify code, and generate complete pages without ever leaving your development environment.
The Current State of AI Coding Tools
AI coding tools (AI Coding Assistants) are software tools that leverage large language models to help developers write, debug, and optimize code. This space heated up rapidly after GitHub Copilot's official launch in 2022. The major players currently include GitHub Copilot (based on OpenAI Codex), Cursor (an IDE integrating multiple models), Claude Code (Anthropic's command-line tool), and Google's Gemini CLI. The core differences between these tools lie in their interaction methods (IDE plugin vs. command line), underlying model capabilities, pricing strategies, and ecosystem integration. CLI-based tools have the advantage of not depending on a specific IDE — they work with any development environment and consume fewer system resources. This is exactly why Gemini CLI and Claude Code chose this form factor.
Pre-Installation: Setting Up the Node.js Environment
Before installing Gemini CLI, make sure you have Node.js installed locally, and the version must be greater than 20.
Node.js is a JavaScript runtime environment built on Chrome's V8 engine that allows JavaScript code to run on servers or local computers outside of browsers. npm (Node Package Manager) is Node.js's default package manager and the world's largest open-source software registry, hosting over 2 million JavaScript packages. Gemini CLI requires Node.js 20+ because it relies on several new features introduced in that version, such as the native fetch API, improved ES module support, and a more stable permissions model.
Node.js Installation Steps
- Visit nodejs.org
- Download the installer for your operating system (Windows/macOS/Linux)
- Double-click the installer and click "Next" through the setup wizard
- After installation, open your terminal and verify with:
node -v
If the terminal displays a version number greater than v20, your Node.js environment is ready and you can proceed to the next step.
Install Gemini CLI in One Minute
Gemini CLI offers two installation methods:
- Temporary execution:
npx @google/gemini-cli(no installation, runs once and done) - Global installation:
npm install -g @google/gemini-cli(recommended for daily development)
npx is a command bundled with npm 5.2+ that lets you execute commands from npm packages without globally installing them — perfect for one-time experiments. Global installation (the -g flag) installs the package to a system-level directory, making the gemini command available from any path — ideal for frequent daily use.
If you plan to use it regularly, go with the global installation:
npm install -g @google/gemini-cli
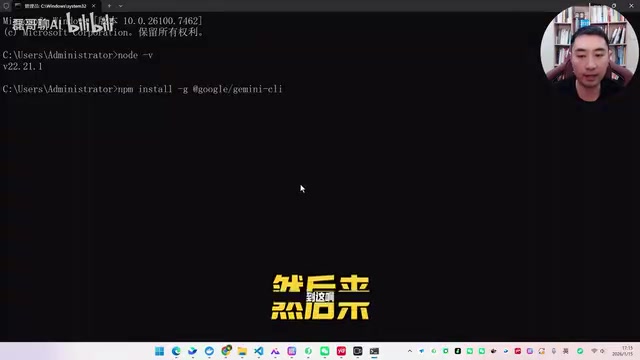
With a stable internet connection, installation takes less than a minute. Once done, test it with the gemini command:
gemini
If the Gemini logo appears in your terminal, the installation was successful.
Account Login and Model Configuration
Logging into Your Google Account
The first time you launch Gemini CLI, the system will ask you to choose an authentication method:
- Login with Google account (recommended for Pro members)
- Enter a Gemini API Key (obtained through Google AI Studio)
The fundamental difference between these two authentication methods: account login goes through Google's consumer product channel, where call quotas are tied to your subscription tier — Pro members typically enjoy higher daily request limits and faster response priority. API Key authentication goes through the developer platform channel, where the free tier has per-minute request limits (RPM) and daily token caps — it offers more flexibility but requires you to manage key security yourself.
After selecting the first option, your browser will automatically open a Google login page. It's recommended to log in with a Google One AI Premium member account — Pro members get higher call quotas and faster response times. Beyond providing 2TB of cloud storage, Google One AI Premium also includes full access to Gemini's advanced models and additional products like NotebookLM Plus.
Once verified, close the browser and return to your terminal — you'll see that the login information has been configured.
Switching to the Latest Gemini 3 Pro Model
Gemini CLI defaults to the Gemini 2.5 model, not the latest version. To use Gemini 3 Pro, you need to manually change a setting:

- Type
/settingsin the Gemini interface and press Enter - Find the "Preview Model" option (default is
false) - Press Enter to toggle it to
true - Press
ESCto exit the settings - Close the terminal and restart Gemini CLI (configuration changes require a restart to take effect)
After restarting, the model name displayed at the bottom will show the latest version. You can confirm by entering the Model option — available models now include Gemini 3 Pro and Gemini 3 Flash.
Gemini Model Version Overview
Google's Gemini model family has undergone rapid iteration: Gemini 1.0 (December 2023) → Gemini 1.5 (February 2024, introducing million-token context windows) → Gemini 2.0/2.5 (2024-2025, enhanced reasoning and coding capabilities) → Gemini 3 Pro (latest version). The Pro series is positioned as a high-performance general-purpose model, excelling at complex reasoning, long-text comprehension, and code generation. The Flash series is the lightweight, fast version suited for latency-sensitive scenarios. The Preview Model setting allows users to experience the latest model versions that haven't yet reached GA (General Availability) — these preview versions typically offer stronger performance but may have stability fluctuations.
Hands-On Demo: Generating a Login Page with Gemini CLI
Creating a Project Directory and Launching
To write code with Gemini CLI, first prepare your project folder:
- Create a folder with an English name, such as
gemini-demo - Open a terminal in that folder (on Windows, right-click → Open CMD here)
- Type
geminito launch the client
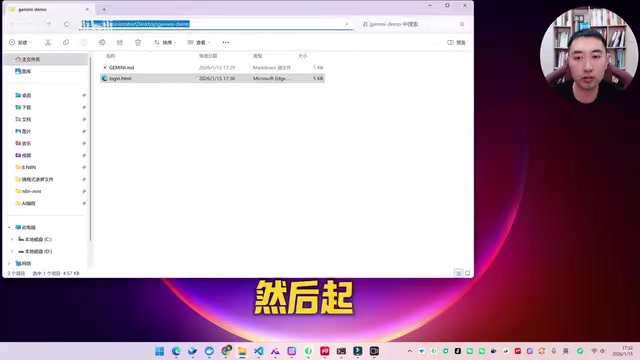
Once launched, all AI operations will execute within the current folder. You can start by running the /init command to let Gemini understand your project's directory structure. The /init command functions like a Project Scanning operation — it traverses the current directory structure, builds an understanding of the overall project architecture, and can then provide more context-aware suggestions in subsequent conversations.
Generating Page Code with Natural Language
Next, simply describe what you want in plain language:
Generate a beautiful and polished login page login.html
After pressing Enter, Gemini will automatically create login.html in the current folder and write complete page code into it.

In practice, the login page generated by Gemini 3 Pro is quite impressive — well-structured layout, attractive styling, and essentially ready to use right away.
Modifying and Iterating
Not satisfied with the result? Just modify it directly in Gemini CLI. For example, to replace all English text on the page with Chinese:
- Type the
@symbol — the system will list all files in the current project - Enter the filename (Tab completion is supported), such as
login.html - Describe your modification request:
Change all English text on the page to Chinese - Press Enter to execute
The @ symbol reference mechanism is a Context Injection design pattern. When you type @filename, the CLI sends the file's complete content as context to the large model, enabling it to understand the file's current state and generate precise modification plans accordingly. The Tab completion feature leverages the terminal's readline interface, reading the file system in real-time to provide path suggestions and prevent typos when entering long filenames.
Gemini will automatically read the file content, find all English text, and complete the replacements directly in the original file — "Welcome Back" becomes "欢迎回来", "Email" becomes "邮箱" — no manual copy-pasting required.
Beyond translating text, you can use the same approach to adjust color schemes, add interactive features, or modify page layouts — all by simply typing out your requirements. The essence of this workflow is compressing the traditional "read documentation → write code → debug and verify" cycle into a two-step "describe requirements → confirm results" process, dramatically reducing the time cost of repetitive coding tasks.
Summary and Recommendations
Gemini CLI offers developers a low-cost, highly effective AI coding solution. Compared to similar tools that cost over a hundred dollars per month, Google One AI Premium membership pricing is genuinely competitive — and beyond Gemini CLI, you also get access to NotebookLM and a suite of other Google AI products.
For developers looking to quickly get started with AI-assisted programming, Gemini CLI has an extremely low barrier to entry: installation takes one minute, and using it is as simple as chatting. Whether you're generating a project from scratch or iterating on existing code, it gets the job done.
Two things to keep in mind: first, ensure your network can access Google services normally; second, your Node.js version must be 20 or above. Meet these two conditions, and you're ready to start.
Key Takeaways
- Gemini CLI is Google's command-line AI coding tool, similar to Claude Code in functionality but at a lower cost
- Node.js version 20+ is required before installation; global installation via npm takes less than a minute
- After logging in with a Google Pro member account, you need to enable Preview Model in Settings to use the latest Gemini 3 Pro model
- Supports natural language interaction — can generate complete page files and iterate modifications on existing files
- The @ symbol references project files with Tab completion support, enabling precise file-level code modifications
Related articles
 Tutorials
ChatGPT Plus Subscription Guide: Are GPT-5.5, image-2, and Codex Worth the Upgrade?
A detailed look at ChatGPT Plus features — GPT-5.5, image-2, and Codex — with a Plus vs Pro comparison and a complete step-by-step subscription guide for users outside the US.
 Tutorials
Harness AI Engineering in Practice: Using Claude Code to Master Enterprise-Level E-Commerce Development
Deep dive into Harness AI Engineering: master enterprise e-commerce development with Claude Code using the Rules, Skills, Wiki, and Changes framework.
 Tutorials
Cursor + Codex Dual-IDE Collaboration: A Practical Methodology for Open-Source Project Customization
A complete methodology for open-source project customization based on real-world experience, detailing the Cursor+Codex dual-IDE workflow, seven-stage process, MVP validation, and AI source code reading techniques.