Godot AI Plugin Setup Guide: Using MCP Protocol to Let AI Directly Control the Game Engine

Godot AI plugin uses MCP protocol to let AI directly control the Godot engine for autonomous game development.
Godot AI is a free, open-source Godot editor plugin that implements MCP (Model Context Protocol), enabling AI assistants like Claude and Codex to deeply interact with the Godot engine — creating scenes, modifying nodes, running the project, and capturing screenshots to form a complete autonomous development loop. In a live demo, AI built a fully functional 3D platformer with a lava shader, enemy system, and fireball mechanics from scratch in just 10 minutes.
If you have a game idea in your head but lack the technical skills to bring it to life, what do you do? AI coding tools like Claude Code and Codex can already help us write a lot of code, but inside the Godot engine, AI often lacks deep understanding of the engine itself. Godot AI is a plugin built specifically to solve this problem — it uses the MCP protocol to let AI coding assistants interact directly with the Godot engine, from creating scenes to running tests, all in one seamless flow.
What Is the Godot AI Plugin?
Godot AI is a free, open-source Godot editor plugin whose core mechanism implements MCP (Model Context Protocol). In simple terms, MCP enables AI coding assistants (such as Claude, Codex, etc.) to communicate with the Godot engine at a much deeper level.
MCP is an open standard protocol introduced by Anthropic in late 2024, designed to establish a unified communication specification between AI models and external tools and data sources. Before MCP, every integration between an AI tool and an external system required a custom adapter layer, leading to severe ecosystem fragmentation. MCP uses a client-server architecture: the AI assistant acts as the client making requests, while the Godot AI plugin serves as the MCP server, exposing a set of standardized tool interfaces (such as creating nodes, modifying properties, running the project, etc.). This design allows any MCP-compatible AI client to connect seamlessly, without needing to develop a separate integration for each AI tool.
In the traditional approach, AI coding tools can only help you generate code snippets — they don't truly "understand" Godot's scene system, node structure, or editor tools. You may have already noticed that when using Codex or Claude Code on their own, they can't even create new Godot scene files. The Godot AI plugin changes all of that. Once installed, AI can not only create scenes and connect nodes, but also run the project directly in the editor and take screenshots to check the results.
It's worth explaining Godot's unique architectural design here. Godot follows a "everything is a node" philosophy, where the entire game is built from a hierarchically nested tree of nodes. Each scene is essentially a reusable subtree of nodes, saved as a text-based .tscn file. The strength of this architecture lies in its modularity — a character, an enemy, or a UI panel can each be an independent scene, then combined into the main scene through instancing. Understanding this helps explain why having AI create game objects as independent scenes is so important: it naturally aligns with Godot best practices, making future modifications and reuse extremely convenient.
Installation and Configuration
Installing the Plugin
The installation process is straightforward:
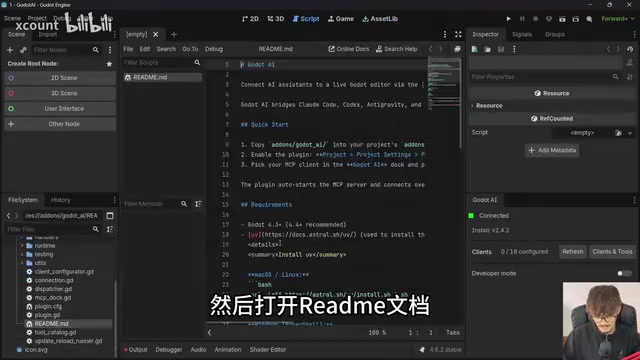
- Search for "Godot AI" in Godot's Asset Library and download it
- Go to Project → Project Settings → Plugins and enable the plugin
- Once enabled, a new panel will appear in the editor — when it shows "Connected," you're good to go
Setting Up Environment Dependencies
The plugin requires UV, a Python package manager. UV is a next-generation Python package manager developed by Astral (the same team behind the Python formatter Ruff), written in Rust, and 10–100x faster than traditional pip at installing and resolving dependencies. The Godot AI plugin depends on UV because its MCP server-side communication logic is implemented in Python. UV automatically creates an isolated virtual environment and installs the required Python packages, avoiding version conflicts with other Python projects on your system. For game developers unfamiliar with the Python ecosystem, UV's automation significantly simplifies the environment setup process.
Open the readme.md file in the plugin directory and copy the installation command for your operating system. One important note: you must fully close Godot before running the install command, otherwise you may encounter file access conflict errors.
Configuring Your AI Client
After installation, go to the "Clients and Tools" section in the Godot AI panel. You'll see configuration options for multiple AI tools, including:
- Claude Desktop / Claude Code
- Codex
- Anti-Gravity Cursor
- Other MCP-compatible AI tools
Make sure the corresponding AI tool is fully closed before configuring. Once all statuses show green, you're ready. Then open your Godot project in both Codex and Claude Code and start creating.
Hands-On Demo: Building a 3D Platformer from Scratch in 10 Minutes
The video's author started from a completely blank Godot project with the goal of building a 3D platformer game featuring:
- A lava shader
- A custom UI
- An enemy system (demon characters)
- Player-fired fireballs
The AI's Autonomous Build Process
After uploading a reference image and text prompt to Codex, the AI immediately recognized that the Godot AI plugin was installed and began using the MCP tools to develop the game. The most noteworthy aspects of the process:
- The AI automatically created multiple independent Godot scenes (main menu, level, character, enemies, etc.)
- The AI ran the Godot engine directly to test whether the code was working correctly
- The AI captured in-game screenshots to understand the actual visual output and made adjustments accordingly
- The entire process took approximately 10 minutes
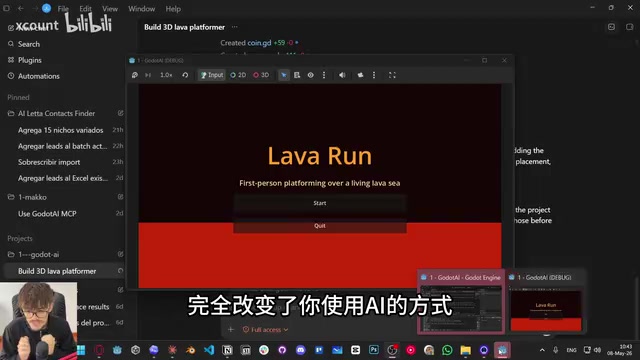
This means AI is no longer just a "blind code writer" — it now has a genuine closed-loop capability of "see results → analyze problems → fix bugs." In software engineering terms, this is similar to an automated variant of visual regression testing. Traditional automated testing relies primarily on assertions to verify logical correctness, but in game development, many issues are visual in nature — mesh clipping, UI misalignment, shader glitches — problems that can only be caught by actually seeing them. The Godot AI plugin gives AI this visual perception capability: it invokes Godot's command-line interface to launch the project, waits for rendering to complete, captures a screenshot, and sends it back to the AI model for multimodal analysis. This creates a complete autonomous development loop: write code → run engine → visual verification → fix issues.
As the author put it: "If Godot reports script or scene errors, the AI patches them before delivering."
Final Results
After 10 minutes, opening the project revealed results that far exceeded expectations:
- A complete main menu: displaying the "Lava Run" title and a start button
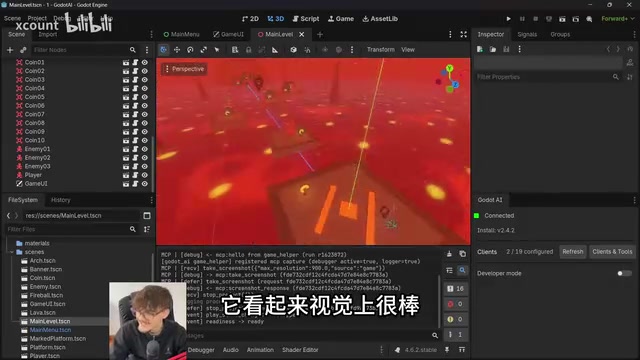
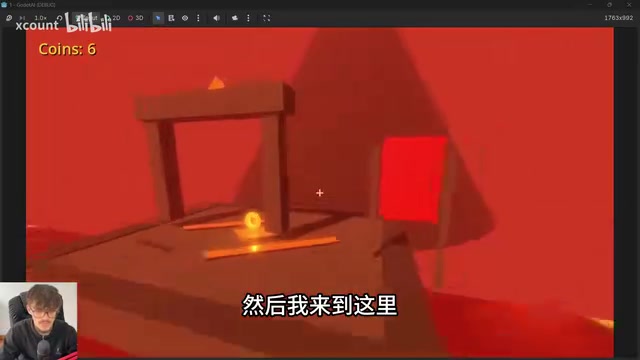
- A 3D platformer level: multiple floating platforms the player can jump across
- A lava shader: the flowing lava effect at the bottom looked remarkably realistic. Shaders are small programs that run on the GPU to control the final rendered appearance of every pixel in the game. Godot uses its own shader language (based on GLSL syntax), and lava shaders typically combine noise textures and time variables to simulate fluid motion, then use the emission property to give the lava a glowing, molten appearance. Writing this kind of visual effect code is a high barrier for beginners, and the AI's ability to generate complete shader code directly from a reference image significantly lowers the difficulty of achieving complex visual effects.
- Environmental atmosphere: fog effects were added to enhance scene immersion
- Enemy system: demon characters patrol the platforms with solid visual design
- Fireball shooting: players can fire fireballs at enemies with impressive visual results
- Win condition: reaching the end triggers a victory screen
Iteration Is Just as Easy
Because the AI created all game objects as independent scenes, subsequent modifications are extremely convenient. Want to add more coins? Just place them in the editor. Want more enemies? Duplicate an existing enemy scene node and adjust its position.
The author also demonstrated using Claude Code to further refine the game mechanics — adding a "knockback" effect when the player collides with an enemy. Claude directly modified the relevant GDScript files via the MCP protocol, with immediate results. GDScript is Godot's native scripting language, with Python-like syntax optimized for game development scenarios. It's deeply integrated with the engine, supporting the Signal mechanism for inter-node communication, Export variables for exposing parameters in the editor, and coroutines for handling asynchronous logic. Godot also supports C# and C++ via GDExtension, but GDScript remains the most popular choice in the community due to its low learning curve and rapid iteration characteristics. For AI to generate usable GDScript code, it needs to understand these engine-specific concepts — and the contextual information provided by the MCP protocol is precisely what helps AI grasp them.
Why Is MCP Protocol the Key to AI Game Development?
The core value of this plugin isn't in its own complexity — it's in establishing a standardized communication bridge between AI and the game engine. Traditional AI coding assistance tools face several fundamental problems:
- Lack of engine context: AI doesn't know the current scene's node structure or resource reference relationships
- Inability to operate the engine: AI can only output code text; it can't create scenes or set properties
- No way to verify results: After writing code, AI has no way to know how it actually runs
MCP solves all three problems at once. It enables AI to:
- Read the complete context of a Godot project
- Directly call editor APIs to create and modify scenes
- Run the project and get visual feedback through screenshots
This "perceive-act-feedback" loop is the true foundation for AI to independently complete complex game development tasks. It's also worth noting that MCP's open nature means similar integrations could appear in Unity, Unreal Engine, and other mainstream game engines in the future. In fact, the community has already begun exploring MCP integration with tools like Blender, signaling the emergence of a new development paradigm where AI can collaborate across entire toolchains.
Summary and Outlook
The Godot AI plugin represents an important direction for AI-assisted game development: not replacing developers with AI, but making AI a truly engine-aware collaborative partner. It's completely free and open-source, and anyone can use it or contribute to the codebase.
For indie game developers, this means you can focus more energy on creativity and design while delegating tedious technical implementation to AI. For programming beginners, it dramatically lowers the barrier to entry into game development — you don't need to master every detail of GDScript; AI can scaffold the foundational framework, and you can learn and adjust from there.
As the video author said: "After using this MCP, I can never go back to AI coding without it." When AI can truly "see" and "operate" a game engine, game development efficiency will take a qualitative leap forward.
Key Takeaways
- The Godot AI plugin uses the MCP protocol to let AI coding assistants interact directly with the Godot engine, including creating scenes, running the project, and verifying results via screenshots
- From a blank project to a complete 3D platformer (with lava shader, enemy system, fireball shooting, and more), AI autonomously built the game in approximately 10 minutes
- The plugin supports multiple AI tools including Claude Desktop and Codex, has a simple setup process, and is completely free and open-source
- MCP protocol solves the three core problems of traditional AI coding tools: lack of engine context, inability to operate the editor, and no way to verify runtime results
- All game objects generated by AI are independent scenes, making it easy for developers to manually modify and iterate afterward
Related articles
 Tutorials
ChatGPT Plus Subscription Guide: Are GPT-5.5, image-2, and Codex Worth the Upgrade?
A detailed look at ChatGPT Plus features — GPT-5.5, image-2, and Codex — with a Plus vs Pro comparison and a complete step-by-step subscription guide for users outside the US.
 Tutorials
Harness AI Engineering in Practice: Using Claude Code to Master Enterprise-Level E-Commerce Development
Deep dive into Harness AI Engineering: master enterprise e-commerce development with Claude Code using the Rules, Skills, Wiki, and Changes framework.
 Tutorials
Cursor + Codex Dual-IDE Collaboration: A Practical Methodology for Open-Source Project Customization
A complete methodology for open-source project customization based on real-world experience, detailing the Cursor+Codex dual-IDE workflow, seven-stage process, MVP validation, and AI source code reading techniques.