Godot Camera2D Follow Player: Complete AutoLoad Singleton Implementation

Complete tutorial for implementing Camera2D player-following in Godot 2D using the AutoLoad singleton pattern
This article walks through the complete process of implementing Camera2D player-following in a Godot 2D game: first building an arena scene, then creating a Global script as an AutoLoad singleton with @export to bind the player reference, and finally syncing global_position every frame in the camera script. It also covers Camera2D internals, node communication approaches, the difference between _process and _physics_process, and when to use AutoLoad vs. Signals.
In Godot 2D game development, having the camera follow the player is a fundamental feature that almost every project requires. This article will walk you through the entire process from scratch, covering arena construction, AutoLoad global singleton configuration, and the complete implementation of Camera2D player-following, with ready-to-use GDScript code.
Building the Basic Arena
Before writing any camera logic, let's prepare the game environment. We need to create an Arena scene in the Godot editor as the space where the player moves around.
Here are the specific steps:
- Create a new 2D scene and rename the root node to
Arena - Add a
Sprite2Dchild node toArenaand assign a background texture to it in the Inspector - Adjust the texture size and display range according to your game design needs, ensuring the player has enough room to move
Once the arena is set up, instantiate the player scene into the arena and adjust the initial position so the character appears at a reasonable starting point.
Creating the Camera2D Node
With the arena and player in place, the next step is adding a camera. In the Arena scene, press Ctrl + A, search for and create a Camera2D node, and rename it to Camera.
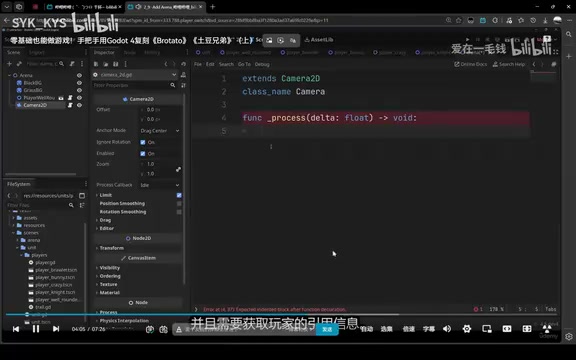
Camera2D is a viewport control node specifically designed by the Godot engine for 2D games. Its core responsibility is determining which area of the scene the game window displays. Without a Camera2D, Godot defaults to rendering with the scene origin (0,0) as the viewport's top-left corner. Once an active Camera2D node exists in the scene, the engine automatically aligns the viewport center to that node's global_position.
The underlying mechanism of Camera2D involves manipulating the CanvasTransform—the canvas transformation matrix in Godot's 2D rendering pipeline. When Camera2D is active, the engine calculates a 2D affine transformation matrix based on the camera's position, zoom, offset, and other properties, then applies it to the current Viewport's canvas_transform property. This means Camera2D doesn't actually "move" the viewport; instead, it applies an inverse transformation to the entire canvas coordinate system, making the content at the camera's position appear at the center of the screen. Understanding this helps explain why certain advanced Camera2D use cases (such as multi-viewport split-screen or minimap rendering) require SubViewport nodes.
Camera2D also includes many built-in utility properties, including zoom, offset, limit (boundary restrictions), drag margin, and smoothing (smooth following). Developers can achieve rich camera effects without manually manipulating viewport transformation matrices. A scene can contain multiple Camera2D nodes, but only one can be active at any given time (with its current property set to true), and the engine automatically handles switching between cameras.
What the camera needs to do is straightforward: read the player's position each frame and sync its own coordinates to match. But here's the problem—the camera and player might not be on the same scene tree branch, and referencing through direct node paths is both fragile and inflexible. This is where Godot's AutoLoad singleton mechanism comes in for global reference management.
Godot Scene Tree Architecture and Node Communication Methods
The Godot engine uses a SceneTree architecture to organize all objects in a game. Every game element is a node (Node), nodes form tree-like hierarchical structures through parent-child relationships, multiple nodes combine into a scene (Scene), and scenes can be instantiated and nested within other scenes.
This design provides extremely high modularity, but introduces a core challenge: how do two nodes communicate when they're on different scene branches? Godot provides three main approaches:
- Direct node path references (
get_node): The most direct but most fragile—any path change causes errors - Signal mechanism (Signal): Godot's preferred observer pattern implementation, suitable for one-to-many event notifications where the sender doesn't need to know who the receiver is
- Global singletons (AutoLoad): Suitable for global objects that need to be frequently accessed by multiple unrelated nodes
Understanding the appropriate use cases for these three communication methods is key to good Godot project architecture design.
Configuring the AutoLoad Singleton Pattern
How AutoLoad Works
AutoLoad is Godot engine's global singleton mechanism. Scripts or scenes registered as AutoLoad are automatically loaded when the game starts and persist throughout the entire runtime—they won't be destroyed during scene transitions. Any node's script can access AutoLoad objects directly by name, making them naturally suited for storing global state and shared references.
From a scene tree perspective, AutoLoad nodes are created during the engine initialization phase and mounted under the scene tree's root node (/root/), at the same level as the current main scene node. This means when you call get_tree().change_scene_to_file() to switch scenes, the main scene node is destroyed and replaced, but AutoLoad nodes remain unaffected. This mounting strategy also explains why AutoLoad nodes can maintain data across scene transitions—they simply don't belong to any switchable scene. Note that AutoLoad loading order follows the registration order in project settings; if multiple AutoLoads have dependencies on each other, you need to ensure the depended-upon AutoLoad is registered first.
Creating the Global Singleton Script
To give the camera easy access to the player reference, we create a global management script:
- Create a new
AutoLoadfolder in the project file system - Create a GDScript file in that folder named
Global - Declare an
@exportvariable in the script with its type set toPlayer
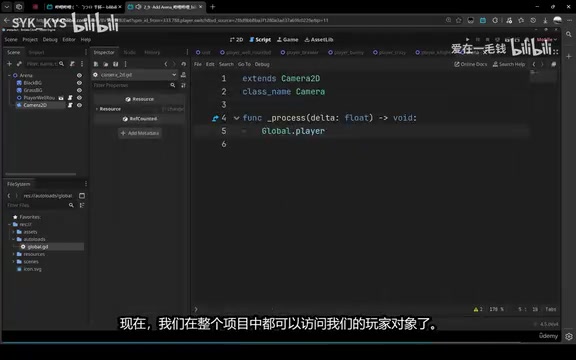
Here's the code:
# Global.gd
extends Node

@export var player: Player
The advantage of using @export here is that you can drag-and-drop to assign values directly in the editor's Inspector panel, without writing hardcoded node paths.
@export is a property annotation in GDScript that exposes script variables to Godot editor's Inspector panel, allowing developers to adjust parameter values through the visual interface without modifying code. @export supports rich type hints, including basic types (int, float, String), resource types (Texture2D, PackedScene), and node type references.
When @export is used with a custom class name (like Player), the Inspector automatically filters and only allows dragging in objects of the matching type, effectively preventing incorrect assignments in large projects. Being able to use Player as a type hint here requires that the player script uses the class_name keyword for global class registration (e.g., class_name Player). GDScript's class_name mechanism registers a script as a globally visible type in the engine, which can be used not only for @export type filtering but also as type annotations in code, type checking with the is keyword, and type casting with the as keyword. Scripts without a registered class_name can only be referenced after loading via preload() and cannot be used as type constraints in @export.
@export values are serialized and saved to .tscn scene files. Even if the default value in the script changes, manually set values in the editor will be preserved. Compared to hardcoding node paths in code using get_node() or the $ symbol, the @export approach is more flexible and less prone to breaking when nodes are renamed or moved.
Registering AutoLoad and Binding the Player Reference
Once the Global script is written, it needs to be registered in project settings:
- Open Project → Project Settings → AutoLoad tab
- Click Add, select the
Global.gdscript, and confirm the name isGlobal
After successful registration, return to the Arena scene. Select the Global node in the scene tree, and the Inspector panel will show a Player-typed export property. Drag the player object from the scene directly into this property field, and the reference binding is complete.
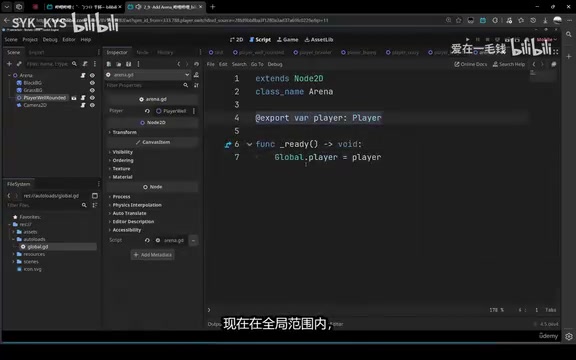
From this moment on, any script in the game can access the player object through Global.player.
Writing the Camera2D Follow Script and Running Verification
Camera2D Player-Following GDScript Code
With the global reference established, the camera follow code is very concise. Create a new script for the Camera node. The logic has two steps: get the player reference from Global at startup, and sync its own position to the player's position every frame.
# Camera.gd
extends Camera2D

var player: Player

func _ready():
    player = Global.player

func _process(delta):
    if player:
        global_position = player.global_position
In _ready(), the reference is obtained via Global.player and cached in a local variable to avoid accessing the global object every frame. The if player check in _process() prevents errors when the player object is null.
The Difference Between global_position and position
In Godot's 2D coordinate system, every Node2D and its subclasses have two position properties: position and global_position.
position: The node's local coordinates relative to its parent nodeglobal_position: The node's absolute coordinates in the entire scene world
When a node's parent is at the origin (0,0) with no rotation or scaling, both values are the same. But once the parent node has undergone any transformation, they diverge.
Using global_position rather than position in the camera follow script is crucial—because the camera and player are likely mounted under different parent nodes with different local coordinate systems. If you mistakenly use position for synchronization, the camera will follow to the wrong location. This is a common pitfall in Godot 2D development, especially when scene nesting is deep.
Choosing Between _process and _physics_process
In Godot's frame loop, _process(delta) and _physics_process(delta) are the two most commonly used callback functions, but they have fundamentally different calling timings:
_process(): Called every render frame; the call frequency depends on hardware performance and current framerate; the delta parameter represents the time elapsed since the last frame (in seconds)_physics_process(): Called in sync with the physics engine's fixed timestep, defaulting to 60 times per second (configurable in project settings), unaffected by render framerate fluctuations
For purely visual logic like camera following, using _process() is a reasonable choice since it updates the display every render frame, ensuring visual smoothness. However, if the player's movement logic is in _physics_process() (common when using CharacterBody2D), the camera reading positions in _process() may experience slight jitter.
This jitter is closely related to Godot 4's CharacterBody2D design. CharacterBody2D is the kinematic physics body node introduced in Godot 4 (replacing Godot 3's KinematicBody2D), and its core method move_and_slide() must be called in _physics_process() to work correctly, as the method internally relies on the physics engine's fixed timestep to calculate collision responses and velocity corrections. When the camera reads a CharacterBody2D's position in _process(), since render frames and physics frames update at different frequencies, the camera may read the same position between two physics steps, causing visual micro-jitter.
In this case, you can either move the camera following into _physics_process(), or enable Camera2D's built-in position_smoothing_enabled property to eliminate jitter—when enabled, the engine automatically interpolates the camera position between physics frames, which is the simplest solution to this problem.

Running and Verifying the Result
After saving all files, press F5 to run the project. If everything is configured correctly, you'll see the view always centered on the player—no matter how the character moves around the arena, the camera follows closely.
Pros and Cons Analysis of AutoLoad Architecture Design
Although this feature isn't complex, it touches on an architectural question that's inescapable in Godot development: how do different nodes and scenes share data?
AutoLoad singleton is one of Godot's officially recommended solutions for cross-scene communication, with clear advantages:
- Globally accessible: Any script can reference it directly by name, no need for fragile node paths
- Stable lifecycle: Persists throughout the game's runtime, data isn't lost during scene transitions
- Reduced coupling: The camera doesn't need to know the player's exact location in the node tree
However, there are caveats. Overusing singletons creates implicit dependencies between modules, making debugging and testing more difficult. The practical recommendation is: only put truly globally-needed core objects (player, game manager, audio manager, etc.) into AutoLoad, and prefer Godot's Signal mechanism for local inter-module communication.
Signals: An Alternative to AutoLoad
Godot's Signal mechanism is the engine's built-in observer pattern implementation, allowing nodes to communicate without directly referencing each other. A node can define and emit custom signals, while other nodes connect to those signals to receive notifications.
The core advantage of signals is decoupling: the sender has no idea who's listening, and the receiver doesn't need to hold a reference to the sender. In the camera-following scenario, an alternative to AutoLoad would be having the player node emit a signal carrying position information every frame, with the camera connecting to that signal and updating its position. However, in high-frequency update scenarios (emitting signals every frame), this introduces unnecessary function call overhead, and signal connection management requires additional code.
Therefore, for requirements like "continuously tracking an object's position," a global AutoLoad reference is the more concise and efficient approach. Signals are better suited for handling discrete events, such as player death, score changes, level completion, and other one-time notifications. In real projects, AutoLoad and Signal are often used together—AutoLoad manages global state and core object references, while Signal handles game event broadcasting and responses.
Summary
This article completed the full implementation of Camera2D following the player in a Godot 2D game. The core steps include three parts:
- Building the arena: Create the Arena scene, configure background textures, place the player
- Configuring the AutoLoad global singleton: Write the Global script, register it as AutoLoad, bind the player reference via
@export - Implementing Camera2D following: Get the reference through
Global.playerin the camera script and sync global_position every frame
This approach is a foundational architectural pattern for many Godot 2D projects. Building on this, you can extend with more camera effects, such as smooth following with lerp(), setting Camera Limits for boundary restrictions, adding Screen Shake, and more to elevate your game's visual experience.
The lerp() (linear interpolation) function is the core tool for implementing smooth camera following. Its mathematical formula is lerp(a, b, t) = a + (b - a) * t, where t is a weight value between 0 and 1. In camera following, a typical usage is global_position = global_position.lerp(player.global_position, 5.0 * delta), which moves the camera position toward the player's position by a certain proportion each frame, producing an exponential decay catch-up effect—moving faster when far away and slower when close, creating a natural easing feel. However, note that using lerp directly with delta doesn't behave perfectly consistently across different framerates. A more precise framerate-independent smoothing formula should use the exp() exponential function: global_position = player.global_position + (global_position - player.global_position) * exp(-speed * delta).
Related articles
 Tutorials
ChatGPT Plus Subscription Guide: Are GPT-5.5, image-2, and Codex Worth the Upgrade?
A detailed look at ChatGPT Plus features — GPT-5.5, image-2, and Codex — with a Plus vs Pro comparison and a complete step-by-step subscription guide for users outside the US.
 Tutorials
Harness AI Engineering in Practice: Using Claude Code to Master Enterprise-Level E-Commerce Development
Deep dive into Harness AI Engineering: master enterprise e-commerce development with Claude Code using the Rules, Skills, Wiki, and Changes framework.
 Tutorials
Cursor + Codex Dual-IDE Collaboration: A Practical Methodology for Open-Source Project Customization
A complete methodology for open-source project customization based on real-world experience, detailing the Cursor+Codex dual-IDE workflow, seven-stage process, MVP validation, and AI source code reading techniques.