LangChain Agent Executor Architecture: Building a ReAct Agent from Scratch

Deep dive into LangChain Agent Executor internals and building a custom ReAct Agent from scratch.
This article explains the core mechanisms of the Agent Executor in LangChain, centered around the ReAct (Reasoning + Action + Observation) iteration pattern. It covers Prompt design, tool binding, Tool Choice strategies (recommending forced tool calling + Final Answer tool), and provides a complete custom Agent Executor implementation, emphasizing max iteration protection and the critical role of Tool Call IDs in parallel tool calling.
Introduction
In AI application development, an Agent is a core concept. It's not just a simple LLM call—it's a set of code logic that iteratively runs LLM calls, processes outputs, and executes tools. This article provides a deep dive into how the Agent Executor works in LangChain, and walks you through building a custom Agent Executor from scratch, helping you truly understand the mechanisms behind how Agents operate.
The ReAct Pattern: The Agent's Core Thinking Framework
What is ReAct?
ReAct is one of the most mainstream Agent design patterns today. Its name comes from the combination of Reasoning + Action. This pattern originates from the 2022 paper "ReAct: Synergizing Reasoning and Acting in Language Models" jointly published by Princeton University and Google Research. Through experiments on multi-hop reasoning benchmarks like HotpotQA and FEVER, the paper demonstrated that interleaving reasoning traces with action steps significantly improves LLM performance on multi-step tasks—compared to pure Chain-of-Thought reasoning, ReAct improves accuracy by approximately 10%~30% on tasks requiring external information retrieval. More importantly, this "think while doing" structure is inherently interpretable: every reasoning step is traceable, allowing you to clearly pinpoint where an Agent made a judgment error during debugging. Although this pattern was proposed several years ago, virtually all LLM providers, including OpenAI, follow a very similar pattern for their tool-calling Agents.
The core ReAct loop consists of three steps:
- Reasoning: The LLM analyzes current information and decides what to do next
- Action: Executes a specific tool call
- Observation: Retrieves the results of the tool execution
Here's a concrete example: Suppose a user asks "Besides the Apple Remote, what other device can control the program that the Apple Remote was originally designed to interact with?" The LLM first reasons that it needs to search for information about the Apple Remote, then calls a search tool and obtains the observation that "Apple Remote is used to control the Front Row media center." Then it enters a second loop, searches for Front Row, and ultimately arrives at the answer "keyboard function keys."
The Role of the Agent Executor
In the entire ReAct loop, the Agent itself is only responsible for reasoning and generating tool call instructions, while the Agent Executor is what actually executes tools, processes responses, and manages the iteration loop. Its workflow can be summarized as:
- Pass user input to the LLM
- Determine whether the LLM's output is a final answer or a tool call
- If it's a tool call, execute the tool and feed the results back to the LLM
- Repeat the above process until a final answer is obtained
One detail worth noting: each iteration may involve multiple LLM calls, which means Agents are more expensive than single LLM calls in terms of both latency and token costs, but this trades off for problem-solving capabilities far beyond what a regular LLM can achieve.
Building an Agent from Scratch: Prompt Design and Tool Binding
Defining the Prompt Template
The first step in building an Agent is designing a proper Prompt template. A typical Agent Prompt contains four parts:
- System Message: Defines the Agent's behavioral rules, including when to use tools and when to answer directly
- Chat History: Historical conversation records
- User Input: The current user message
- Agent Scratchpad: Intermediate reasoning steps, including tool call records and observation results
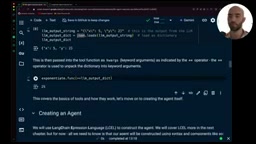
The Agent Scratchpad is key—tool calls generated by the LLM are stored as AI Messages, while results returned by tools are stored as Tool Messages, linked together via tool_call_id.
Tool Binding and Execution Mechanism
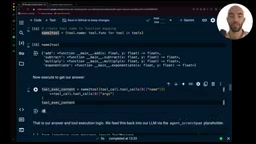
LangChain uses the @tool decorator to convert ordinary Python functions into structured tool objects containing metadata like name, description, and JSON Schema. The underlying principle of this mechanism is: the decorator automatically parses the Python function's type hints and docstrings, and leverages Pydantic models to convert them into JSON Schema format compliant with the OpenAI Function Calling specification. This means the quality of your function annotations directly determines how accurately the LLM understands and calls your tools—the more precise the descriptions and the clearer the parameter explanations, the higher the probability that the LLM will select the correct tool and pass valid arguments. Once tools are bound to the LLM, it can generate structured output containing tool names and parameters.
The execution flow is very intuitive: extract the tool name and parameters from the LLM's output, find the corresponding function through name mapping, then execute that function with keyword arguments.
Tool Choice Strategies: Comparing Two Termination Approaches
Approach 1: Auto Mode
When you set tool_choice="auto", the LLM can freely choose to use tools or answer the user directly in the content field. This approach is simple and intuitive, but has a practical problem: the LLM sometimes chooses to answer directly when it should use tools, especially when using smaller models, where this "tool-skipping" behavior becomes more frequent.
Approach 2: Forced Tool Calling + Final Answer Tool (Recommended)
Setting tool_choice="any" (equivalent to "required") forces the LLM to call a tool every time. To allow the Agent to output a final answer, you need to create an additional final_answer tool.
This approach has two significant advantages:
- Stronger control: Eliminates the possibility of the LLM bypassing tools to answer directly; output is always in the tool_calls field with a unified format
- Structured output: You can define a precise output Schema in the final_answer tool, such as including an
answerfield and atools_usedfield, ensuring downstream logic can reliably parse the output
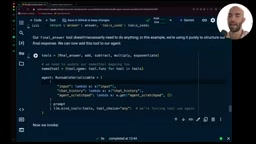
This structured output is extremely important in production environments—when the Agent's output needs to be passed to frontend displays or downstream processing pipelines, a predictable output format significantly reduces system fragility.
Complete Implementation of a Custom Agent Executor Class
Core Architecture
Encapsulate all the manually executed steps from before into a CustomAgentExecutor class. The core logic is as follows:
class CustomAgentExecutor:
    def __init__(self, llm, tools, prompt, max_iterations=3):
        self.chat_history = []
        self.max_iterations = max_iterations
        # Initialize agent and tool mapping

    def invoke(self, input: str):
        count = 0
        while count < self.max_iterations:
            # 1. Call agent to generate tool calls
            # 2. Execute tools, get observation results
            # 3. Add results to scratchpad
            # 4. If it's final_answer, extract answer and return
            count += 1
Key Design Considerations
Maximum iteration protection: This is an easily overlooked but critically important safety mechanism. If the Agent's logic has issues (for example, observation results aren't properly fed back to the LLM), the Agent might infinitely loop LLM calls, leading to exorbitant API costs. Setting max_iterations effectively prevents this.
The importance of Tool Call ID: Each tool call has a unique ID, and when a tool returns results, it must carry the corresponding ID. This is especially critical in parallel tool calling scenarios. Starting with GPT-4 Turbo, OpenAI introduced Parallel Function Calling capability, allowing the model to generate multiple call instructions simultaneously in the tool_calls array within a single response. This feature can compress the total latency of multiple independent queries from "serial accumulation" to "parallel execution," with particularly notable effects in scenarios requiring simultaneous queries to multiple data sources. However, parallel execution means the return order of tools is no longer deterministic, making tool_call_id the only reliable correlation anchor—the LLM relies on it to precisely match each observation result back to its corresponding call request, ensuring the integrity of the reasoning context.
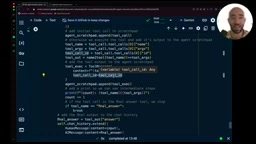
Handling parallel calls: OpenAI's models support generating multiple parallel tool calls in a single response. In simple scenarios, you can assume there's only one tool call per response (accessed via index [0]), but in production environments, you need additional logic to handle parallel call scenarios.
Summary and Practical Recommendations
By manually building an Agent Executor, we can clearly see that the core of an Agent isn't mysterious at all—it's essentially an iterative control loop around LLM calls. Once you understand this, you can flexibly customize Agent behavior logic according to specific business requirements.
A few practical recommendations:
- Prefer the forced tool calling + Final Answer tool pattern for more controllable output
- Always set a maximum iteration count to prevent unexpected infinite loops
- Handle parallel tool calls in production environments—don't assume there's only one tool call per response
- Understand the underlying principles before using LangChain's abstractions, so you can quickly locate and resolve issues when they arise
Although LangChain provides a highly abstracted AgentExecutor ready for direct use, deeply understanding its internal mechanisms will give you the confidence to build more complex Agent systems that better fit your business scenarios.
Related articles
 Tutorials
ChatGPT Plus Subscription Guide: Are GPT-5.5, image-2, and Codex Worth the Upgrade?
A detailed look at ChatGPT Plus features — GPT-5.5, image-2, and Codex — with a Plus vs Pro comparison and a complete step-by-step subscription guide for users outside the US.
 Tutorials
Harness AI Engineering in Practice: Using Claude Code to Master Enterprise-Level E-Commerce Development
Deep dive into Harness AI Engineering: master enterprise e-commerce development with Claude Code using the Rules, Skills, Wiki, and Changes framework.
 Tutorials
Cursor + Codex Dual-IDE Collaboration: A Practical Methodology for Open-Source Project Customization
A complete methodology for open-source project customization based on real-world experience, detailing the Cursor+Codex dual-IDE workflow, seven-stage process, MVP validation, and AI source code reading techniques.