MiniMax H3 Video Reference Replacement: A Practical Prompt Engineering Tutorial
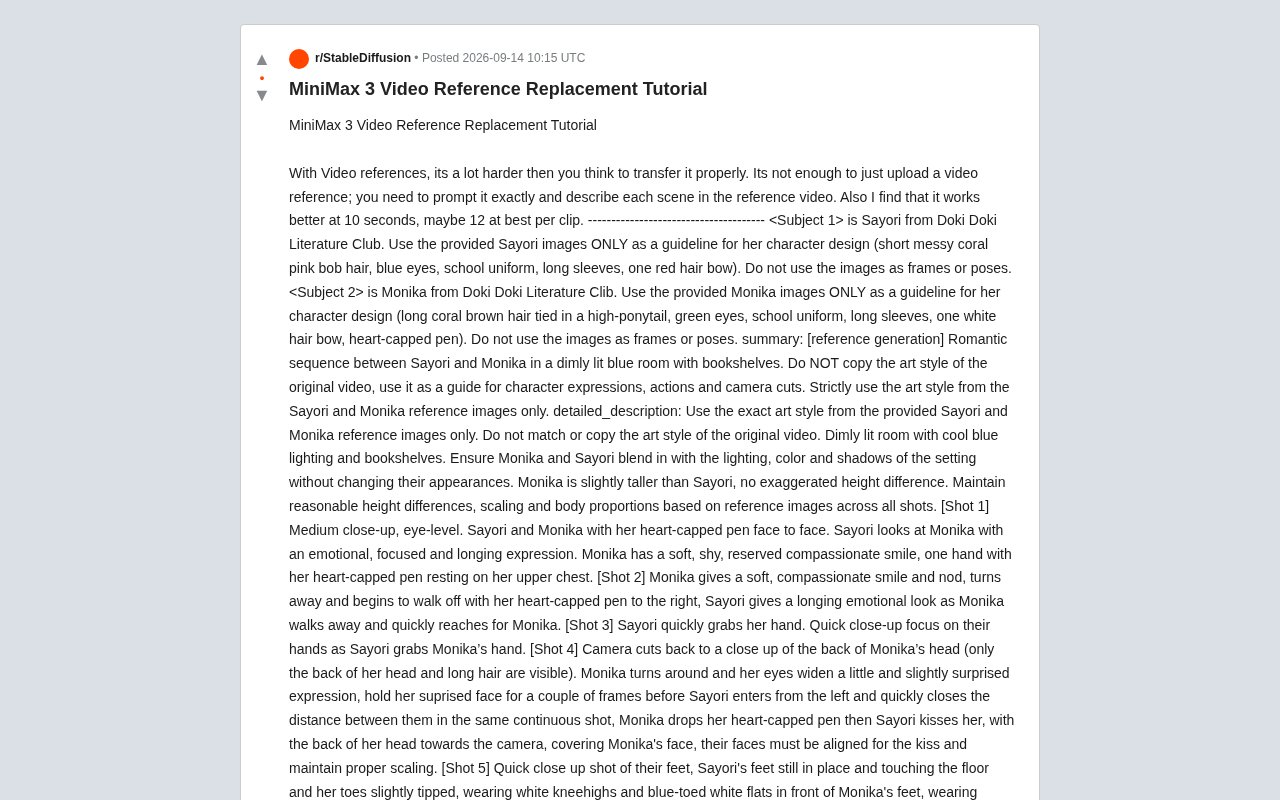
MiniMax H3 video reference requires precise shot-by-shot prompts to separate motion transfer from style preservation.
Based on a Reddit user's hands-on experience, this article breaks down how to correctly use MiniMax H3's video reference replacement feature. The core finding: uploading a reference video alone is insufficient. Users must actively set boundaries through precise prompt structures — including labeled character definitions, summary-level style attribution, shot-by-shot camera and physics descriptions, and heavy use of negative instructions. Recommended clip length is around 10 seconds, with 12 seconds as the upper limit.
The Video Reference feature sounds straightforward — upload a reference video and let the model generate accordingly. But anyone who has actually worked with MiniMax 3 (also known as Minimax H3) quickly discovers that accurately transferring motion and camera cuts from a reference video onto a new character is far harder than it looks. One Reddit user shared a complete hands-on workflow, and the core takeaway comes down to a single sentence: uploading a reference video alone is nowhere near enough — you have to describe every scene as if you were writing a shot-by-shot storyboard script.
The Core Challenge of Video Reference Replacement
Many people expect the Video Reference feature to work like a one-click character swap, but in reality the model doesn't automatically understand what you want to preserve versus replace. As the original author points out, if you simply upload a reference video, the model will easily treat the footage as frames or poses to copy directly — sometimes even importing the original video's art style along with it.
The key to avoiding this is giving the model explicit boundary instructions. The author repeatedly emphasizes two points in the prompt: first, "Use the provided images ONLY as a guideline for character design," and second, "Do not use the images as frames or poses." These restrictive phrasings essentially tell the model: learn the motion, don't copy the frames.
Another practical insight is duration control. The author states clearly that video reference replacement works best at around 10 seconds, with 12 seconds as the upper limit. Beyond that length, motion continuity and character consistency both degrade noticeably — consistent with the temporal drift issues widely observed in current video generation models on longer clips.
There's a technical reason behind this "style contamination" phenomenon. Current mainstream video generation models (including MiniMax H3) typically process both the appearance features and motion features of reference frames simultaneously through attention mechanisms. The model doesn't naturally distinguish between "I want to borrow this motion" and "I want to keep my own visual style" the way a human director would. The reference video's color palette, stroke style, and even compositional habits can all seep into the output implicitly. This is why "style instructions" are essentially soft constraints applied to attention weights through language — telling the model to draw visual style information from the character reference images rather than the motion reference video. It also explains why negative instructions ("Do NOT copy the art style") tend to be more effective than positive descriptions: explicitly excluding a certain type of feature gives the model a clearer optimization direction than broadly asking it to "maintain style consistency."
Prompt Structure: Breaking It Down Like a Storyboard
The most valuable part of this tutorial is how it demonstrates a reusable prompt organization structure. The author breaks the entire prompt into several clear layers:
Character Definition (Subject Definition)
The prompt opens by establishing labels for each character using <Subject 1>, <Subject 2>, followed by a detailed list of appearance traits. For example, the first character's description is granular enough to specify "messy coral-pink bob, blue eyes, school uniform, long sleeves, one red hair tie." This extremely fine-grained appearance anchoring is the foundation for maintaining character consistency across shots.
Scene Summary and Style Constraints
In the summary section, the author establishes the overall scene (dimly lit blue-tinted room, bookshelf background) along with one critical style directive: do not copy the art style of the reference video — use it only as a reference for character expressions, actions, and camera transitions, and strictly apply the art style from the reference images instead.
This step is the key to separating "motion transfer" from "style preservation." The video reference supplies motion information (expressions, actions, camera movement), while the character reference images supply visual style. Keeping these two responsibilities clearly separated is how you avoid style contamination.
Shot-by-Shot Description
What truly demonstrates professional-level prompting is the shot breakdown inside detailed_description. The author splits the roughly 10-second clip into 7 shots (Shot 1 through Shot 7), each annotated with:
- Shot size and camera angle (e.g., "medium close-up, eye level," "extreme close-up on feet," "back-of-head close-up")
- Specific character actions and expression changes
- Continuity requirements for consecutive shots
- Props and physical details (e.g., the timing of a pen dropping, footsteps retreating)
Particularly worth studying is the author's control over physical continuity — for instance, explicitly specifying "only that pen drops," "feet step back on the first frame, then land," and even requiring that the height and body proportions of both characters "remain consistent and reasonable across all shots based on the reference images." This level of frame-precise description is precisely what makes model output controllable.
Breaking a long clip into shot-by-shot descriptions also serves a key engineering purpose: video generation models suffer from temporal drift when processing longer sequences — as the number of generated frames increases, the model's adherence to early prompt instructions gradually decays, and character appearance along with scene details may quietly shift. The shot-by-shot structure effectively places multiple "anchor points" along the timeline; each scene cut acts as a reactivation of the prompt, keeping the model continuously constrained by the description throughout the clip. This is also the underlying logic behind the author restating character appearances at the end of the clip — using explicit text anchoring to counteract the drift tendency in later frames.
Practical Tips for Consistency Control
Drawing from this tutorial, here are several generalizable techniques for maintaining character consistency:
Bookend your appearance descriptions. The author fully restates both characters' appearance traits (hairstyle, hair tie, school uniform, shoe colors) in the final shot, reinforcing character recognition at the end of the clip and preventing character drift in longer segments.
Blend into the environment without altering appearance. The prompt requires characters to "blend into the scene in terms of lighting, color, and shadow, without changing their appearance." This is a useful balance between realistic lighting integration and character ID consistency.
Use explicit negation. Liberally use phrases like "Do NOT copy..." and "Do not use..." to proactively block the directions the model might drift toward. This tends to be more effective than purely positive descriptions.
Local Deployment vs. Cloud Platforms
The author mentions that the final output was generated on the Kinovi AI platform, but emphasizes that "the same applies to any Minimax H3 implementation." For users without powerful GPUs or a technical background, cloud platforms are a viable alternative — and according to the author, the content flexibility is comparable to running the model locally.
It's worth noting that this is based on a single Reddit user's experience, and actual results will vary depending on platform implementation, model version, and parameter settings. The real value of this tutorial isn't in the specific example — it's in the methodology it reveals: the quality of video reference generation depends on how precisely you can write the storyboard script. Rather than treating it as a one-click tool, think of it as a production engine that requires a detailed director's script to run well.
Related articles
The Hidden Risks of Culvert Failure: An Overlooked Infrastructure Hazard
Culverts are hidden drainage structures buried beneath roads. Their failure can silently hollow out road beds, cause localized flooding, and trigger deadly collapses — yet they remain chronically overlooked.

Naoma AI Demo Agent V2: Turning Website Traffic into Booked Meetings with AI Sales
Naoma AI Demo Agent V2 replaces demo request forms with an AI sales rep that demos products, qualifies leads, and books meetings in real time. 50K+ demos run.
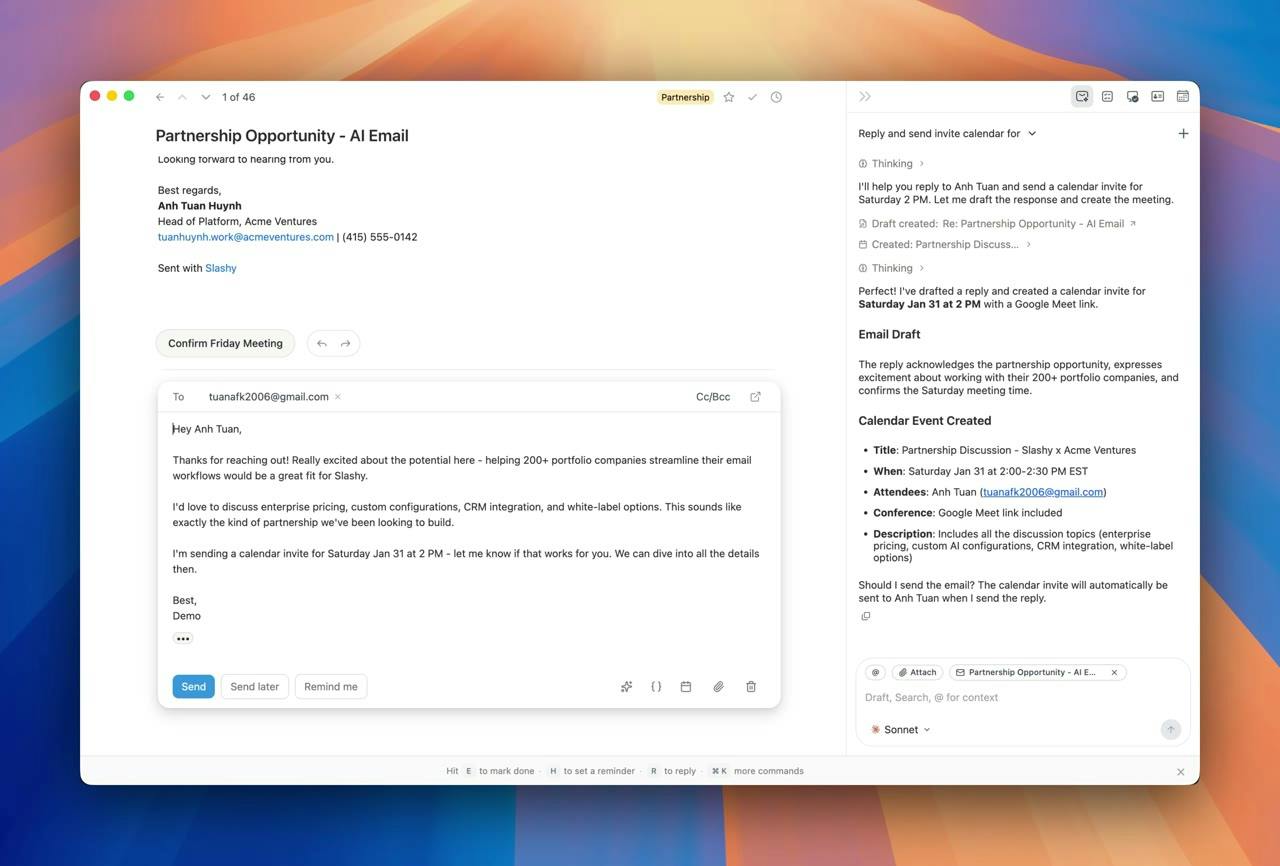
Slashy Assistant: The AI Email Assistant That Handles Your Inbox for You
Slashy Assistant is an AI-native email client with a built-in smart assistant that drafts replies in your voice, organizes email, schedules meetings, and tracks follow-ups. Accessible via iMessage, Slack, and phone — set up in five minutes.