OpenClaw Deployment Tutorial: Setting Up an AI Agent + Telegram Bot on a VPS

OpenClaw is a system-level AI agent that fully controls the OS and interacts via Telegram and other channels.
This article introduces OpenClaw—a system-level AI Agent that goes beyond Claude Code by taking control of your entire operating system, including installing software, modifying configurations, and managing emails and calendars. It provides a complete walkthrough for deploying OpenClaw on a VPS: installing Node.js 24, configuring an AI model (such as GPT-5.5), creating and linking a Telegram Bot, setting personalization rules, and accessing the web control panel via SSH tunnel for management. The importance of isolated deployment for security is also emphasized.
What Is an AI Agent? OpenClaw's Technical Positioning
An AI Agent is an AI system capable of autonomously perceiving its environment, formulating plans, and executing multi-step tasks. The fundamental difference from traditional chatbots lies in its ability to take action. Traditional LLMs (Large Language Models) can only generate text responses, whereas an AI Agent can invoke tools (Tool Use), execute code, and access external APIs, forming a closed loop of "perceive → think → act → feedback." OpenClawAd is a "system-level Agent" whose control granularity extends to the operating system layer—technically made possible by the maturation of tool-calling frameworks like Claude Code and OpenAI Function Calling.
Think of OpenClaw as an enhanced version of Claude Code—it's not limited to editing files and running commands; it can take control of your entire system. It can install/uninstall packages, modify system configurations, read emails, manage calendars, and interact with you through messaging platforms like Telegram, WhatsApp, and Slack.
The runtime environment is very flexible: Docker containers, virtual machines, desktop PCs, or VPS servers all work. But here's an important security reminder: Do not install OpenClaw directly on machines containing sensitive information (emails, bank accounts, etc.). It has full control over the system and can delete, read, or create anything. It's recommended to deploy it in an isolated environment—a VPS is the ideal choice.
Environment Preparation: Server and Node.js Installation
Choose a VPS Server
You can use any VPS provider (Hetzner, DigitalOcean, Vultr, etc.). The key is to have a clean Ubuntu server. Make sure you have the IP address and an SSH connection method (either password or key pair works).
Update the System and Install Node.js 24
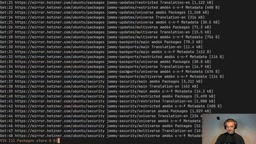
After connecting to the server, first update the system packages:
sudo apt update
sudo apt upgrade
OpenClaw requires a minimum Node.js version of 22, with 24 recommended. The default APT repository on Ubuntu systems often lags several major versions behind (e.g., Ubuntu 22.04 defaults to Node.js 12), while modern AI toolchains typically require newer versions to support ES Modules, top-level await, and other features. Here we use NVM (Node Version Manager) to solve this problem—NVM allows users to install multiple Node.js versions on the same system and switch between them at any time, making it the standard practice for managing runtime versions in the Node.js ecosystem:
# Install NVM
curl -o- https://raw.githubusercontent.com/nvm-sh/nvm/v0.40.3/install.sh | bash

# Initialize NVM
source ~/.bashrc

# Install and switch to Node.js 24
nvm install 24
nvm use 24
Installation and Initial Configuration
Install OpenClaw with a Single Command
Once the environment is ready, install OpenClaw globally:
npm install -g openclaw@latest
Run the Onboarding Initialization Process
After installation, execute the initialization:
openclaw onboard --install-daemon
The --install-daemon parameter registers OpenClaw as a system daemon—a service process that runs continuously in the background without depending on a user login session, typically managed by systemd on Linux systems. This means OpenClaw will keep running even after you close the SSH connection, allowing it to respond to Telegram messages and execute scheduled tasks. Without this parameter, running it directly in the terminal means the process will terminate as soon as the SSH session disconnects.
The system will display a security warning. After confirming the risks, select Quick Start mode. Next, you'll need to configure two core components.
Configure the AI Model
OpenClaw supports multiple model providers: Anthropic, Gemini, DeepSeekAd, OpenAI, and more. This tutorial uses OpenAI as an example, selecting GPT-5.5 as the agent's "brain." You'll need to have your OpenAI API Key ready in advance—just paste it when prompted.
Create a Telegram Bot and Link It
The Telegram Bot API is an open interface provided by Telegram that allows developers to create automated bot accounts. BotFather is itself a Bot—Telegram's official Bot management center responsible for creating new Bots, generating Tokens, setting command menus, and more. A Bot Token is a string like 110201543:AAHdqTcvCH1vGWJxfSeofSAs0K5PALDsaw, essentially an HTTP API authentication credential. Whoever holds it has full control over that Bot account, so it must be kept secure and never leaked to public code repositories.
Here are the configuration steps:
- Search for @BotFather in Telegram and start a conversation
- Send the
/newbotcommand - Set a name and unique username for the Bot (the username must not already be taken)
- Obtain the Bot Token and copy it
- Paste the Token into OpenClaw's configuration prompt

For the search engine, you can choose DuckDuckGo (no API Key required). For skills, just add a basic Summarization skill for now—skip the other API Key configurations and Hooks settings for the time being.
Wake Up the Bot and Set Personalization Rules
Once configuration is complete, choose to "Hatch" your Bot in the terminal. OpenClaw will proactively ask you: "Who am I? Who are you?" You need to provide it with basic information and behavioral guidelines:
I'm Florian, you are Neural Claw.
Your style: professional, concise, straight to the point.
Don't be verbose, and ask for permission before performing actions.
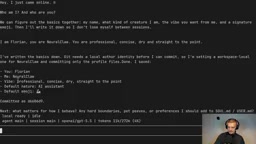
This information gets written into the Bot's identity.md and soul.md files, defining its personality and behavioral boundaries. If you have hard constraints (e.g., "never delete a certain directory"), make sure to clearly state them at this step.
When finished, press Ctrl+C to exit. Seeing "onboarding complete" means the initialization was successful.
Web Control Panel: Access and Management
Obtain the Authentication Token
OpenClaw comes with a built-in web management interface. First, check the gateway service status:
openclaw gateway status
Then retrieve the authentication Token from the configuration file:
cat ~/.openclaw/openclaw.json
Find the gateway_auth_token field and copy it.
Access the Panel via SSH Tunnel
The OpenClaw gateway runs on localhost:18789 and needs to be accessed from your local machine via an SSH tunnel. An SSH tunnel is a technique for forwarding network traffic through an encrypted SSH connection: -L 18789:127.0.0.1:18789 means forwarding traffic from port 18789 on your local machine through the encrypted SSH channel to the corresponding port on the remote server. The benefit is that the service doesn't need to be exposed to the public internet, avoiding the security risks of directly opening ports, while the traffic is encrypted via SSH to prevent man-in-the-middle attacks—this is the standard security practice for accessing local services on a server:
ssh -N -L 18789:127.0.0.1:18789 root@your-server-IP
Once the tunnel is established, open http://localhost:18789 in your browser and paste the Token to access the control panel. Here you can view Bot status, manage communication channels, and adjust configurations.
Telegram Pairing and Daily Usage Demo
On the Channels page of the control panel, you can confirm that the Telegram status shows Running. However, when you send a message to the Bot in Telegram for the first time, you'll receive an "access not configured" response.
Related articles
 Tutorials
ChatGPT Plus Subscription Guide: Are GPT-5.5, image-2, and Codex Worth the Upgrade?
A detailed look at ChatGPT Plus features — GPT-5.5, image-2, and Codex — with a Plus vs Pro comparison and a complete step-by-step subscription guide for users outside the US.
 Tutorials
Harness AI Engineering in Practice: Using Claude Code to Master Enterprise-Level E-Commerce Development
Deep dive into Harness AI Engineering: master enterprise e-commerce development with Claude Code using the Rules, Skills, Wiki, and Changes framework.
 Tutorials
Cursor + Codex Dual-IDE Collaboration: A Practical Methodology for Open-Source Project Customization
A complete methodology for open-source project customization based on real-world experience, detailing the Cursor+Codex dual-IDE workflow, seven-stage process, MVP validation, and AI source code reading techniques.