Pixi Package Manager: The Ultimate Solution for Unified Management of Python, Rust, and System Dependencies

Pixi is a cross-language package manager unifying Python, Rust, and system-level dependencies
Pixi is an open-source package manager written in Rust, built on the Conda-Forge ecosystem, capable of managing Python packages, Rust toolchains, and system-level dependencies like FFmpeg within a unified workflow. It achieves reproducible builds through lock files and supports project-level environment isolation, essentially functioning as a superset of uv. The article demonstrates how Pixi configures a cross-language development environment with a single command through a Rust+Python hybrid project walkthrough, and introduces practical features like its task system.
What is Pixi?
If you've ever needed Python, Rust, FFmpeg, and OpenSSL in a single project, you know how painful it is to manage dependencies across different languages and system layers. Python has pip/uv, Rust has cargo, and system tools rely on apt/pacman—each tool manages its own domain, making environment consistency nearly impossible to guarantee.
Pixi was born to solve exactly this problem. It's an open-source package manager written in Rust that supports Linux, macOS, and Windows, capable of managing Python packages, Rust toolchains, and system-level dependencies like FFmpeg, OpenSSL, and ImageMagick within a single unified workflow. It's built on top of the Conda-Forge ecosystem—a community-driven Conda package repository that was established in 2015 and currently hosts over 27,000 packages. Unlike the official Anaconda channel, Conda-Forge is entirely maintained by the open-source community, with all package build recipes publicly available on GitHub for review. Its greatest technical advantage lies in cross-platform binary distribution: every package comes with pre-compiled binaries for Linux (x86_64/aarch64), macOS (Intel/Apple Silicon), and Windows, eliminating the need for local compilation during installation. This is the fundamental reason Pixi can uniformly manage both Python libraries and system tools like FFmpeg—from Conda-Forge's perspective, they're all just "packages with binaries," with no essential difference.
In simple terms, Pixi is essentially a superset of uv: everything uv can do (lock files, reproducible environments, version constraints), Pixi can do too, but its management scope extends from Python to "everything."
Quick Start: From Initialization to Running
Installing Pixi and Initializing a Project
Installation methods vary by system. On Arch Linux it's sudo pacman -S pixi; for other platforms, refer to the official documentation. Once installed, the workflow is very similar to uv:
mkdir sample-project && cd sample-project
pixi init
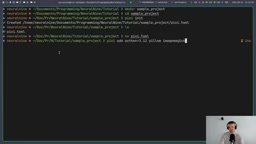
pixi init generates a pixi.toml file containing project metadata, channels (defaulting to conda-forge), and an empty dependency list.
Install Languages, Libraries, and System Tools with a Single Command
The most impressive thing about Pixi is that you can install a programming language itself, language-level libraries, and system-level tools all with a single command:
pixi add python=3.12 pillow imagemagick
This command does three things: installs the Python 3.12 runtime, installs the Python library Pillow, and installs the system-level image processing tool ImageMagick. All three are recorded in pixi.toml and generate a precise lock file.
The lock file (pixi.lock) is the core mechanism by which Pixi achieves reproducible builds. It not only records the version of each direct dependency but also recursively records the exact version numbers and content hashes (SHA256) of all transitive dependencies. This forms a two-layer structure with the version constraints in pixi.toml (e.g., python=3.12): the toml file expresses "intent," while the lock file expresses "fact." When team members run pixi install, the package manager prioritizes reading the lock file rather than re-resolving the dependency tree, ensuring everyone gets the exact same binaries. This mechanism is similar to Rust's Cargo.lock or Node.js's package-lock.json, but Pixi's lock file coverage extends to system-level binary dependencies—something pure Python tools like pip/uv cannot achieve.
Isolated Project Environments
After installation, these tools only exist within the project's Pixi environment. Typing magick (ImageMagick's command) directly in the terminal will show "not found," but calling it through pixi run magick works perfectly—tools are installed under .pixi/envs/default/bin/, completely isolated from the system environment.
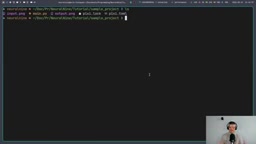
This means you can use different versions of the same tool across different projects. For example, your system has FFmpeg 8.1.1 installed, but a specific project needs FFmpeg 7:
pixi add ffmpeg=7
pixi run ffmpeg  # Uses v7
ffmpeg           # System still has v8.1.1
Hands-On: Building a Rust + Python Hybrid Project with Pixi
One Package Manager to Handle Python's Rust Extension Development
Pixi's cross-language capability shines when developing Rust extensions for Python. This involves two key tools: PyO3 is the core library in the Rust ecosystem for writing Python extension modules, providing FFI (Foreign Function Interface) bindings between Rust and Python, allowing developers to write high-performance code in Rust and call it directly from Python; Maturin is the toolchain for building and publishing PyO3 extensions, handling the tedious steps of compilation, packaging into .whl files, and installation into Python environments.
The traditional workflow requires you to independently install rustup (the Rust toolchain manager), configure PATH environment variables, then install maturin with pip—and configuration differences across operating systems can lead to the classic "works on my machine" problem. Pixi unifies all of this:
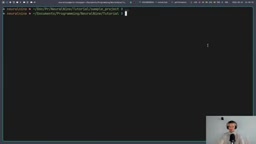
mkdir rust-ext-example && cd rust-ext-example
pixi init
pixi add python=3.12 rust pip maturin
Four dependencies, one command. The Rust compiler (rustc) and cargo are both locked within the project environment, fundamentally eliminating toolchain version inconsistency issues.
Initializing and Building the Rust Extension
Next, use maturin to initialize the Rust extension project:
pixi run maturin init --bindings pyo3
This generates Cargo.toml, pyproject.toml, and a Rust source code template. Write a simple Rust function (e.g., doubling an integer), then build and install it into the Pixi environment:
pixi run maturin develop
The build artifacts are automatically installed into the current Pixi environment's Python, with no manual pip install required.
Running Python to Call the Rust Extension
Create main.py:
import pixi_rust_extension
print(pixi_rust_extension.double(24))  # Output: 48
Run it:
pixi run python main.py
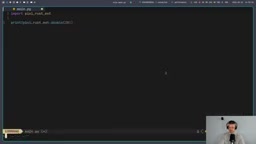
Throughout the entire process, the Rust compiler, Python interpreter, and maturin build tool are all uniformly managed by Pixi, with versions locked in the project's lock file.
Practical Features: Task System and Global Installation
Task System for Simplifying Repetitive Commands
When commands become lengthy, Pixi's Task system can help you create shortcuts:
pixi task add start-main "python main.py"
Related articles
 Tutorials
ChatGPT Plus Subscription Guide: Are GPT-5.5, image-2, and Codex Worth the Upgrade?
A detailed look at ChatGPT Plus features — GPT-5.5, image-2, and Codex — with a Plus vs Pro comparison and a complete step-by-step subscription guide for users outside the US.
 Tutorials
Harness AI Engineering in Practice: Using Claude Code to Master Enterprise-Level E-Commerce Development
Deep dive into Harness AI Engineering: master enterprise e-commerce development with Claude Code using the Rules, Skills, Wiki, and Changes framework.
 Tutorials
Cursor + Codex Dual-IDE Collaboration: A Practical Methodology for Open-Source Project Customization
A complete methodology for open-source project customization based on real-world experience, detailing the Cursor+Codex dual-IDE workflow, seven-stage process, MVP validation, and AI source code reading techniques.