PyAutoGUI Tutorial: A Complete Guide to Desktop Automation with Python

A beginner's guide to desktop automation with Python's PyAutoGUI library
This article introduces Python's PyAutoGUI library, which simulates mouse clicks, keyboard input, and other operations to handle repetitive daily tasks. Starting from installation and setup, it demonstrates core usage through a hands-on auto-messaging project, covering key techniques like Chinese input handling and random intervals to avoid detection, then summarizes additional use cases including office automation and UI testing along with important precautions.
Why Do You Need Desktop Automation?
In our daily work, we frequently face large volumes of repetitive, mechanical tasks—batch-filling spreadsheets, sending scheduled messages, organizing files automatically, or entering data repeatedly. These tasks are time-consuming and tedious, yet unavoidable. Python's PyAutoGUI library is the perfect tool for solving these problems. It can precisely simulate mouse clicks, keyboard input, and other manual operations, essentially giving your computer a pair of "smart hands and feet."
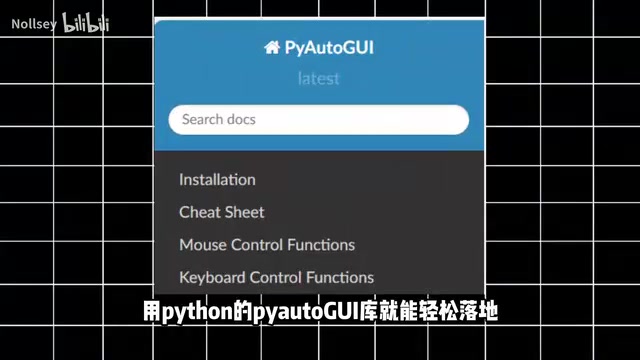
This article will walk you through everything from installation and configuration to a hands-on project, demonstrating PyAutoGUI's core functionality through an auto-sending chat messages script, along with extension ideas.
PyAutoGUI Installation and Environment Setup
The installation process is straightforward. Open Command Prompt (Windows) or Terminal (Mac/Linux) and enter the following command:
pip install pyautogui
Wait for the installation to complete. If your network is slow, you can use a mirror source to speed things up:
pip install pyautogui -i https://pypi.tuna.tsinghua.edu.cn/simple
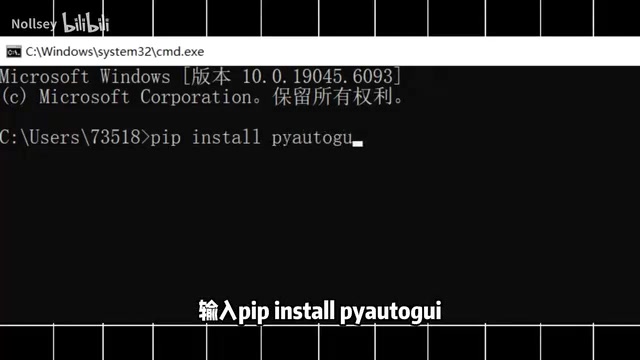
Once installed, run import pyautogui in Python to verify the installation. If no errors appear, your environment is ready and you can start writing automation scripts.
Hands-On Project: Auto-Sending Chat Messages with PyAutoGUI
Core Logic
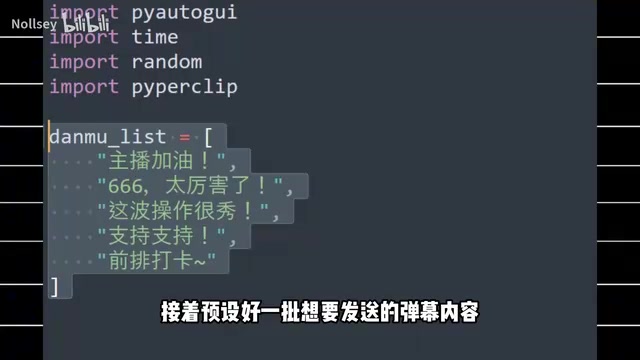
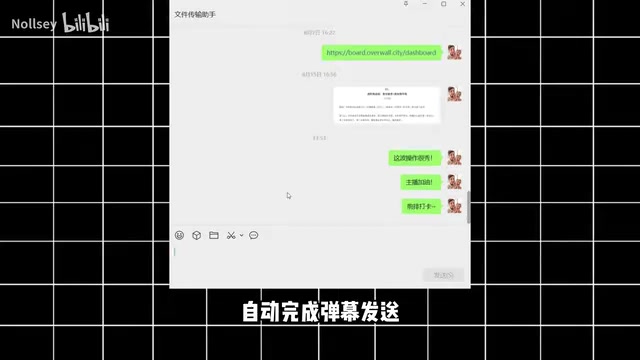
The logic of this project is crystal clear: pre-define a batch of messages, have the program randomly select from them, simulate keyboard input, and press Enter to send. The entire workflow fully mimics manual operation, making it suitable for scenarios like live stream interactions or batch commenting.
Complete Code Implementation
import pyautogui
import time
import random

# Pre-defined messages
barrage_list = [
    "主播说得太好了!",
    "学到了,感谢分享!",
    "这个技巧太实用了",
    "666,厉害了",
    "请问这个怎么实现的?",
    "支持一下!"
]

# Pause for 3 seconds to manually position the cursor in the input box
print("请在3秒内将光标定位到弹幕输入框...")
time.sleep(3)

# Loop to send messages
for i in range(10):  # Send 10 messages
    # Randomly select a message
    text = random.choice(barrage_list)
    # Simulate keyboard input
    pyautogui.typewrite(text, interval=0.05)  # English input
    # For Chinese characters, use the clipboard method
    # import pyperclip
    # pyperclip.copy(text)
    # pyautogui.hotkey('ctrl', 'v')

    # Press Enter to send
    pyautogui.press('enter')
    # Random wait of 1-3 seconds to mimic human rhythm
    time.sleep(random.uniform(1, 3))

print("弹幕发送完成!")
Key Technical Details
There are several noteworthy technical points in this code:
-
3-Second Buffer Time:
time.sleep(3)gives the user time to manually position the cursor—a very common design pattern in PyAutoGUI scripts. -
Handling Chinese Input:
pyautogui.typewrite()natively supports only English characters. For Chinese input, the recommended approach is to use thepypercliplibrary to copy text to the clipboard and paste it. -
Random Intervals to Avoid Detection: Using
random.uniform(1, 3)to set random wait times prevents operations from being too regular, which could trigger bot detection on platforms. -
Built-in Safety Mechanism: PyAutoGUI has a built-in fail-safe feature—quickly moving the mouse to the top-left corner of the screen will immediately interrupt script execution, preventing runaway programs.
PyAutoGUI Core APIs and More Use Cases
Auto-sending chat messages is just the tip of the iceberg of what PyAutoGUI can do. In real-world scenarios, its applications are far broader than you might imagine.
Office Automation Scenarios
- Batch File Renaming: Combined with the
osmodule, automatically standardize the naming of hundreds of files - Auto-Filling Forms: Read data from Excel and automatically fill it into web forms or enterprise systems
- Scheduled Report Generation: Combined with scheduled tasks, automatically take screenshots, organize data, and generate reports
Testing and Monitoring Scenarios
- UI Automation Testing: Simulate user workflows to verify that software interface features work correctly
- Screen Content Monitoring: Use
pyautogui.screenshot()andlocateOnScreen()to implement screen content recognition and automated responses
PyAutoGUI Common API Quick Reference
| Function | Method | Description |
|---|---|---|
| Mouse Move | moveTo(x, y) | Move to specified coordinates |
| Mouse Click | click(x, y) | Click at specified position |
| Keyboard Input | typewrite('text') | Simulate typing |
| Key Press | press('enter') | Simulate pressing a key |
| Hotkey | hotkey('ctrl', 'c') | Simulate keyboard shortcuts |
| Screenshot | screenshot() | Capture the current screen |
| Image Location | locateOnScreen('img.png') | Find an image on screen |
Tips and Precautions
When writing automation scripts with PyAutoGUI in practice, the following tips are worth keeping in mind:
Be Aware of Screen Resolution Effects: PyAutoGUI relies on screen coordinates and pixel recognition. Different resolutions and system scaling ratios may cause positioning deviations. It's recommended to run scripts in a fixed display environment, or use image recognition methods (locateOnScreen) instead of hardcoded coordinates to improve script compatibility.
Compliance Matters: Automation tools are inherently neutral, but using them for inflating metrics, cheating, or similar behavior may violate platform rules or even laws and regulations. It's advisable to use PyAutoGUI for legitimate scenarios that improve personal work efficiency.
Advanced Combinations: If you need more powerful automation capabilities, you can combine PyAutoGUI with Selenium (web automation), OpenCV (image recognition), Schedule (scheduled tasks), and other libraries to build more complex automation workflows.
Conclusion
PyAutoGUI is a simple yet practical Swiss Army knife in Python's automation toolbox. It has a gentle learning curve—just a few lines of code can deliver valuable desktop automation. For anyone plagued by repetitive work, mastering this library can significantly boost productivity, freeing up time and energy for more creative endeavors. If you're looking for a Python automation solution with a low entry barrier and quick results, PyAutoGUI is absolutely worth trying.
Related articles
 Tech Frontiers
A Rare Quiet Day in AI: Recursive Self-Improvement Stirs Beneath the Surface
A rare quiet day in AI sees multiple sources go silent simultaneously. Behind the calm, Recursive Self-Improvement (RSI) research continues. What this means for the industry.
 Tech Frontiers
Reve 2 vs. Ideogram 4: A Deep Dive into Layout Control in AI Image Generation
A deep comparison of Reve 2 and Ideogram 4's layout control capabilities, covering technical approaches, real-world use cases, and industry trends for designers and creators.
 Tech Frontiers
In the Weights: Check Your Influence Score in the AI World
In the Weights is an AI influence search engine that quantifies your presence in the AI world with a score. Explore how it evaluates practitioners and what it means for digital identity.