PyTorch for Absolute Beginners: A Step-by-Step Guide to Environment Setup and IDE Configuration

A hands-on guide to building a clean deep learning environment, from Anaconda installation to choosing PyTorch GPU/CPU versions.
Based on Bilibili creator Chen Yu's tutorial, this article systematically walks through the complete process of setting up a PyTorch deep learning environment. It first emphasizes that using Anaconda to manage environments with VS Code or PyCharm as the editor is the most reliable starting combination, and warns that installation paths must not contain Chinese characters and environment variables must be configured correctly. It then compares the two editors, recommending the lightweight VS Code for daily development. The core section covers the PyTorch installation decision: first use nvidia-smi to confirm the GPU and CUDA version, then choose the GPU or CPU version, and note that the CUDA version in the installation command must not exceed the driver's supported maximum. The article also explains why virtual environments are necessary to resolve Python version conflicts across multiple projects, and offers a counterintuitive reminder—try not to switch mirrors when installing PyTorch, to avoid accidentally installing the CPU version.
Why You Need a Clean PyTorch Environment
Installing a deep learning framework is often the first hurdle for beginners. In his tutorial, Bilibili creator Chen Yu points out bluntly: using Anaconda to manage environments, paired with VS Code or PyCharm as the editor, is currently the most reliable starting approach. This combination helps you isolate dependencies across different projects and avoid version conflicts. The core logic of the entire onboarding flow can be broken down into three steps: install Anaconda, choose the right editor, and install the correct PyTorch version.
The Foundation of Environment Management: Installing and Verifying Anaconda
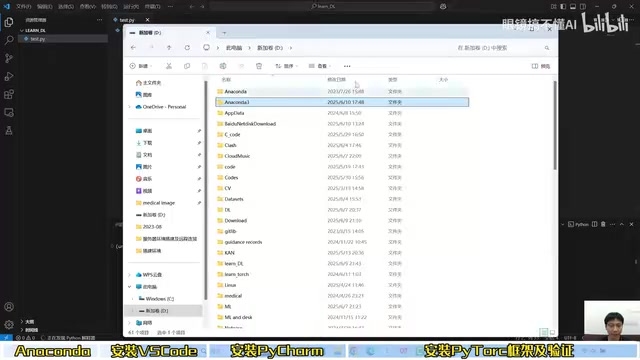
Chen Yu recommends downloading Anaconda from the official website. During installation, there are two easy-to-miss details: the installation path must not contain Chinese characters, otherwise mysterious errors may occur later; additionally, on Windows, make sure to check "Add to environment variables" or manually add the installation path to the system Path.
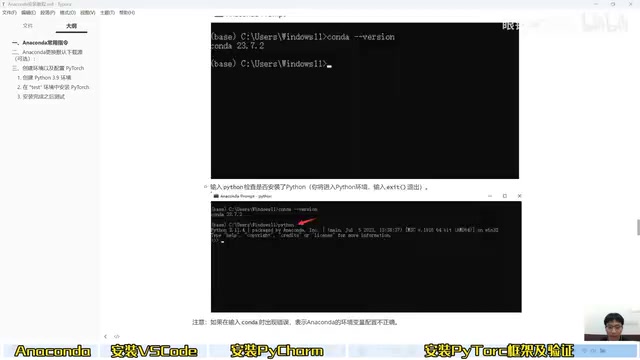
After installation, open Anaconda Prompt and enter conda -V to verify. If you see "conda is not recognized as an internal or external command," it means the environment variables are not configured properly. In that case, go into the system environment variable settings and add the Anaconda installation root directory, the Scripts directory, and the Library\bin directory to Path in that order.
According to the creator's demonstration, after a normal installation you should see a version number returned, something like conda 23.4.1.
Choosing an Editor: The Lightweight Contest Between VS Code and PyCharm
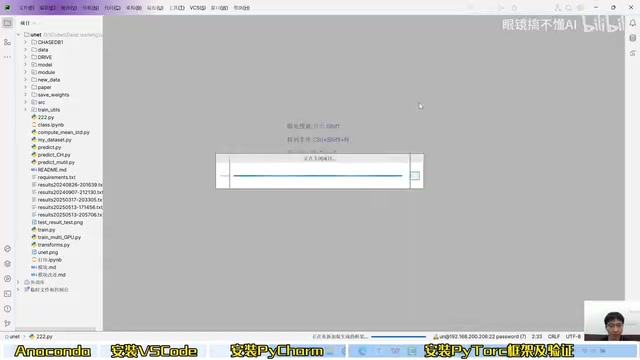
The video demonstrates the configuration process for both VS Code and PyCharm, and gives a clear recommendation: prioritize VS Code for daily development. The reasons are that it is lightweight, starts quickly, has a rich plugin ecosystem, and is completely free. PyCharm's Professional Edition requires payment; although the Community Edition is free, it is heavier, and indexing takes noticeably longer when opening large projects.
The key steps to configure a Python environment in VS Code are: install the Chinese language pack, the Python extension, and the Jupyter extension, then select the interpreter in the bottom-right corner, point it to conda.exe under the Anaconda installation directory, and load the base environment or a custom environment. The creator specifically reminds viewers to choose "Trust" when opening a folder for the first time.
The Core Decision in PyTorch Installation: GPU or CPU
This is the most critical fork in the entire tutorial. The creator's method for deciding is: enter nvidia-smi in the terminal. If it displays a graphics card model and CUDA version, you have a dedicated GPU and can install the GPU version of PyTorch; if it says the command does not exist, you have integrated graphics or a business laptop, so install the CPU version directly.
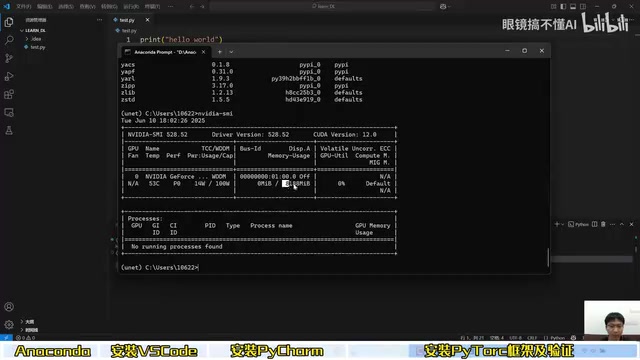
After determining the CUDA version, go to the historical versions page on the PyTorch official website. The creator typically uses v2.0 or v2.1 and emphasizes that pip installation is faster than conda. Copy the corresponding installation command into the terminal and run it. One important detail: if nvidia-smi shows CUDA version 12.0, then the CUDA version in the installation command must not exceed 12.0—you can choose a backward-compatible version such as 11.8 or 11.3.
After installation, run import torch and torch.cuda.is_available() in the Python environment. Returning True means the GPU version was installed successfully; returning False means it is the CPU version. The creator admits that the speed difference between the two when running real projects is enormous: a task that might take ten minutes on GPU could take an hour or more on CPU. However, at the beginner stage, the CPU version is perfectly adequate on a computer without a dedicated GPU, and you can make up for the compute gap later by renting cloud servers.
What is CUDA? CUDA (Compute Unified Device Architecture) is a parallel computing platform and programming model introduced by NVIDIA that allows developers to use NVIDIA GPUs for general-purpose computing. PyTorch's GPU version is essentially compiled with links to CUDA libraries so that tensor operations can be offloaded to the graphics card. The CUDA version shown by nvidia-smi is actually the maximum CUDA runtime version supported by the graphics driver, while the CUDA version in the installation command is the CUDA toolkit version used when PyTorch was precompiled. As long as the latter is not higher than the former, the driver is backward compatible—which is why you can install a CUDA 11.8 version of PyTorch when the driver shows 12.0.
The difference between pip and conda installation pip is Python's official package manager and only manages Python packages; conda is a cross-language, cross-platform package and environment manager that can handle Python packages and their non-Python dependencies (such as CUDA libraries and the MKL math library) at the same time. Therefore, conda installation can sometimes automatically resolve low-level dependencies, but resolving the environment is slower; installing PyTorch's official wheels with pip is usually faster, and the pip command recommended by PyTorch already bundles the required CUDA runtime, so there is no need to preinstall the full CUDA Toolkit on your system.
Virtual Environments: An Essential Skill for Running Multiple Projects in Parallel
Why go through the trouble of using Anaconda at all? The creator explains the necessity with a scenario: Project A needs Python 3.9, Project B needs Python 3.7, and the machine only has a single base environment—installing both versions directly will inevitably conflict. Use conda create -n environment_name python=3.9 to create an isolated environment, then conda activate environment_name to activate it, so each project has its own dependency space.
In both VS Code and PyCharm, you need to manually switch the interpreter to the corresponding virtual environment. VS Code's Jupyter Notebook feature also requires installing ipykernel, otherwise the kernel cannot start.
The relationship between the base environment and virtual environments After installing Anaconda, a base environment exists by default, and any operation without a specified environment acts on it. Installing all kinds of packages directly into base is a common beginner mistake, because once a package upgrade causes incompatibility, fixing it is very troublesome. A conda virtual environment is essentially an independent directory containing its own Python interpreter, pip, and site-packages; after activation, the terminal path points to that directory, completely isolating it from base and other environments.
The role of ipykernel VS Code's Jupyter Notebook feature relies on a Jupyter kernel to execute code. ipykernel is the Python implementation of a Jupyter kernel; it is responsible for starting a Python process in the background, receiving code from the Notebook, and returning results. If ipykernel is not installed in the virtual environment, VS Code cannot register that environment as an available kernel, and the Notebook will report that no kernel can be found. The installation command is conda install ipykernel or pip install ipykernel; after installation, you usually need to restart VS Code or refresh the kernel list.
A Noteworthy Reminder: The Risk of Switching Mirrors
At the end of the video, the creator gives a counterintuitive piece of advice: try not to switch mirrors when installing PyTorch. The reason is that some mirror sources may only sync the CPU version of the package; after switching mirrors, you may think you installed the GPU version but actually installed the CPU version, wasting time. If download speeds are truly slow, prioritize changing your network environment rather than switching mirror sources.
Related articles

Gemini 4 Neon Leak: A Potential Strong Contender Against Opus 5.5
A Hacker News thread suggests Gemini 4 Neon looks like an Opus 5.5 competitor. This article unpacks the product positioning behind this community signal, shifts in the top-model competitive landscape, and what it means for developers' model selection strategy.

Claude Fable 5.2's Self-Authored Short Film 'Fable' Sparks Discussion
A short film 'Fable,' credited to Claude Fable 5.2 for script, visuals, and directing, appears on Hacker News. This article analyzes the significance of full-pipeline AI creation, community reactions, and what it means for content creators.

Anthropic IPO Pricing: A Signal of AI Giants Going Public
Anthropic's IPO pricing draws attention. This article analyzes its potential impact on AI industry valuation, commercialization paths, and the competitive landscape, and highlights public-market expectations and challenges for AI companies.