Wagtail Getting Started Tutorial: Build a Customizable CMS Blog System from Scratch with Django
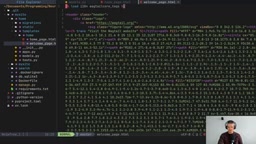
Wagtail is a highly customizable open-source CMS built on Django, ideal for building blog systems from scratch.
Wagtail is an open-source CMS built on Django that adopts a "code as configuration" design philosophy, requiring developers to define page models and content structures in Python code for ultimate customizability. This article covers everything from project initialization, defining page models and templates, building a blog system, to StreamField for flexible content composition and Snippets for managing non-page data entities, demonstrating the complete workflow of building a blog with Wagtail.
What is Wagtail?
Wagtail is an open-source content management system (CMS) built on Django, designed specifically for blogs and content publishing scenarios. If you're familiar with WordPress, you can think of Wagtail as its "opposite" — WordPress works out of the box with rich plugins, while Wagtail is more like an "Arch Linux-style" CMS: you need to define everything from scratch, including the data structure of blog posts, page templates, and even what the homepage looks like.
The benefits of this design philosophy are obvious: ultimate customizability. You won't be limited by the framework's presets, while still enjoying Django's "batteries included" convenience — ORM, Admin panel, migration system, and more. For developers who want complete control over their blog system, Wagtail is a choice well worth considering.
Django Ecosystem Background: Django is one of the most mature web frameworks in the Python ecosystem, born in 2005, with a design philosophy of "batteries included" — ORM, Admin, form system, authentication framework, and other core features work out of the box. Wagtail is built on top of Django and naturally inherits all of Django's advantages: powerful ORM supporting multiple database backends (PostgreSQL, MySQL, SQLite), a built-in migration system that keeps database schema changes trackable, and Django Admin which Wagtail has transformed into a modern interface designed specifically for content editors. This means that when using Wagtail, you're actually using a web framework that has been battle-tested in production environments for over a decade, with stability and community support far exceeding most niche CMS solutions.
Project Initialization and Basic Structure
Installing Wagtail and Creating a Project
Installing Wagtail is straightforward — you can install it directly via pip or use the more modern package manager uv:
# Traditional approach
pip install wagtail
wagtail start mysite mysite

# Using uv (recommended)
uv init
uv add wagtail
uv run wagtail start mysite mysite
Once created, the project structure is very similar to a standard Django project: there's a manage.py, a settings configuration directory, and a default home app. Developers familiar with Django will feel right at home.
The process for initializing the database and creating a superuser is also identical:
python manage.py migrate
python manage.py createsuperuser
python manage.py runserver
Understanding Wagtail's "Start from Scratch" Design Philosophy
After launching the project and visiting the Admin panel, you'll notice something interesting: although there's a Home page, you can't edit anything except the title. This is precisely the embodiment of Wagtail's "start from scratch" philosophy — you haven't defined what content fields a page should contain yet.
This is fundamentally different from WordPress's approach. WordPress comes with pre-built content types like Posts and Pages, along with the Gutenberg editor as a universal content editing interface. Wagtail requires developers to first declare "what fields this page has" in Python code, and then the framework automatically generates the corresponding editing interface. This "code as configuration" approach makes content structure fully version-controlled, allowing you to track every field change through Git.
Defining Page Models and Templates
Adding Content Fields to the Homepage
Wagtail's core workflow is: first define data models in models.py, then render content in templates. Using the homepage as an example, here's how to add a rich text field:
from wagtail.fields import RichTextField
from wagtail.models import Page

class HomePage(Page):
    body = RichTextField(blank=True)
    content_panels = Page.content_panels + [
        FieldPanel('body'),
    ]
In the corresponding template, use {{ page.body|richtext }} to render the rich text content, and you'll need to load {% load wagtailcore_tags %} at the top of the template. After every model modification, you need to run makemigrations and migrate to sync the database.
The richtext template filter does more than just output an HTML string — it also handles the resolution of Wagtail internal links. When editors insert a link to another Wagtail page in the rich text field, what's stored is the page ID rather than the URL. The richtext filter converts it to the actual URL at render time, so internal links won't break even if the page path changes.
Building a Blog System with Wagtail
A blog system requires two core models: BlogIndexPage and BlogPage. They have a parent-child relationship — the index page lists all posts, and the blog page displays specific content.
class BlogPage(Page):
    intro = models.CharField(max_length=250)
    date = models.DateField("Post date")
    body = RichTextField(blank=True)

    content_panels = Page.content_panels + [
        FieldPanel('date'),
        FieldPanel('intro'),
        FieldPanel('body'),
    ]
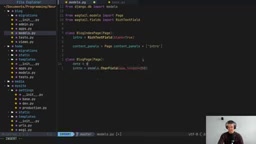
In the index page template, iterate through child pages using page.get_children to list all posts. A practical tip is to use the {% with post.specific as post %} statement to avoid writing verbose access patterns like post.specific.intro every time.
Technical Explanation of the
specificAttribute: Wagtail's page tree is stored uniformly in the database asPagebase class records.get_children()returns genericPageobjects that don't include custom fields from subclasses. Thespecificattribute triggers an additional database query to fetch the complete instance of the corresponding subclass (such asBlogPage). For listing pages that need to bulk-fetch child pages, you can usespecific_deferredorselect_relatedto optimize query performance and avoid N+1 query problems.
Advanced Features: Filtering, Code Blocks, and Snippets
Filtering Published Posts
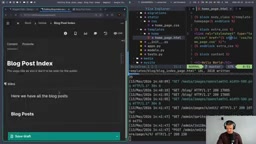
By default, the index page displays all child pages, including drafts. A better approach is to override the get_context method to only return published posts:
class BlogIndexPage(Page):
    def get_context(self, request):
        context = super().get_context(request)
        blogpages = self.get_children().live().order_by('-first_published_at')
        context['blog_pages'] = blogpages
        return context
This way, draft posts won't appear on the frontend, and posts are sorted in reverse chronological order by publication date.
.live() is an extension method on Wagtail's QuerySet that filters for page records where live=True. Wagtail's publishing system maintains a state machine independent of Django models: pages can be in Draft, In Review, Live, or Expired states, and a complete revision history is preserved. This means you can roll back to any historical version at any time — a feature that traditional CMS solutions like WordPress struggle to support natively.
Flexible Content Composition with StreamField
One of Wagtail's most powerful features is StreamField, which allows you to define flexible combinations of content blocks. For example, if you want to alternate between rich text and code blocks in your blog:
from wagtail.fields import StreamField
from wagtail import blocks

class CodeBlock(blocks.StructBlock):
    language = blocks.ChoiceBlock(choices=[
        ('python', 'Python'), ('javascript', 'JavaScript'),
        ('bash', 'Bash'), ('html', 'HTML'), ('css', 'CSS'),
    ], default='python')
    code = blocks.TextBlock()

class BlogPage(Page):
    body = StreamField([
        ('paragraph', blocks.RichTextBlock()),
        ('code', CodeBlock()),
    ], use_json_field=True, blank=True)
Technical Explanation of StreamField: StreamField's underlying implementation relies on JSON fields to store structured content. Each content block is serialized as a JSON object array with type identifiers, for example:
[{"type": "paragraph", "value": "<p>...</p>"}, {"type": "code", "value": {"language": "python", "code": "print('hello')"}}]. This design solves the pain point of traditional CMS solutions having "one big rich text box" — content is decoupled from presentation logic while preserving the WYSIWYG editing experience. Theuse_json_field=Trueparameter is the recommended approach since Wagtail 3.0, using the database's native JSON field instead of the older text serialization method. On PostgreSQL, this can leverage GIN indexes for better query performance and supports JSONPath query syntax.
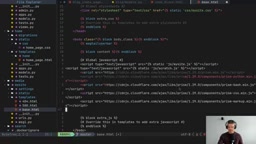
Combined with syntax highlighting libraries like Prism.js, you can include the relevant CSS and JavaScript in your base template to achieve beautiful code display effects.
Snippets: Managing Non-Page Data Entities
Snippets are used to define entities that need to exist in the database but don't require their own page, such as author information. Register them with the @register_snippet decorator, then establish a many-to-many relationship with blog posts using ParentalManyToManyField:
@register_snippet
class Author(models.Model):
    name = models.CharField(max_length=255)
    author_image = models.ForeignKey('wagtailimages.Image', ...)
Technical Details on Snippets and ParentalManyToManyField: Snippets are essentially regular Django models that are registered with Wagtail's Admin interface through the
@register_snippetdecorator. Unlike Page models, Snippets don't participate in Wagtail's page tree structure, have no URL routing, and don't have publish/draft state management (although Wagtail 4.x introduced optional revision and publishing features for Snippets).ParentalManyToManyFieldis Wagtail's extension of Django's standardManyToManyField. The key difference is that it supports Wagtail's Revision system — when you save a page draft, the associated many-to-many relationships are also correctly recorded in the revision history rather than being immediately written to the database's intermediate table, ensuring the integrity and rollback capability of draft content.
In the Admin panel, Snippets appear in a separate management area where you can create authors and associate them with posts via checkboxes when editing articles.
Official Demo Template: Learning Complete Project Structure
Wagtail provides an official demo template that helps you quickly understand what a complete Wagtail project looks like:
wagtail
Related articles
 Tutorials
ChatGPT Plus Subscription Guide: Are GPT-5.5, image-2, and Codex Worth the Upgrade?
A detailed look at ChatGPT Plus features — GPT-5.5, image-2, and Codex — with a Plus vs Pro comparison and a complete step-by-step subscription guide for users outside the US.
 Tutorials
Harness AI Engineering in Practice: Using Claude Code to Master Enterprise-Level E-Commerce Development
Deep dive into Harness AI Engineering: master enterprise e-commerce development with Claude Code using the Rules, Skills, Wiki, and Changes framework.
 Tutorials
Cursor + Codex Dual-IDE Collaboration: A Practical Methodology for Open-Source Project Customization
A complete methodology for open-source project customization based on real-world experience, detailing the Cursor+Codex dual-IDE workflow, seven-stage process, MVP validation, and AI source code reading techniques.