Zero-to-Launch Mini Program Development Tutorial: Sealos Deployment + Trae Code Generation + WeChat Publishing

Step-by-step guide to deploying and publishing a memo mini program from scratch
This is part two of the memo mini program tutorial, covering the complete workflow from local development to WeChat mini program launch: deploying Node.js backend and MongoDB database using Sealos DevBox, leveraging Trae AI to auto-generate backend API code and complete frontend integration, then packaging via WeChat Developer Tools, configuring domain whitelists, and submitting for review. The entire process is beginner-friendly.
Introduction
In the previous tutorial, we used UniApp and Trae to write the frontend and backend code for a memo app. But getting it running locally is just the first step — to let users actually use this mini program, you still need to deploy the backend online, set up the database, package the code as a WeChat mini program, and pass WeChat's review process.
This article will walk you through the entire remaining workflow step by step: deploying the Node.js backend and MongoDB database on the Sealos cloud platform, using Trae to automatically generate API integration code, then packaging the UniApp project as a WeChat mini program and submitting it for review. Every step includes specific instructions, so even complete beginners can follow along.
Backend Service Deployment: Using Sealos DevBox
Creating a DevBox Instance
First, go to the Sealos website, log in, select a region (e.g., Tencent Cloud), and click to enter the DevBox panel. Here's what to do:
- Create a new DevBox: Click "New", select the Node.js version (20 recommended), enter a name, and set CPU and memory configuration
- Complete creation: Click "Create" in the upper right corner and confirm — your backend machine will be ready immediately
The whole process is simple. Sealos provides a one-click cloud development environment, saving you from buying servers, installing operating systems, and configuring environments.
Deploying MongoDB Database
The backend service needs a database to store data. In the Sealos panel:
- Click the arrow and select "Database"
- Click "New Database" and choose MongoDB
- Keep the default configuration and click "Deploy"
After the database is deployed, make sure to copy the password and host address — you'll need them later when connecting to the database.
Connecting to the Remote Development Environment
Go back to DevBox, click "One-click Configure", and download the script for your system version. Run it in your local terminal:
bash <downloaded-script-file>
After successful execution, go back to the webpage, copy the connection command, and run it in your terminal to connect to the remote DevBox.
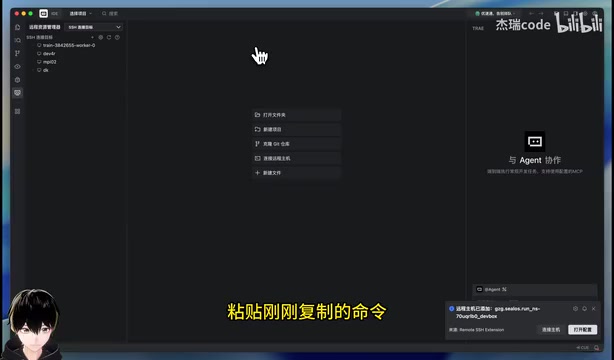
Next, copy the SSH command and add the connection in VS Code or Trae's remote explorer. Open the remote project folder and paste in the API documentation file (api-docs) generated in the previous tutorial.
AI-Generated Backend API Code
Using Trae to Auto-Generate Node.js Backend
Drag the API documentation into Trae and use the following prompt:
Please generate backend API endpoints based on my documentation. The database connection details are [paste MongoDB password and host address]
Trae will automatically generate complete Node.js backend code based on the documentation. After generation, run in the terminal:
npm install
npm start
If you encounter errors, simply copy the error message to Trae and let it fix them. After fixing, restart and confirm that the database connection is successful.
Configuring Public Network Access Port
Go back to the Sealos DevBox details page, click "Modify", and change the container exposed port from the default 8080 to the actual backend startup port of 3000. Click "Modify" and wait for the container to restart.
After restart, find the public debugging URL on the details page and try accessing it in your browser. If it shows 404, that means the network is working (it just doesn't have a corresponding root route, which is normal).
Generating API Integration Documentation
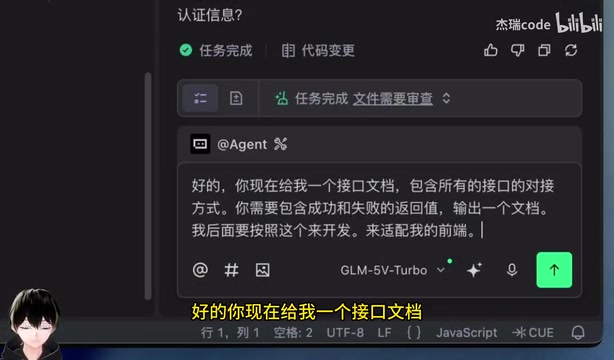
Continue with this prompt for Trae:
Please give me an API documentation that includes all endpoints and integration methods, including both success and failure response values
Trae will output a complete API document containing each endpoint's URL, request examples, and response JSON examples. This document will be used later for frontend integration.
Frontend API Integration and Debugging
Replacing Local API Addresses with Production URLs
This step is crucial: replace the localhost addresses in the API documentation with the DevBox's actual public URL. You can have Trae do this directly:
Please change the base URL in the documentation from localhost to [paste public debugging URL]
Also, delete the local backend folder created in the previous tutorial (or rename it to "local" as a backup). Create a new integration document file in the frontend folder and paste in the content generated by Trae.
Letting AI Handle Frontend API Calls Automatically
Enter the prompt:
This document contains all the backend endpoints and API integration methods. Please implement all the API integrations in the frontend. There was an old implementation in the previous documentation — please handle that as well.
Trae will automatically modify the frontend code, pointing all API calls to the production backend. After the changes, have it run tests to confirm everything works.
Local Debugging to Verify Functionality
Navigate to the frontend folder, install dependencies, and start the project:
npm install
npm run dev
Open the project URL in your browser. If you encounter connection timeouts or syntax errors, press F12 to open the console, check the error messages, and copy them to Trae for fixing.
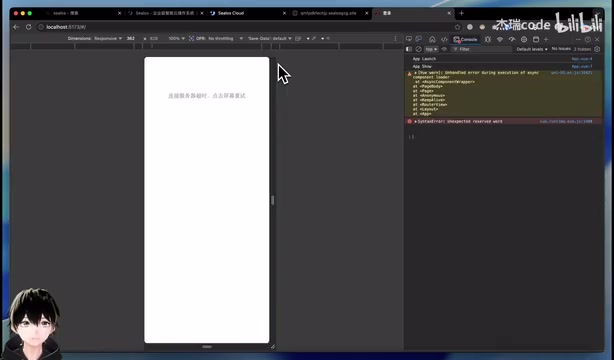
After fixing, restart and verify core features one by one: registration, login, creating memos, and viewing details. At this point, frontend-backend integration is essentially complete.
Packaging and Publishing as a WeChat Mini Program
Building UniApp as a WeChat Mini Program
Find the build command build:mp-weixin in the project's package.json and run the build:
npm run build:mp-weixin
After building, a mp-weixin folder will be generated in the dist directory — this is the mini program's source package.
Importing the Project with WeChat Developer Tools
- Open WeChat Developer Tools and click the plus icon to create a new project
- Point the directory to the
dist/mp-weixinfolder - Enter the AppID (obtained from the WeChat Official Accounts Platform)
- Select "Don't use cloud services"
How to get the AppID: Go to the WeChat Official Accounts Platform, scan the QR code with WeChat to log in, find "Development Management" in the left menu, and you'll see the AppID there — just copy it.

Configuring Server Domain Whitelist
In the WeChat Official Accounts Platform under "Development Management" → "Server Domain", add the DevBox's public debugging URL to the request legitimate domains. This step tells WeChat: our mini program needs to access this backend address, please allow it.
Uploading Code and Submitting for Review
- Click "Upload" in the upper right corner of WeChat Developer Tools
- Fill in the version number and notes
- After successful upload, go back to "Version Management" on the WeChat Official Accounts Platform
- You can first set it as a trial version and scan the QR code to test
- Once confirmed working, click "Submit for Review"
- After the review is approved, the mini program will appear in the "Production Version", and all users can search for and use it
Summary and Recommendations
Through these two tutorials, we completed the entire workflow of taking a memo mini program from zero to launch:
- Development phase: Used UniApp + Trae AI programming assistant to quickly generate frontend and backend code
- Deployment phase: Leveraged Sealos DevBox for one-click deployment of Node.js backend and MongoDB database
- Publishing phase: Packaged, uploaded, and submitted for review via WeChat Developer Tools
Throughout the process, AI programming tools (whether Trae, Cursor, or Claude Code) handled a massive amount of code writing and debugging work, making it possible for zero-experience developers to follow along. However, one thing to note: AI-generated code sometimes has minor bugs, such as lists not displaying after page refresh. These need to be caught during the debugging phase and fixed by the AI.
If you want to improve further, I recommend spending some time understanding the code logic after AI generates it. That way, when problems arise, you can more accurately tell the AI what went wrong, making the fix process much more efficient.
Related articles
 Tech Frontiers
A Rare Quiet Day in AI: Recursive Self-Improvement Stirs Beneath the Surface
A rare quiet day in AI sees multiple sources go silent simultaneously. Behind the calm, Recursive Self-Improvement (RSI) research continues. What this means for the industry.
 Tech Frontiers
Reve 2 vs. Ideogram 4: A Deep Dive into Layout Control in AI Image Generation
A deep comparison of Reve 2 and Ideogram 4's layout control capabilities, covering technical approaches, real-world use cases, and industry trends for designers and creators.
 Tech Frontiers
In the Weights: Check Your Influence Score in the AI World
In the Weights is an AI influence search engine that quantifies your presence in the AI world with a score. Explore how it evaluates practitioners and what it means for digital identity.