After Your n8n Free Trial Expires: How to Deploy Your AI Agent to Vercel for Free
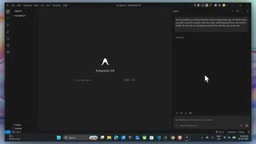
Rebuild your n8n AI Agent as a standalone project and deploy it to Vercel for free after your trial expires.
This guide walks through a complete workflow for migrating an n8n AI Agent to Vercel without an ongoing subscription. The four-step process covers: exporting the n8n workflow as JSON and using a custom Claude Skill to generate a rebuild Prompt; pasting that Prompt into Antigravity to auto-generate a full project with your API key configured; pushing the code to GitHub; and finally importing it into Vercel, adding the API key as an environment variable, and redeploying. The approach effectively turns n8n into a design tool rather than a runtime, hosting the logic as a standalone Next.js project on Vercel's free tier. Key limitations include a long dependency chain, ongoing LLM API costs, and potential loss of complex n8n integrations.
Why Migrate Your n8n Agent to Vercel
Many people build AI Agents during n8n's free trial period, but once the 14-day trial ends, those agents stop running unless you subscribe. This is a real problem for beginners and indie developers — the tool is great, but the price tag is a barrier.
This article is based on a workflow shared by a YouTube creator, introducing an approach to bypass the subscription requirement: export the Agent you built in n8n, use a code generation tool to rebuild it as a standalone project, and deploy it to Vercel for free on an ongoing basis. No recurring n8n subscription required — ideal for users on a tight budget who still want their Agent running 24/7.
A quick disclaimer: this is a single-source tutorial, and the workflow depends on several third-party tools (such as Claude and the Antigravity editor). Actual results may vary depending on your LLM configuration and account environment.
Step 1: Export Your Agent Configuration from n8n
The starting point is an already-built Agent in n8n (the video uses one called "Growth Chat" as an example). Select the workflow and copy it as JSON — this JSON is the foundation for everything that follows, as it fully describes the Agent's logic structure.
With the JSON copied, switch over to Claude. This is where a custom Claude Skill built by the creator comes in — trigger it by typing the /deploy-agent command, paste in the n8n JSON you just copied, and wait. Claude will generate a Prompt that can be used to rebuild the project. This Skill is the critical piece of the entire workflow; the creator has shared the download link in the video's comments or description.
n8n's JSON workflow format is the structured data n8n uses to describe automation flows. Each node corresponds to a functional unit — an HTTP request, conditional logic, data transformation, or an LLM call — and the JSON records each node's type, parameters, connections, and execution order. Because the entire workflow is serialized into readable JSON, it becomes possible to "feed" it to an AI tool, let it understand the logic, and regenerate equivalent code. This is one of n8n's advantages over purely GUI-based tools: what you see is what you get, while the underlying structure remains exportable, version-controllable plain text.
Step 2: Rebuild the Project Locally with Antigravity
With the Claude-generated Prompt in hand, switch to the Antigravity editor. First, create and select a working folder (named my-agent-yt in the example), then paste the Prompt you copied from Claude into the right-side input area and wait for the tool to generate the complete project code.
Once generation is complete, you'll need to configure your API key. Find the .env.local file in the left file panel, paste in the API key for whichever LLM your Agent uses, and save. This step determines whether your Agent can actually call the model.
Local Validation
With everything configured, open a terminal, run cd my-agent to enter the project directory, then run npm run dev. The tool will return a localhost URL — copy it into your browser, and you should see your Agent's interface.
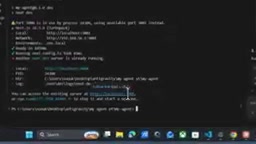
The creator tested it live by typing "hey buddy," and the Agent responded correctly, confirming that local execution was working fine. Validating locally before deploying to the cloud is a necessary sanity check — it prevents pushing broken code to production.
Antigravity is a code editor designed for AI-assisted development, similar in spirit to Cursor or GitHub Copilot, but optimized specifically for the workflow of generating complete project scaffolding directly from a Prompt. It integrates natively with the local file system and terminal, automatically creating directory structures, writing config files, and running commands like npm through its built-in terminal. For users unfamiliar with manual scaffolding, tools like this dramatically reduce the friction between "idea" and "running code." One caveat: the quality of generated code depends heavily on the quality of the input Prompt — which is exactly why this workflow routes through Claude first to generate a structured Prompt, rather than feeding the raw n8n JSON directly to Antigravity.
Step 3: Push to GitHub
To deploy to Vercel, the project first needs to be hosted on GitHub. Create a new repository on GitHub (named my-agent-yt), and GitHub will provide a set of push command URLs after creation.
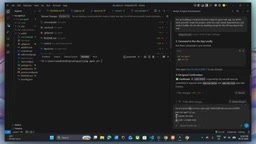
Copy those URLs back into Antigravity and simply tell it to "push this project on GitHub." After sending the instruction, it handles the push automatically. Refresh GitHub and you'll see the complete project appear in the repository. This step transforms your local code into a cloud-accessible source, setting up Vercel for automated deployment.
Step 4: Deploy on Vercel and Configure Your API Key
In Vercel, click Add New → Project, select the GitHub repository you just created, and click Deploy. After the initial deployment completes, there's one easy-to-overlook step: configuring environment variables.
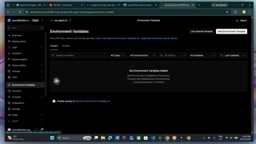
Because the API key was intentionally not pushed to GitHub for security reasons, it must be added separately in Vercel. Go to the project's Environment Variables settings, click Add Environment Variable, enter your LLM provider's name as the Key and paste the corresponding API key as the Value, then save.
After adding the environment variable, you need to trigger a redeployment for the configuration to take effect: go to the Deployments page, click the three-dot menu on the right, and select Redeploy. Once redeployment finishes, open the live Vercel URL and test it — type "hey buddy" and the Agent responds with "Hey there, how can I help you today." At this point, an Agent that was once dependent on an n8n subscription is now running independently on Vercel.
Vercel's free tier (Hobby Plan) supports free deployment of personal projects, with automatic HTTPS, global CDN edge nodes, and 100GB of monthly bandwidth — more than enough for a low-traffic personal Agent. Vercel natively supports the Next.js framework (both are part of the Vercel ecosystem), so the Next.js-style project generated by Antigravity integrates seamlessly without any extra build configuration. The Environment Variables mechanism is standard security practice on cloud platforms — sensitive credentials stay out of the code repository and are injected separately into the runtime environment, so even if the repo is public, the API key won't be exposed. The reason a Redeploy is necessary: Vercel only reads and injects environment variables at build/deploy time. Simply saving a variable doesn't trigger a rebuild, so any time you modify environment variables, you need to manually trigger a redeployment.
The Value of This Approach — and Its Limitations
The core idea here is to demote n8n from a "runtime environment" to a "design tool" — you rapidly prototype the logic in n8n, then use AI code generation to "solidify" it into a standalone Next.js-style project, ultimately hosted on Vercel's free tier. For scenarios where you just want a single Agent online long-term with modest traffic, this can genuinely save you from ongoing subscription costs.
That said, it's worth being realistic about the limitations:
- Long dependency chain: The workflow spans n8n, a Claude Skill, Antigravity, GitHub, and Vercel — a misconfiguration at any step can block the whole process.
- LLM costs remain: What's free is the deployment environment. API call costs for the underlying language model are still charged to your API key.
- Feature parity may suffer: n8n excels at complex multi-node orchestration and integrations. When rebuilt as a standalone project, capabilities that relied on n8n's internal nodes may not carry over completely.
- Single source: This article is based on one creator's demo. It's advisable to validate the process on a test account before applying it to anything important.
If you're stuck at the moment your n8n trial expires, this approach offers a free alternative path worth trying. As for the Claude Skill that makes it all work — grab it from the original video's description, install it through Claude, and it's ready to reuse.
Related articles

@ai-sdk/workflow-harness 1.0.146 Release Notes
@ai-sdk/workflow-harness 1.0.146 is a patch-level update that syncs the @ai-sdk/harness dependency to 1.0.146. Auto-published via GitHub Actions with a verified signature.

Googlebook In-Depth Review: Can Google's New Laptop Replace the Chromebook?
In-depth Googlebook review: Google Book OS on Android 17, Pixel ecosystem integration, Gemini semantic search, and how it stacks up against Chromebook and MacBook Air on price and apps.

Python in Practice: Build an MCP Server from Scratch to Give LLMs Real-Time Web Data
Step-by-step guide to building an MCP server with Python and FastMCP, connecting it to Claude Code and Claude Desktop, and enabling LLMs to answer questions with live web data.