Arduino Uno Q + Claude: Building an AI Workbench That Automatically Documents Your Projects

Arduino Uno Q + Claude auto-records maker sessions and generates tutorials for under 40 cents per 90-minute build.
Kevin McAleer built an AI workbench documentation system using the Arduino Uno Q's MPU+MCU dual-chip architecture. The MCU handles low-power sensing (current clamp for soldering iron, button triggers) and only wakes the MPU's camera and mic when activity is detected. Two capture loops collect timelapse frames and analysis frames; the latter are filtered by OpenCV frame differencing (skipping <4% change) before sending to Claude Sonnet for structured recognition, with Opus generating the final tutorial draft in one call. Audio transcription offloads to a 60-line Faster Whisper Flask server on a Mac. Setup takes a few hours; API cost per 90-minute session is under $0.40.
For makers, the most tedious part of creating tutorials often isn't the build itself — it's recalling every step afterward, sorting through photos, and writing up the documentation. YouTuber Kevin McAleer paired an Arduino Uno Q with Claude models to build an intelligent workbench that quietly observes from the sidelines. It automatically records, transcribes, captures screenshots, identifies components, and generates a publish-ready draft tutorial at the end of the session. The entire system took just two to three hours to set up, and a 90-minute build session costs less than 40 cents in API fees.
One Board, Two Computers: A Division of Labor Philosophy
The heart of this setup is the Arduino Uno Q's unique architecture. It's essentially a complete Linux computer powered by a Qualcomm chip with 4GB of RAM (the 2GB version works too), while also hosting an STM32 microcontroller onboard. In other words, a single board integrates both an MPU (Microprocessor Unit) and an MCU (Microcontroller Unit) — two computers in one, and the division of labor turns out to be perfect for this use case.
Why do you need two computers working together? The author makes a key observation: running vision models continuously to detect activity wastes enormous compute and power. Most of the time, a maker is sitting at the bench reading datasheets, making tea, or taking a sip of sugar-free Pepsi — nothing worth recording is actually happening.
So the MCU handles low-power, low-level sensing. It can connect to an SCT013 non-invasive current clamp clipped onto the soldering iron's power cord to detect whether the iron is on; it can also connect to a momentary button where a short press marks an important moment and a press held over two seconds ends the session. Only when the MCU detects activity does it send a signal to the Linux host to wake the camera and microphone. This "only intervene for expensive operations" design is the foundation that keeps the whole system power-efficient and cost-effective.
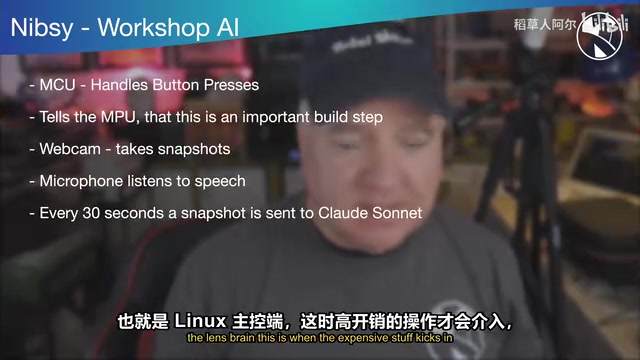
The core distinction between an MPU (Microprocessor Unit) and an MCU (Microcontroller Unit) lies in their design priorities. MPUs prioritize general-purpose computing — they come with full OS support, large memory interfaces, and rich peripherals, making them ideal for "heavy" tasks like running Linux, processing images, or hosting web servers, though they consume more power at idle. MCUs integrate the processor, memory, Flash storage, and peripherals all on a single chip, trading performance for extremely low power consumption and real-time responsiveness, with boot times measured in milliseconds — perfect for "watchdog" work like continuously polling sensors, driving LEDs, or listening for button presses. In traditional embedded development, these two chip types typically live on separate PCBs and communicate via UART, SPI, or I2C buses. The Arduino Uno Q integrates both on a single board with standard Arduino interfaces, making this kind of collaboration accessible to makers without needing to design inter-board communication circuits from scratch.
Dual Capture Loops and Local Change Detection: Driving Costs to a Minimum
The MPU side runs a browser-based web control panel that displays a live camera feed, scrolling transcription text, status indicators, and a timer. The system actually runs two capture loops at different rates.
The timelapse loop captures one frame every 10 seconds and saves it to disk — entirely local, no AI involved — building a complete time-lapse record of the entire build process. A separate analysis loop runs every 30 seconds, grabs a frame, and first runs it through a local change detector. Using OpenCV to compare the current frame against the previous one pixel by pixel, if the change is less than 4%, the frame is simply skipped — no API call is made.
This change-detection filter is the key to cost control. The author ran the numbers: during a 90-minute build session, only 40 or 50 frames actually get sent for analysis rather than hundreds, because all the static, uneventful frames are filtered out upfront.
Model selection also reflects careful trade-offs: routine per-frame analysis is sent to the relatively cheaper, faster Sonnet model, which returns structured information — visible components, whether a noteworthy event occurred, whether a build phase is underway — along with timestamps and keyframe paths. The expensive Opus model is only triggered once at the very end, to make a holistic assessment and summary of the entire session.
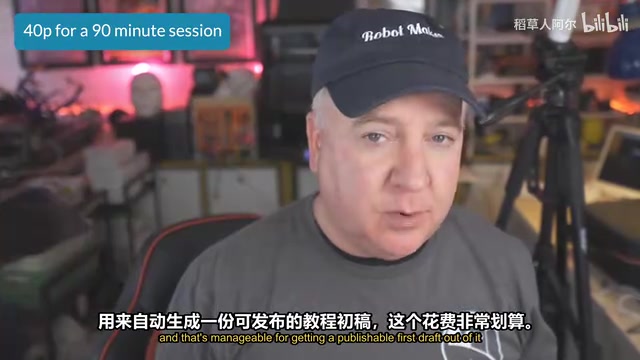
Low-cost routine analysis runs throughout the entire 90 minutes; expensive global reasoning happens just once. The total cost stays under 40 cents for a publishable tutorial draft. For makers, that's a pretty compelling return on investment.
OpenCV's frame differencing method is one of the lightest motion detection techniques in computer vision. The approach works by converting two consecutive frames to grayscale, computing the per-pixel absolute difference, and then calculating the percentage of pixels whose difference exceeds a brightness threshold — quantifying the "degree of change" between frames. This computation runs entirely on the local CPU with no GPU required, and the latency is extremely low (typically within tens of milliseconds). Compared to deep learning-based motion detection models, frame differencing is nearly zero-cost and hardware-agnostic; its downsides are susceptibility to false positives from lighting changes (like clouds blocking sunlight) and an inability to distinguish "meaningful motion" from "irrelevant background jitter." In this system, however, the coarse-filtering task only needs to answer "did anything move?" — not "what moved?" — so frame differencing is more than adequate, leaving the finer semantic judgment to Claude.
A Three-Device Architecture Where Each Component Plays Its Role
The entire system is a collaboration between three devices. The Arduino Uno Q (which the author calls the MonoQ) handles data capture and the dashboard display; a Mac laptop handles the computationally intensive audio processing; Claude in the cloud handles image understanding and final classification; and the onboard STM32 quietly monitors hardware and drives the LED display at the bottom layer.
The reason speech transcription runs on the Mac is that the Arduino can't handle all the high-frequency tasks simultaneously, and transcription is computationally demanding. The transcription server on the Mac is only about 60 lines of Python — a Flask application running the English Faster Whisper model. It exposes a single endpoint: the MonoQ records 10 seconds of audio via a USB microphone, POSTs the raw audio to the Mac, the Mac transcribes it and returns JSON, and the entire round trip takes only a second or two.
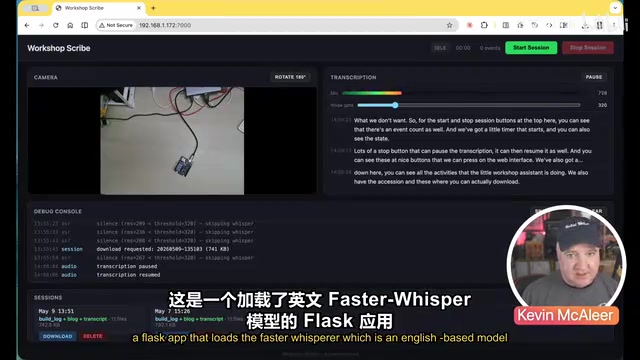
The author also frankly notes a quirk with Faster Whisper: because it was trained on a large volume of YouTube videos, if the environment is completely quiet with only background noise, the transcription will start generating strange "hallucinated" content. A noise gate was therefore added to the web UI to filter out background ambient sound.
Faster Whisper is a high-efficiency inference implementation of OpenAI's Whisper speech recognition model, reimplemented by SYSTRAN using the CTranslate2 inference engine. Compared to the original Whisper, Faster Whisper achieves more than 4x faster inference on CPU (even more on GPU) while significantly reducing memory usage. It supports multiple model sizes (from tiny to large-v3) and can run English transcription smoothly on an ordinary laptop without a discrete GPU. Flask is one of the lightest web frameworks in the Python ecosystem — just ~10 lines of code can expose a function as an HTTP endpoint. The combination of these two as a "60-line local transcription server" is a popular pattern in the maker community: wrapping compute-intensive tasks as microservices and letting resource-constrained host devices call them over HTTP preserves flexibility while avoiding the headache of porting complex dependencies to embedded environments.
LED Status Indicators and Real-World Usage
The 8×13 red LED matrix connected to the MCU has five display states that intuitively communicate the system's current status: a slow breathing pulse when idle; two dots scanning back and forth like eyes when recording; the full matrix lit up brightly when an important event is detected; a focus-line scan pattern when thinking through classification; and a checkmark when all tasks are complete.
In practice, when the author isn't interacting with the bench, the system captures nothing. Once "Start Session" is clicked, the transcription area in the dashboard scrolls through whatever he's saying to himself, the timer counts up, and the camera captures the scene in real time. It can identify development boards on the desk, detect objects being moved, and notice components being connected. Pressing the "Take Snapshot Now" button captures a dedicated frame whenever a specific detail needs highlighting.

When wrapping up, clicking "Stop Session" causes the LED to flash purple and display a V-shaped thinking pattern, indicating that the entire session is being sent to Opus to generate a summary. The downloaded blog post includes the captured photos, step-by-step instructions, and a detailed bill of materials.
The author is also candid about the system's limitations: transcription quality is "not particularly great," and because Sonnet's knowledge cutoff is slightly dated, it repeatedly misidentified the Arduino board as a Micro:bit. Overall though, the generated text can be fed directly into the scripting tools he normally uses to produce YouTube storyboards, significantly reducing the post-production workload.
Hardware List and Key Takeaways
The hardware needed to replicate this system isn't expensive: an Arduino Uno Q, a standard 1080P USB webcam (~£15), an SCT013 current clamp (connected to analog pin A0), a momentary pushbutton (connected to digital pin 2), the onboard LED matrix display, plus a Mac or Raspberry Pi to run the transcription service.
The most valuable lesson from this project isn't how polished the generated tutorials are — it's the pragmatic "edge AI" design philosophy it demonstrates: use cheap local sensing and image differencing for coarse filtering, minimize expensive cloud model calls to the absolute minimum, and let "intelligence" only activate when it's truly needed. This layered filtering, cost-conscious architecture is a useful reference for any developer looking to deploy AI into real hardware projects. The complete code and documentation are available on the author's website at kevsrobots.com.
Related articles

How Big Can Stars Really Get? The Physical Limits of the Largest Stars
Red supergiants are the largest stars by volume, with radii up to 2,000 times the Sun, engulfing the inner solar system. But there is no precise upper limit on stellar size—models predict up to 15,000 solar radii. The most massive blue stars are far smaller than red supergiants—biggest and heaviest are two different things.

Apple HomeView Smart Display Full Feature Breakdown: Wall-Mount or Desktop, $299
Apple launches HomeView, a $299 smart display with wall-mount and desktop options, 12MP camera for facial recognition, smart home control, music playback, and recipe step-by-step cooking. Full breakdown of watch faces, apps, privacy, and cooking integration.

Where Did the Promised New Studio Go? Craft Computing Answers After Five Years
Craft Computing's host responds to viewer questions: the new studio promised five years ago was shelved as construction costs soared from $30,000 to $75,000, and was replaced by a 168-square-foot garage conversion.