Build Your First AI Agent with n8n (No Code): Memory & Tool Calling in Practice

Build a minimal AI Agent with n8n using Gemini API, memory, and tool calling — zero code required.
This article walks through building a minimal viable AI Agent on the n8n no-code platform with conversation, memory, and tool-calling capabilities. The process covers four steps: configuring a chat trigger and AI Agent node; obtaining a free Gemini API key from Google AI Studio and binding it to the chat model; adding a Simple Memory node with a context window of 5 turns to fix the model's stateless "amnesia"; and connecting a Calculator tool node to demonstrate on-demand external tool invocation. This minimal setup fully covers the core concepts of AI Agent architecture and is ideal for beginners with no coding background.
Why Choose n8n for Building AI Agents
n8n is a no-code automation platform that lets anyone — even those without a programming background — build their own AI agents and automate repetitive tasks at scale. That's its core appeal for beginners: no code required. You simply drag and drop nodes in a visual interface, connect modules together, and run a fully functional AI Agent with conversational capabilities.
For first-time users, n8n offers approximately 14 days of free trial, during which you can freely test and create automation workflows and AI agents — no payment needed to experience the full platform. That window is more than enough time to build and debug a basic Agent from scratch.
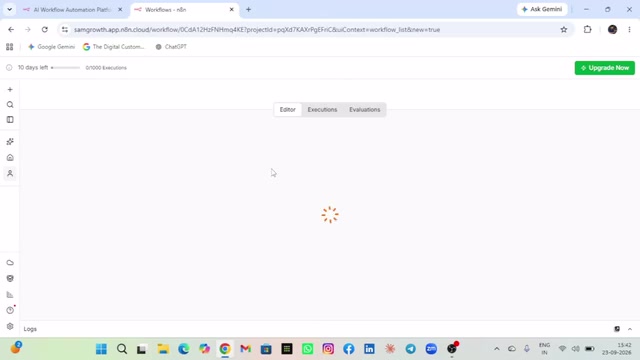
When creating a Workflow, the platform gives you two options: build from scratch or use AI-assisted creation. While the AI-assisted route is more convenient, manually building from zero offers far more learning value for beginners — you'll genuinely understand the role of API keys, triggers, and memory modules rather than having the underlying logic obscured by auto-generated results.
Step 1: Trigger Node and the AI Agent Node
The first step in building any Agent is choosing a Trigger. Since this tutorial builds a chat-based AI agent, we use the Chat Trigger node, which makes user messages the starting point of the entire workflow.
Once the trigger is set, click the "+" button to add an AI Agent node and connect it to the chat trigger. Inside the AI Agent node, you can configure a System Message — a clear task definition that tells the agent what role it should play and what it should do. For this basic demo, we keep the system message simple, just to verify the flow works end-to-end. And it does: once connected, the chat trigger responds as expected.
Step 2: Connect the Gemini API Key
An Agent framework alone isn't enough — it needs an actual large language model to generate responses. That's where the Chat Model node comes in. n8n supports multiple models including Anthropic and Google Gemini. This tutorial recommends Google Gemini because its API key is free to obtain.
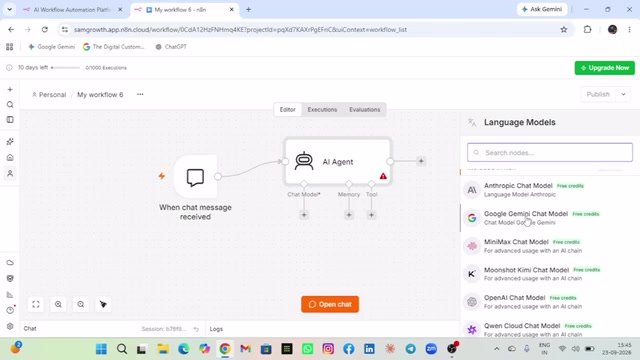
To get your key, go to Google AI Studio (the Google Studio website mentioned in the video). Click "Create API Key" to generate a Gemini API Key. Copy the key, then return to n8n's Chat Model node, select "Create New Credential", and paste it in to complete the binding.
Before configuring this, sending a message to the Agent yields no real response — because the chat model has no API key. Once the key is bound and you ask "What is AI?", Gemini responds with a complete, proper answer. This step is the critical turning point that transforms your Agent from an empty shell into something actually usable.
An API Key is essentially a unique string that acts as your identity credential, allowing the service provider (in this case, Google) to identify who is making the API call and apply rate limits or billing accordingly. Unlike a username/password, API keys are typically auto-generated and should never be shared publicly — if leaked, others can consume your quota or generate charges under your account. In n8n, keys are stored encrypted as Credentials and are automatically retrieved when the workflow runs, so you never need to paste them manually per request. Google Gemini currently offers a limited free usage tier for individual developers, which is more than sufficient for learning and lightweight use cases.
Step 3: Add Memory So the Agent Remembers Conversations
An Agent that only handles single-turn Q&A delivers a poor experience. The tutorial demonstrates this clearly: the user tells the Agent "My name is Mohit," then immediately asks "What's my name?" — and the Agent replies, "Sorry, I don't know your name."

The problem is the lack of a Memory module. Without memory, the Agent cannot retain context from previous conversation turns. The fix is to add a Simple Memory node to the Agent. After connecting it, the test succeeds: the Agent correctly remembers and responds, "Your name is Mohit."
The Simple Memory node has one key parameter: Context Window Length, which controls how many rounds of conversation history the Agent retains. The tutorial sets this to 5, meaning the agent keeps the last 5 turns of chat history. You can adjust this based on your needs — a higher number means longer memory, but it also consumes more context resources.
Large language models are inherently stateless — every API call looks like a brand-new conversation to the model; it doesn't automatically remember what was said before. To simulate "continuous conversation," you must send the conversation history along with each new request. That history is the Context. Context Window Length determines how many turns to include: setting it to 5 means each request carries the last 5 exchanges between the user and the AI. Longer context makes conversations more coherent, but it also consumes more Tokens (the billing unit) and may hit the model's maximum input length limit. n8n's Simple Memory node maintains this history locally and is the most lightweight solution for enabling stateful conversations.
Step 4: Tool Calling — Using the Calculator as an Example
One of the most powerful aspects of an AI Agent is its ability to call Tools to handle tasks the model itself isn't good at. n8n has a rich library of built-in tool nodes, including various Google services. This tutorial uses the simplest one — the Calculator — as a demonstration.
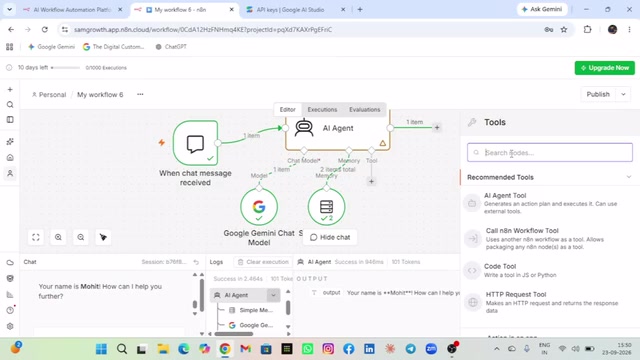
The Calculator tool requires virtually no extra configuration — once connected to the Agent, it activates automatically. When a user inputs a math expression, the Agent identifies it as a computation task, triggers the Calculator node to perform the precise calculation, and returns the result (e.g., "1359"). This on-demand tool invocation mechanism is exactly what sets AI Agents apart from ordinary chatbots.
The author also notes that more complex tools (like Google-related services) contain many operation options, which are worth exploring once you've mastered the basics.
Tool Use / Function Calling is one of the core capabilities of modern AI Agent architecture. Here's how it works: before generating a response, the model first determines whether the current task requires an external tool. If so, it outputs a structured "call instruction" (rather than a direct answer); the Agent framework then executes the corresponding tool and returns the result to the model, which uses it to generate the final response. This mechanism gives Agents capabilities far beyond pure language generation — they can query real-time data, perform precise calculations, manipulate files, and even trigger other automation workflows. Pure language models are prone to arithmetic errors precisely because they rely on probabilistic prediction rather than actual numerical computation. By integrating a calculator tool, such tasks are handed off to a deterministic program, dramatically improving accuracy.
Summary: The Complete Picture of a Minimal Viable Agent
Putting these four pieces together gives you a minimal viable AI Agent:
- Chat Trigger — receives user input
- AI Agent Node — acts as the central orchestrator
- Gemini Chat Model — provides language understanding and generation
- Simple Memory — gives the conversation contextual continuity
- Calculator Tool — demonstrates the extensibility of tool calling
This example is small in scope, but it completely covers the core concepts of building an AI Agent: triggers, model integration, API key management, memory mechanisms, and tool calling. Once you understand this minimal structure, layering on more complex tools and business logic becomes straightforward. For anyone who wants to get into AI automation but is intimidated by coding, the n8n + Gemini combination offers a genuinely low-barrier path to hands-on practice.
Related articles

Receipt Forgery Detection Near Random? Real-World Struggles and Solutions in Document Image Forensics
A receipt forgery detection project with ROC-AUC near random reveals the pitfalls of small-sample document forensics. Explores anomaly detection, self-supervised pre-training, and numerical consistency as viable alternatives.

From Workflows to Eval-Driven Development: A Paradigm Shift in How We Solve Problems with AI
AI problem-solving is shifting from deterministic workflows to "define evals + hillclimb." This piece explores how eval-driven development reshapes tasks, data vendors, human roles, and Agent UX.

Tesla Powerwall + Electric Vehicle: A Dual Backup Power Solution for Outages
Tesla Powerwall combined with EV bidirectional charging can provide multi-layer home backup power during outages. We break down runtime, V2H realities, and Supercharger loop feasibility.