Building a Secure MCP Server from a REST API: OAuth, Permissions, and Risk-Level Classification in Practice

Build a secure MCP server from a REST API with OAuth, risk-level classification, and dual credential isolation.
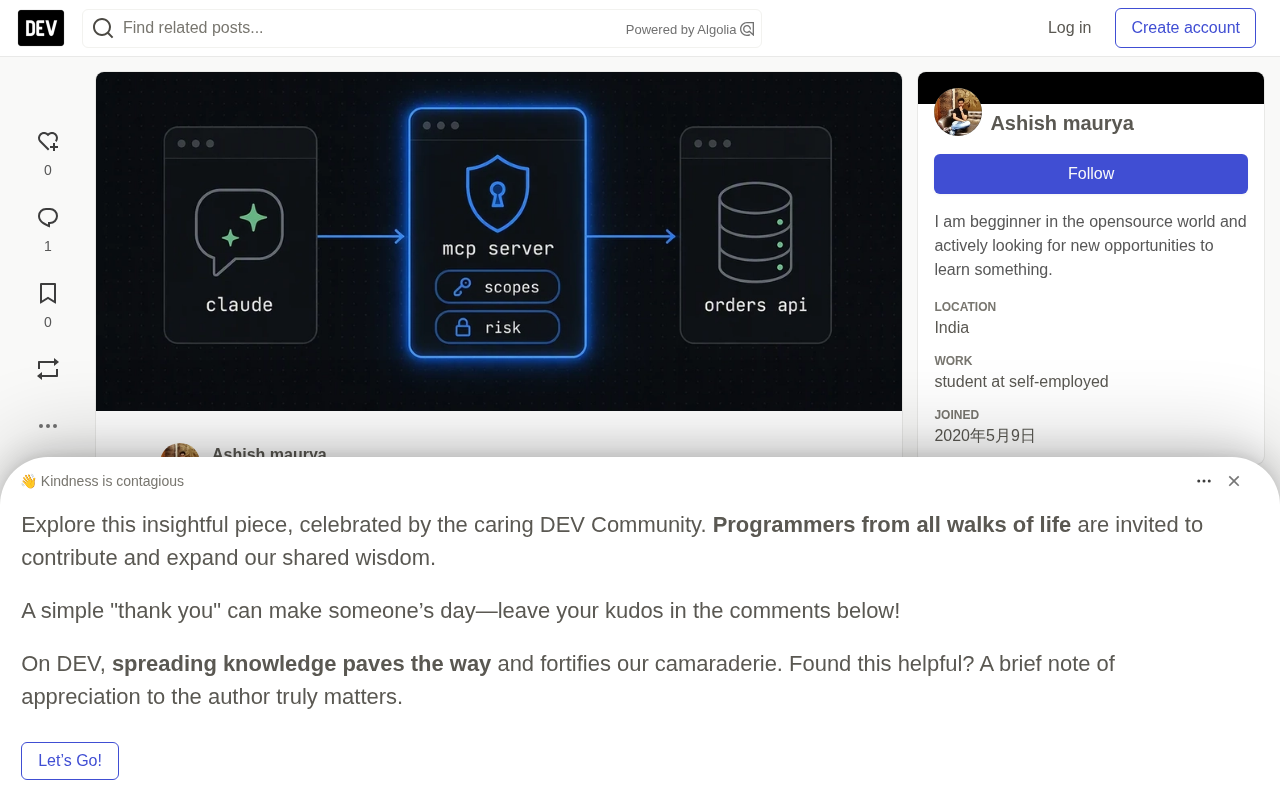
Using an orders API as a concrete example, this article walks through securing a REST API wrapped as an MCP server. The core approach is layered containment: never expose destructive operations at the tool-selection stage, enforce OAuth scopes per tool and cryptographically forward claims to bind caller tenant identity, strictly separate client OAuth credentials from backend API keys, tag every tool call with a Read/Write/Destructive risk level, and log everything. The article emphasizes that MCP itself only standardizes tool discovery and invocation — permission boundaries and dangerous operation controls must be enforced by the developer at build time, not left to the model's judgment.
Every team wants the same thing right now: let Claude, Cursor, or an internal agent query orders, look up customers, and open tickets through an existing API. And every security team asks the same question in return: what stops the model from calling the endpoint that deletes things?
Model Context Protocol (MCP) only solves half the problem. It gives AI clients a standard way to discover and invoke tools. The other half — deciding which tools exist, who can call them, and what counts as "dangerous" — is still entirely on you.
This article walks through how to build an MCP server from an existing REST API while handling authorization and authentication correctly: OAuth for clients, scopes and claims for tools, and risk-level classification for anything that mutates data. Koodisi's approach (which auto-generates MCP servers from published API collections) is used as a reference, but the pattern applies to any implementation you build yourself.
Example Scenario: An Orders API
Suppose you have a minimal orders API with three operations:
| Operation | Function | Risk |
|---|---|---|
GET /orders/{id} | Read an order | Read |
POST /orders/{id}/refund | Initiate a refund | Write |
DELETE /customers/{id} | Delete a customer | Destructive |
The goal is clear: Claude can freely query orders, can initiate a refund with a confirmation step in place, and the delete endpoint — it simply should not exist as far as the model is concerned.
Step 1: Start with a Published API and a Security Profile
Before building the MCP server, three things need to be in place:
- A published API collection with a generated OpenAPI spec. Every operation in the spec is a candidate tool.
- A Security Profile that defines the identity provider, scopes (e.g.,
orders:read,orders:write), and claims the token can carry (e.g.,tenant_id). - A runtime environment.
The security profile matters more than it might appear. A server can only be bound to one profile, and you can only grant scopes and claims that are already defined in that profile. In other words, no one can hand an AI client permissions the identity provider never issued — the permission boundary is tightened at the source.
An OpenAPI spec (formerly Swagger) is a JSON/YAML file that describes a REST API's structure — paths, HTTP methods, parameters, request bodies, and response formats for each endpoint. When an MCP server generates tools, it essentially translates each
operationIdin the spec into a callable function for the model, with the function name, parameter types, and description all derived from the spec itself. This means spec quality directly determines how well the model "understands" the tools: vague operation descriptions cause the model to guess when to call something, while precise descriptions let it accurately infer intent. Before wiring an API into MCP, it's worth reviewing whether each operation'ssummaryanddescriptionfields clearly express the business semantics and side effects — not just the technical signature.
Step 2: Create the Server and Select Tools
During the creation flow, you name the server, choose an environment and security profile, then select which published operations to expose. In this example, only the first two are exposed:
GET /orders/{id}→ tool, risk level ReadPOST /orders/{id}/refund→ tool, risk level WriteDELETE /customers/{id}→ not exposed
That last line is the most important security decision in this entire article. The cheapest guardrail is simply not exposing an operation in the first place.
Risk levels come in three tiers: Read, Write, and Destructive. They travel alongside each tool so that clients can insert a confirmation step before any data-mutating operation — like a refund.
Step 3: Configure Scopes and Claims at the Tool Level
In the "APIs & Tools" view, you can set defaults for the entire spec (inherited by all tools) and then add extra requirements for individual tools:
Spec defaults:         scopes: orders:read      claims: tenant_id
refund tool (added):   scopes: orders:write
Claims are the part many people skip and later regret. The claim value attached to the caller is cryptographically forwarded to the downstream API, so the backend still receives the caller's tenant information and can apply its own normal rules. The model cannot talk its way into another tenant's orders — because the tenant comes from the token, not the prompt.
In OAuth 2.0, scopes are permission strings attached to an access token that declare what the holder is authorized to do. When the MCP server receives a tool call request, it checks whether the caller's token includes the scope required by that tool — for example,
orders:write— and rejects the request outright if it doesn't, without forwarding anything to the downstream API. Claims are key-value fields in the token payload — common examples includesub(user ID),tenant_id, androle— signed into the token by the identity provider (IdP) at issuance and impossible to forge by the client. Forwardingtenant_idas a claim to the downstream means every request the backend receives carries cryptographically verified tenant information, eliminating any need to trust the caller to self-report their identity in the request body or prompt — and fundamentally preventing cross-tenant privilege escalation.
Step 4: Configure Downstream Credentials for Tools
Tools need to authenticate against your real API. In "Downstream Credentials", you fill in the API Key, Bearer Token, or Basic Auth value for each security scheme. These credentials are encrypted at rest and never displayed again.
Note the separation of responsibilities here: the client authenticates to the MCP server via an OAuth application; the tool authenticates to your backend via downstream credentials. The AI client never sees the backend secret. This is one of the foundational security pillars of the entire architecture.
This separation of concerns corresponds to the Separation of Concerns principle in information security, expressed concretely in credential management as two independent chains of trust. First: the AI client (Claude, Cursor, etc.) holds an OAuth
client_idandclient_secret, which can only prove "who I am and what permissions I have" to the MCP server — it never touches the backend API's actual credentials. Second: only after confirming the client's identity and scope are valid does the MCP server use its own stored downstream credentials to make requests to the backend. This means that even if the AI client is compromised through prompt injection or session hijacking, the attacker can only act within that client's existing scope — they cannot extract or reuse the backend credentials to bypass the MCP layer and call the API directly. This architecture also simplifies credential rotation: updating a backend API key only requires changing the server-side configuration, with no impact on connected clients.
Step 5: Client Authentication with an OAuth Application
In "Client Access", create a new OAuth application, set scopes and default claims, assign users, and grab the client_id and client_secret (shown only once — copy it immediately).
For external users, enable "Accept External Clients" and share the registration link. Registration requests enter a Pending state; login returns 401 until someone approves them. This is exactly the kind of approval queue every API deserves.
Step 6: Test Before Connecting Claude
The "Connect" tab can generate a short-lived test token, letting you hit the server directly with raw JSON-RPC. MCP is built on JSON-RPC 2.0; a tool listing request looks like this:
curl -s "$MCP_ENDPOINT" \
  -H "Authorization: Bearer $TEST_TOKEN" \
  -H "Content-Type: application/json" \
  -H "Accept: application/json, text/event-stream" \
  -d '{"jsonrpc":"2.0","id":1,"method":"tools/list"}'
You should see exactly two tools. If you see three, go back to Step 2.
Step 7: Connect Claude (or Cursor) to the MCP Server
The same "Connect" tab generates config snippets for Claude, Cursor, Gemini CLI, mcp-remote, Python, or cURL. For Claude Desktop: go to Settings → Developer → Edit Config, paste the snippet into claude_desktop_config.json, fill in the client ID and secret, and restart. Claude authenticates via OAuth and the tools appear.
Then try the most natural prompt:
"What's the status of order 1042? If it hasn't shipped yet, issue a refund."
Claude uses the read tool to look up the order, and the refund tool — marked Write — is exactly the kind of operation the client can place behind a confirmation step. Either way, the delete endpoint is not on the menu.
Step 8: Watch What It Actually Does
The "Analytics" tab shows total call volume, success rate, errors, blocked calls, and p95 latency, with breakdowns by tool or user. The "Activity log" lets you trace every individual call. When someone asks "did the AI trigger that refund?", you can answer with a record rather than a guess.
Key Takeaways
- Expose less. The safest destructive tool is the one that doesn't exist.
- Label risk levels. Read, Write, and Destructive give clients a standardized reason to pause and ask.
- Bind to identity, not prompts. Scopes and forwarded claims lock the model within the caller's permission boundary.
- Keep credentials separate. Clients use OAuth; backend secrets stay server-side.
- Log every call. Agents operate at machine speed — per-call audit logs are not optional.
The wave of agents accessing enterprise APIs is coming, and keeping them in a controlled, auditable environment matters far more than just getting them to run. This pattern — starting from an OpenAPI spec and closing with risk classification and dual credential isolation — gives teams a concrete, deployable starting point.
Related articles

Felix Rieseberg Personal Homepage
Felix Rieseberg's personal homepage sparks attention on Hacker News. This article covers the Slack engineer's technical background, the rise and fall of nativefier, and the value of a developer homepage as a tech calling card.

@ai-sdk/vue 3.0.306 Patch Release Syncs with [email protected] Update
@ai-sdk/vue 3.0.306 released, synced with [email protected]. A routine patch release for the Vercel AI SDK ecosystem with no public API changes; the Vue adapter layer stays version-aligned with the core package.

Gemini 4 Argon API Launches: The Era of Million-Token Output Begins
Google launches Gemini 4 Argon with sparse MoE architecture, up to 1M output tokens, and a 68.90% Vals Index score, available across API, AI Studio, and the Gemini app.