Building and Deploying a Personal Website from Scratch with Claude Code: A Complete Walkthrough

Build and deploy a personal website from scratch using Claude Code and a budget cloud server.
This guide walks through building a personal brand website with Claude Code — Anthropic's agentic coding assistant — and deploying it on a ¥99/year Alibaba Cloud server. It covers the full workflow: AI-driven development, natural language iteration, Git hosting on GitHub, Nginx configuration, and scripted auto-update pipelines. No deep frontend experience required.
In an era where AI coding tools are rapidly maturing, you don't need deep frontend expertise to take a website from design to deployment. This guide is based on a hands-on demonstration by a Bilibili creator, walking through how to use Claude Code to build a personal brand website and deploy it live on a ¥99/year Alibaba Cloud server — forming a fully reusable development and operations loop.
What is Claude Code: Claude Code is a command-line AI coding assistant developed by Anthropic. It runs in the terminal, can directly read and write the local file system, execute shell commands, and perform Git operations. Unlike code completion tools such as GitHub Copilot, Claude Code excels at understanding the full project context, breaking tasks into steps, and executing multi-step operations autonomously. It's one of the most representative tools for "Agentic Coding" today — essentially letting a large language model participate directly in the entire software engineering lifecycle.
Step 1: Plan First, Then Build
Rather than jumping straight to asking AI to "write a website," the smarter approach is to start with a clear requirements document. Before writing a single line of code, the creator first used a large language model to generate a "personal brand website spec," which included: a handle/username, content focus, the domain to be linked later, technical stack details, a personal bio, and social/contact links across platforms.
The value here is simple — giving the AI a well-defined context boundary. With that Markdown spec placed in the project directory, a single prompt — "Please build my personal website based on the current spec" — was enough for Claude Code to break the task into 14 steps and execute them sequentially, generating a complete website codebase.
Local Preview and Iterative Refinement
After generation, the creator asked Claude Code to "run the project locally" to preview the result. This is where AI-driven development really shines: iteration through natural language. Three refinements were requested — the down-arrow on the homepage wasn't clickable, the typewriter animation should only trigger when the element enters the viewport, and a "back to top" button was needed in the bottom-right corner.
These are tasks that would traditionally require manually writing JavaScript event listeners and IntersectionObserver animation triggers. With a conversational description, Claude Code accurately located and modified the relevant code.
What is IntersectionObserver: IntersectionObserver is a native Web API in modern browsers that asynchronously observes whether a target element intersects with the viewport. Previously, developers had to listen to scroll events and manually calculate element positions using
getBoundingClientRect()— verbose code that also caused janky scrolling due to frequent main-thread execution. IntersectionObserver offloads this calculation to the browser's internal engine, offering better performance and cleaner code. It's the modern standard for "trigger animations on scroll."
After refinement, the site rendered well on both desktop and mobile, with responsive design handled without any extra prompting.
Purchasing the Alibaba Cloud ¥99 Server
Once the website was ready, the next step was finding it a home. The creator chose Alibaba Cloud's "99 Plan" — a cloud server for ¥99/year with the same renewal price — exceptional value given that standard pricing is typically over ¥1,000/year.
A few practical notes worth highlighting:
- One ID card, one server — real-name verification must be completed before purchasing;
- Choose a region close to you (the creator in Shenzhen selected China South 1); the OS selected was Ubuntu 22;
- Bandwidth is 3 Mbps — low, but more than sufficient for a personal showcase site.
After payment, the instance is typically provisioned within 1–5 minutes. The console will assign a public IP address, which is the server's only external-facing identity. The creator noted that production environments typically don't expose a bare IP — instead, a domain name is purchased and pointed to the server, which ties into the later steps of ICP filing and HTTPS setup.
Code Hosting: Git and GitHub
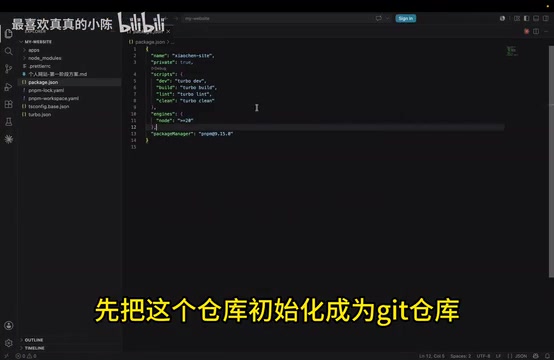
The deployment strategy follows a clean, mainstream workflow: initialize a local Git repo → push to GitHub → pull on the server → build and deploy.
The first step was again delegated to Claude Code: "Please initialize a Git repository for the local project and make sure to add a .gitignore file." The AI automatically generated .gitignore and excluded the bulky node_modules directory.
Why ignore node_modules: The
node_modulesdirectory is where Node.js installs project dependencies. It can contain tens of thousands of files and hundreds of megabytes — all of which can be fully regenerated by runningnpm installbased on the dependency declarations inpackage.json. Excluding it via.gitignoreis a fundamental engineering best practice: it keeps the repository lean, commit history clean, and is the default behavior in GitHub's official Node.js template.
GitHub Registration and Security Hardening
One practical tip from the registration process: 163 email addresses currently cannot be used to register GitHub accounts, but QQ email works fine — saving others the troubleshooting headache.
After registration, it's strongly recommended to enable two-factor authentication (2FA) — GitHub will eventually require it anyway. Use an authenticator app like Microsoft Authenticator to scan the QR code and bind it, and be sure to save your recovery codes in case you lose access to your phone.
Pushing Code with SSH Keys
Compared to HTTPS (which requires entering credentials each time), SSH keys are the preferred approach — configure once, and push/pull indefinitely without a password.
How SSH Key Authentication Works: SSH key auth is based on asymmetric encryption. A key pair is generated locally — the private key stays on your machine, and the public key is uploaded to GitHub. When establishing a connection, the server encrypts a random challenge with your public key and sends it back; the client decrypts it with the private key and returns the result, proving identity without ever transmitting a password. Compared to HTTPS username/password authentication, SSH keys eliminate repetitive credential entry and offer stronger security — the standard approach for developers interacting with Git hosting platforms.
The core steps are:
- Check whether
~/.sshkeys already exist locally; - If not, generate them with
ssh-keygen, enter your email when prompted, and press Enter through the rest; - Copy the public key content and add it to GitHub under SSH Key settings;
- Test connectivity with
ssh -T [email protected].

Once connected, three commands — git add ., git commit, and git push -u — pushed the code to the remote GitHub repository.
Server Environment Setup and Deployment
After logging into the server, deployment proceeded methodically. The key steps for environment setup included:
- Updating system packages and installing Git and other base tools;
- Generating an SSH key on the server and adding it to GitHub (so the server can pull from the repo);
- Installing Node.js, npm, pnpm, and PM2 (process management) as runtime dependencies;
- Navigating to the
/optdirectory and cloning the project via its SSH URL usinggit clone.
What is PM2: PM2 (Process Manager 2) is a widely used production process manager in the Node.js ecosystem. When a Node.js app crashes due to an uncaught exception, PM2 automatically restarts it. After a server reboot, PM2 can restore apps at startup via the
startupcommand. It also includes built-in log aggregation, multi-process load balancing (cluster mode), and a performance monitoring dashboard. For personal sites, PM2's most common use case is keeping the Next.js SSR server process alive and ensuring continuous uptime.
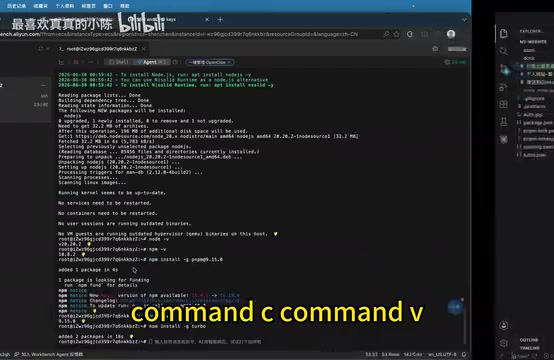
After cloning, navigate into the project directory, run pnpm install to install dependencies, then pnpm build to compile. The build output lands in the apps/web/out directory.
Firewall and Nginx Configuration
Deploying a static site requires two more things: opening the right ports and configuring a web server.
In the Alibaba Cloud console under "Security Groups," add inbound rules to allow HTTP port 80 and HTTPS port 443 in addition to the default SSH port 22. Also check the system firewall (ufw) status — if it shows inactive, no further action is needed.
Next, install Nginx, copy the build output to the Nginx web root, and edit the config file — listen on port 80, specify the HTML root directory, and enable gzip compression along with static asset caching.
Nginx's Role in Static Site Deployment: Nginx is currently the world's most widely used high-performance web server, known for its event-driven, non-blocking I/O model that can handle tens of thousands of concurrent connections on a single machine. In static site deployments, Nginx acts as both "gatekeeper" and "courier": it maps incoming HTTP requests to HTML/CSS/JS files on disk, uses gzip compression to reduce transfer size, and sets
Cache-Controlresponse headers to guide browser caching — delivering a smooth browsing experience even on low-bandwidth servers. When HTTPS is configured later, TLS termination (SSL offloading) is also handled by Nginx.
Run nginx -t to verify the config, then restart Nginx. Visit the server's IP address in a browser — the site is live.
Building a Reusable Automated Update Workflow
One-time deployment is straightforward; making ongoing maintenance effortless is the harder part. The creator wrote an update script on the server with simple, clean logic: pull latest code → run build → delete old files → copy new output → log results. Then granted it execute permissions.

With this in place, the day-to-day development workflow is dramatically simplified to: edit code locally → push to GitHub → SSH into the server and run the update script.
Codifying Repetitive Tasks as a Claude Code Skill
The cleverest step was having Claude Code generate the "commit and push to GitHub" sequence as a Skill and register it globally. From that point on, invoking the Skill automatically produces a concise, well-formatted commit message and completes the push. This reflects a broader trend in AI-assisted development — moving from "writing code" to "automating workflows" by converting repetitive actions into reusable capabilities.
Summary and Next Steps
This workflow covers the full lifecycle of a personal website from zero to launch: AI generation → natural language iteration → Git hosting → cloud server deployment → scripted operations. For anyone who wants a personal homepage but has been held back by technical barriers, this is a low-cost, repeatable path.
The site currently runs on a bare IP address. The next steps are to register a domain, complete ICP filing, and configure HTTPS so the site can be served like any professional website. Notably, the somewhat more complex tech stack (Next.js + pnpm) was a deliberate choice — leaving room to add more sophisticated features later.
The Forward-Looking Case for Next.js: Next.js supports three rendering modes: Static Site Generation (SSG), Server-Side Rendering (SSR), and Incremental Static Regeneration (ISR). For a personal brand site at this stage, using
next exportto output plain static HTML is perfectly sufficient. But once you need to add a blog system, form submissions, user authentication, or dynamic data APIs, Next.js's API Routes and Server Components can accommodate all of that without requiring a stack change. This is a reminder that even in AI-assisted development, developers still need forward-thinking judgment when making technology choices.
Related articles

ChatGPT Space Launches: Team Collaboration and New Pages Features Explained
ChatGPT Space is OpenAI's new team collaboration feature with Pages, real-time collaboration, and Slack/Google Drive sync. We break down its privacy design, multi-platform integration, and the full workflow from conversation to document.

Migrating Apache Spark UDFs to GPU Acceleration with AI Agents
NVIDIA developer blog explains how AI Agents rewrite Apache Spark UDFs for GPU acceleration, covering migration criteria, agent rewriting and verification workflows, plus pitfalls like result consistency and CPU-GPU transfer overhead.
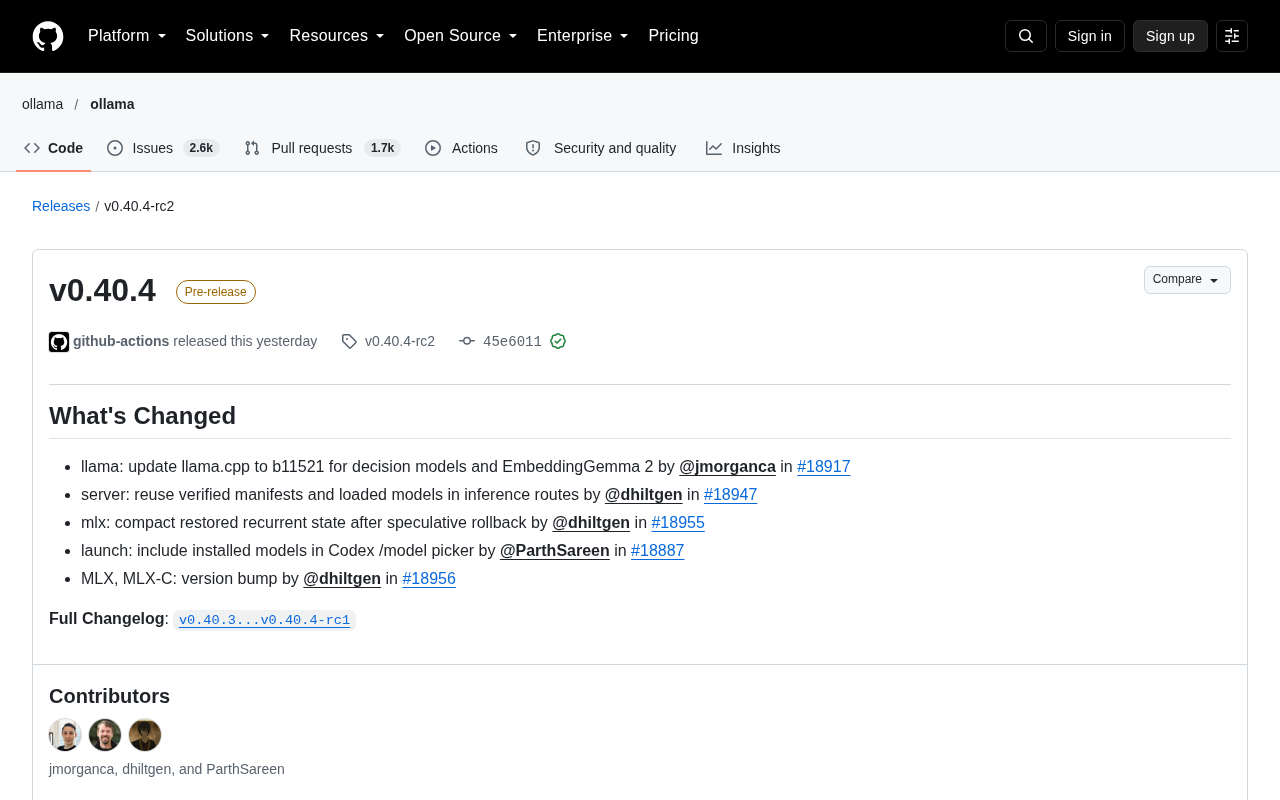
Zed Editor v0.40.4-rc2 Released: Usage Credits Now Available Without Upgrading
Zed editor releases v0.40.4-rc2, allowing users to use usage credits for AI features without upgrading to a paid plan, lowering the trial barrier.