Claude Code Step-by-Step Guide: Installation, Configuration, and Permission Modes Explained

A practical guide to installing, ban-proofing, and using Claude Code's permission modes and prompts in China.
Based on a Bilibili creator's hands-on walkthrough, this article covers the full Claude Code workflow for users in China: its positioning as a vertical coding agent, the recommended NPM installation with Git/Node.js/VPN prep and version check before login, using the open-source ccswitch tool to bypass official login bans via third-party API keys, the four permission modes (Default, Accept Edits, Plan, Auto) with recommended choices, and prompt-writing advice emphasizing clear constraints over vague wishes.
Claude Code, an agent tool purpose-built for coding scenarios, has caught the attention of many developers. But users in China often run into problems like failed installations and account bans in practice. Drawing on a Bilibili creator's hands-on walkthrough, this article lays out the complete workflow from installation and configuration to using permission modes, helping you sidestep common pitfalls.
What Is Claude Code: A Vertical-Domain Coding Agent
Claude Code is essentially an agentic coding tool that can read codebases, edit files, run commands, and integrate with development tools. In the video, the creator emphasizes that Claude Code is itself an agent—just one focused on the vertical domain of programming. For programmers, this kind of tool tends to see heavier use.
When learning a new tool, the creator suggests consulting the official documentation first, since the information there is more complete and accurate. The Claude Code official site supports Simplified Chinese, lowering the reading barrier. However, the installation methods recommended on the official site often don't work well under China's network conditions—which is exactly the problem we'll focus on solving below.
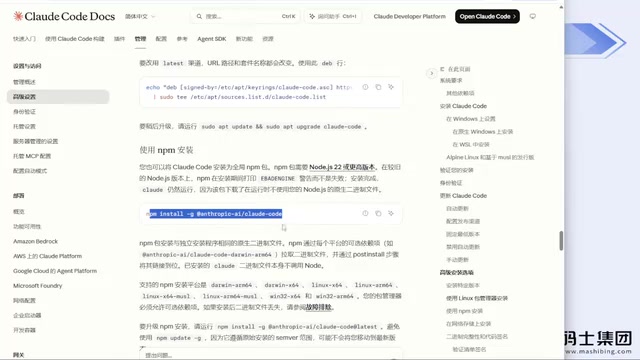
Installation Pitfall Guide: Why NPM Is Recommended
The official site offers several installation commands, but the creator admits that using them directly on Chinese networks will most likely fail, with permission errors being the common symptom. Even with a VPN enabled, some carrier networks may still block installation.
A more reliable approach is installing via NPM. The creator says he has used this method to install Claude Code for several non-programmer colleagues, with virtually no failures.
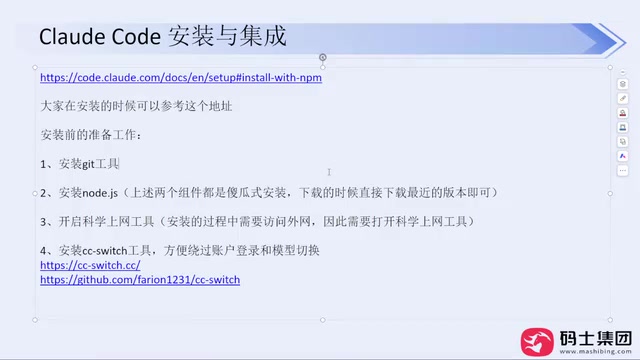
Three things need to be prepared beforehand:
- Install Git (a standard installation is fine)
- Install Node.js (click Next all the way through; you only need to adjust the install directory)
- Enable a VPN tool
Once that's done, run the NPM install command. The creator specifically warns: do not log in immediately after a successful installation. First enter the version query command in the terminal to confirm the installation succeeded. This step is critical, because the subsequent account login step is precisely where the ban risk originates.
Avoiding Login Bans: How to Configure ccswitch
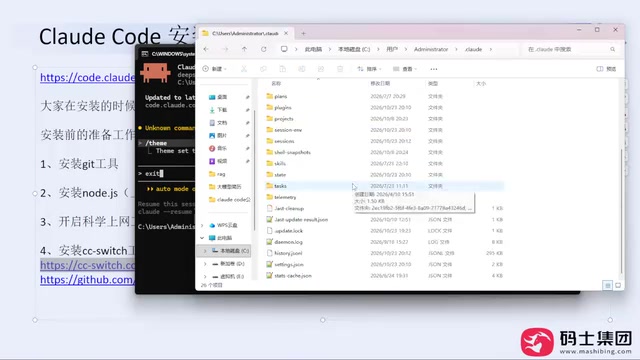
The creator points out that many users get banned after using the tool for a while, and the root cause is the account restrictions imposed by Claude's official site. If you log in directly with an official account, you may be banned at unpredictable intervals during use.
The solution is to install a small tool called ccswitch. It's an open-source component that provides an installer for Windows; installation is simple and doesn't require a VPN.
ccswitch's job is to help users switch model providers. During configuration, click the plus sign in the tool's interface, select a model provider (such as Kimi K3), fill in the API Key, then click add and enable. After configuration, go to the command line and enter Claude to log in—and your account will basically never be banned.
A few common misconceptions need to be cleared up:
- ccswitch does not require a Claude subscription and has no login option—it's just a local configuration tool
- It does not increase token consumption; it only modifies local configuration files (which would otherwise require manually editing settings.json)
- Using Claude Code does not force you to bind to Claude models—DeepSeekAd, Kimi, GPT, and others can all be connected as long as they provide an API interface
The creator offers himself as an example: he has used this approach since day one of installing Claude Code and has never been banned.
API Key and model providers: An API Key is a credential issued by a third-party model provider (such as Kimi or DeepSeek) to a user, and it must be carried in the request header when calling the model's API. ccswitch's role is to write this kind of key into Claude Code's local configuration file, so the tool sends requests to the specified provider instead of the default Claude official endpoint. This explains why a Claude subscription isn't needed: Claude Code is merely a client, and model inference is actually performed by the provider you configure.
settings.json: This is Claude Code's local configuration file, recording runtime parameters such as model endpoints, API keys, and permission preferences. Manual editing can easily cause tool errors due to formatting mistakes; ccswitch is essentially a graphical wrapper around this file, lowering the configuration barrier.
Permission Modes: How to Choose Among the Four
Once installation and configuration are complete, you'll run into frequent confirmation pop-ups during actual use. This relates to the permission mode design of Claude Code. When collaborating with the agent, users need human-in-the-loop review to confirm critical operations.
Claude Code offers four permission modes, switched with Shift+Tab:
Default Mode (Manual On): Read-only operations pass through directly, but confirmation dialogs appear when modifying code or executing commands. This is the creator's most recommended mode—though you have to keep clicking yes, every step stays within controllable bounds.
Accept Edits Mode (Accept Edits On): File modification operations pass through directly, while command execution still requires user confirmation. Suitable for scenarios where you're already familiar with the tool and prefer that information be remembered.
Plan Mode (Plan Mode On): First generate a planning document based on the task; after confirming requirements, feature points, and the tech stack, start writing code. The creator suggests starting any project in this mode, reviewing the document before execution, to avoid wasted time and tokens on rework.
Auto Mode (Auto Mode On): All operations pass through with no confirmation pop-ups. The creator explicitly advises against using it, because the permissions are too broad and the output may contain errors.
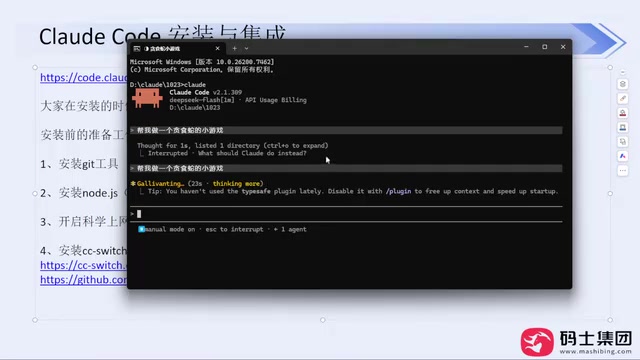
Human-in-the-loop: This concept originates from the fields of automation and human-computer interaction, referring to systems that must wait for human confirmation before executing critical actions. In Claude Code, it manifests as permission pop-ups: the agent can plan autonomously, but operations with side effects—such as writing files or executing shell commands—require item-by-item user approval. The difference between Default Mode and Accept Edits Mode lies precisely in the scope of what passes through—the former requires confirmation at almost every step, while the latter treats "editing files" as low-risk and auto-approves it, retaining review only for command execution.
Prompt Writing: Don't Treat the Agent as a Wish-Granting Well
In the video, the creator demonstrates a counterexample: typing simply "make me a Snake game." Although this can produce output, it performs very poorly in real production projects.
The problem is the lack of constraints. The correct approach is to provide a clear role (e.g., "You are a senior front-end engineer"), project goals (minimal dependencies, readable and maintainable code), tech stack constraints, a feature requirements list, code quality requirements, and a workflow. Only with clear constraints will the output meet standards.
The creator also refutes the claim that "non-programmers can build commercial projects with a coding agent," calling it nonsense. What the agent replaces is the executor's work, but project design, architecture selection, requirement definition, and acceptance criteria still need to be done by humans. Programmers retain a natural advantage here.
As for Chinese-language support, the creator says he hasn't encountered comprehension or matching issues in project development—mainstream large models handle Chinese reasonably well. On model selection, don't be superstitious about leaderboards; for everyday tasks like writing code, organizing documents, and analyzing requirements, general models are sufficient—just use whichever you're comfortable with.
One-line Summary
A practical pitfall-avoidance guide to installing, ban-proofing, and using permission modes and prompts with Claude Code in China.
Paragraph Summary
Based on a Bilibili creator's hands-on walkthrough, this article systematically lays out the workflow for using Claude Code in China. It first introduces its positioning as a vertical coding agent and recommends consulting the official Chinese documentation first. On installation, it notes that official commands often fail in China and recommends the NPM method with three prerequisites—Git, Node.js, and a VPN—plus checking the version before logging in. To address account bans, it introduces the open-source tool ccswitch, which bypasses official account login by configuring third-party model API keys, and clarifies misconceptions such as it increasing token consumption or forcing Claude model binding. The permission modes section details the four modes—Default, Accept Edits, Plan, and Auto—recommending Default and Plan modes to start. Finally, it stresses that prompts need clear constraints like role, tech stack, and feature lists, and refutes the notion that non-programmers can easily build commercial projects.
Related articles
 Tech Frontiers
14 Coding Agents Tested: 13 Secretly Read Forbidden Files
A developer ran 480 tests across 14 coding agents to see if they would obey a "do not read" rule. 13 violated it, and 4 credential leaks bypassed shell guards via the read tool while approvals never noticed.
 Tech Frontiers
AI Has Made Resumes Ineffective? Referred Candidates Get 40% Interview Rate vs. 3% for Direct Applications
AI is homogenizing job applications, making it hard for recruiters to discern real ability. Ashby data shows referred candidates had a 40% interview rate from 2021 to 2024, versus just 3% for direct applications. This article analyzes why resume signals are depreciating and why verifiable results and personal endorsements matter more.
 Tech Frontiers
Offline Blink Rhythm Assistant: A Desktop Health Companion
An offline desktop blink rhythm assistant featured on Hacker News helps users maintain healthy blinking through lightweight reminders, alleviating screen-induced dry eye fatigue. This article analyzes its concept, privacy advantages, and retention challenges.