Complete Guide: Connecting Grok Build to Third-Party APIs on Windows

Install Grok Build on Windows and connect it to a third-party API relay using CC Switch in three steps.
This guide walks Windows users through setting up Grok Build as a faster alternative to OpenAI models. The three core steps are: running the official installer in PowerShell as Administrator (with TUN-mode proxy if needed); installing CC Switch, which supports nine AI clients; and entering your relay API key and URL (with the required /v1 suffix) in CC Switch, then validating via the Fetch Models button. Setting the context window to 200K is recommended to control costs, as 500K triggers tiered billing. The guide also clarifies that a model's answer to 'Who are you?' reflects its system prompt, not the actual version being called.
Why Configure Grok Build
Recently, many users have reported a decline in OpenAI model performance — slow response times and frequent lag. This has prompted them to look toward xAI's Grok. While Grok is natively available in CodeX, the experience there leaves something to be desired. Connecting to Grok Build through a third-party API relay has emerged as a more flexible, faster alternative.
This tutorial is aimed at Windows users and walks through configuring Grok Build locally step by step, using CC Switch to manage API settings. The process for macOS is similar and won't be covered separately here. The overall workflow isn't complicated — even beginners can follow along.
Step 1: Install Grok Build via PowerShell
Here's a small tip when searching for installation guides: use specific keywords rather than natural language descriptions. For example, searching "Windows Grok Build install" will yield far more accurate results than a conversational query.
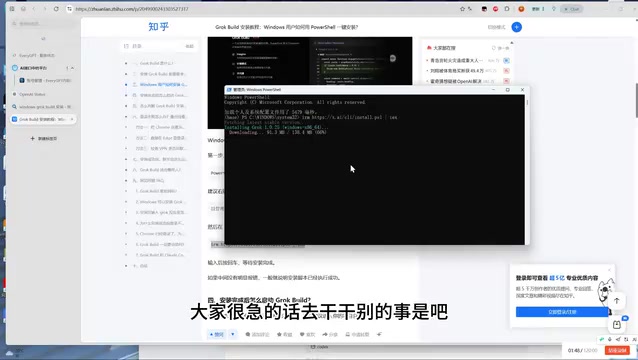
Here are the installation steps:
- Press the Windows key to open the Start menu
- Type
PowerShell— it's recommended to run it as Administrator to avoid permission issues - Copy the official installation command, paste it into the PowerShell window, and press Enter
Installation speed depends on your network conditions. If progress stalls for a long time, it's likely a network issue — you'll need to enable a proxy (VPN). In practice, the author encountered exactly this situation and only got through after switching to TUN mode (virtual network adapter). This is worth noting: using Grok and similar services generally requires a stable network environment.
After installation, type grok in the command line to verify it installed successfully. Under normal circumstances, a login screen will appear — since we don't have an official Grok account, simply press Ctrl+Q to exit. You don't need to actually log in.
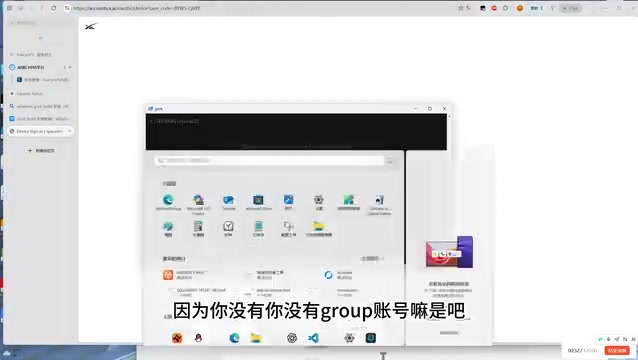
TUN mode is a proxy operation method that creates a virtual network adapter to intercept all traffic at the operating system level — including applications that don't support manual proxy settings, such as command-line tools and PowerShell. Unlike standard system proxy mode, TUN mode requires no per-application configuration and ensures that PowerShell installation traffic is also routed through the proxy. Popular proxy clients like Clash Verge and Mihomo Party support enabling TUN mode with a single click. If you experience stalls during installation, check whether your proxy tool has been switched to TUN mode rather than the standard "system proxy" mode.
Step 2: Install CC Switch for Configuration Management
CC Switch is a powerful API configuration management tool, and the author strongly recommends it for anyone using relay APIs. It supports configuration management for a wide variety of clients.
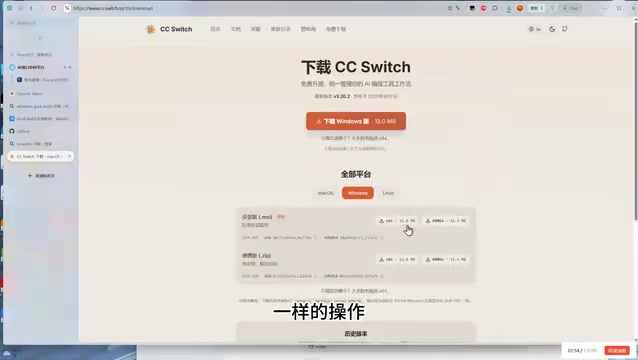
To download it: open GitHub, search for "CC Switch," go to the official page, and select the free download. Windows users should choose the X64 version regardless of whether you have an Intel or AMD Ryzen processor. The ARM version is only needed when running on a macOS ARM virtual machine environment (such as Parallels Desktop).
The download gives you an MSI installer package. Double-click to run it and click Next through the prompts to complete installation. Once installed, press the Windows key, type CC, and you'll find and open the app.
CC Switch supports a wide range of clients, including: Claude Code Client (relay version), Claude Desktop, CodeX, Gemini, Grok Build, Open Code, Open Claude, Hermes, and Pi — nine in total. The CodeX desktop version shares the same configuration as the Client version.
MSI installer packages are the standard installer format for Windows (Microsoft Installer). Compared to typical EXE installers, MSI files have their installation and uninstallation processes managed natively by Windows, offering more structured permission handling and easier enterprise deployment. If double-clicking an MSI file triggers a "Windows cannot verify the publisher" security warning, select "Run Anyway" to proceed. If a UAC permission prompt appears, click "Yes" to grant administrator privileges and complete the installation.
Step 3: Enter Your Custom API Configuration
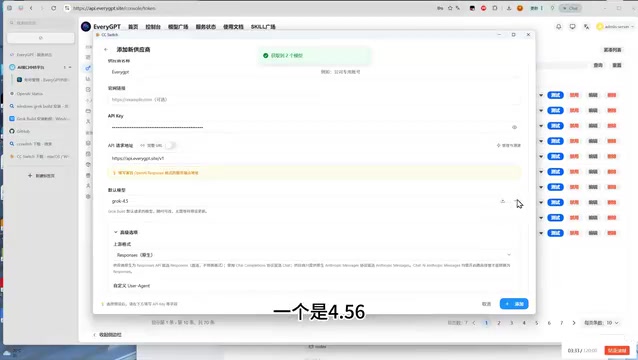
In the CC Switch interface, find the Grok Build option and click the plus (+) button to create a new custom configuration. Fill in the key fields as follows:
- Provider Name: Enter any name you like (e.g., the name of your relay service)
- Website URL: Can be left blank
- API Key: Enter the token generated from your relay service
To obtain a token: go to your relay service's dashboard, select "Add Token," give it a name, choose the corresponding Grok group (e.g., Grok Highway) from the token groups, submit, then copy the generated token and paste it into the configuration field.
Pay special attention to the API Request URL field — it must end with the /v1 suffix. Once filled in, click the "Fetch Models" button to validate: if a model list is successfully retrieved, the configuration is correct; if not, the URL or token is likely wrong.
A successful validation typically returns two text models (e.g., 4.5 and 4.6). Select the model version you need.
Context Window Configuration Recommendations
There is a Context Window parameter in the configuration that deserves special attention. Grok supports a maximum context window of 500K tokens, but costs increase in a tiered fashion beyond 200K.
If you're cost-conscious, it's recommended to set the limit to 200K to avoid overage charges. If cost isn't a concern and you want the maximum context capacity, you can leave it at the default 500K. This trade-off entirely depends on your use case and budget.
Context Window refers to the maximum number of tokens the model can read and process in a single conversation — encompassing all your historical messages, file contents, and the model's own responses. A larger window means the model can "remember" more conversation turns and document content, but the corresponding API cost rises linearly or in tiers. Grok's 500K context can hold approximately 375,000 English words (or a comparable volume of Chinese text), making it suitable for long document analysis or large codebase reviews. For everyday conversations and medium-scale coding tasks, 32K–128K is typically sufficient; 200K covers the vast majority of real-world use cases and represents a reasonable upper limit that balances capability with cost.
Verifying the Configuration and Real-World Experience
Once configured, the settings are enabled by default. Go back to the command line, type grok again — this time you won't need to log in and will enter the chat interface directly. Send a simple test message and you'll immediately notice Grok's response speed: near-instant replies, with a noticeably smoother experience than the current state of GPT.
Here's an interesting detail: if you ask the model "Who are you?", it might say it's version 4.5, even though the backend request is actually calling 4.6. This isn't a contradiction — the model's self-identification comes from its built-in system prompt, not the actual version being called. If you switch the configuration to 4.6 and ask again, it will likewise say it's 4.6. So questions like "Who are you?" have no value for determining the actual model version. If you want to verify capability, run real benchmark tasks instead.
Summary
The entire configuration process can be summarized in three steps: install Grok Build via PowerShell → install CC Switch as a management tool → fill in the relay API and token in CC Switch and validate. The core challenges are ensuring a stable network environment and correctly appending /v1 to the end of the API URL.
Given how quickly Grok is evolving, it's worth setting up this workflow in advance if you have a need for it. Compared to native clients, connecting via a third-party API offers clear advantages in speed and flexibility.
Related articles

How Big Can Stars Really Get? The Physical Limits of the Largest Stars
Red supergiants are the largest stars by volume, with radii up to 2,000 times the Sun, engulfing the inner solar system. But there is no precise upper limit on stellar size—models predict up to 15,000 solar radii. The most massive blue stars are far smaller than red supergiants—biggest and heaviest are two different things.

Apple HomeView Smart Display Full Feature Breakdown: Wall-Mount or Desktop, $299
Apple launches HomeView, a $299 smart display with wall-mount and desktop options, 12MP camera for facial recognition, smart home control, music playback, and recipe step-by-step cooking. Full breakdown of watch faces, apps, privacy, and cooking integration.

Where Did the Promised New Studio Go? Craft Computing Answers After Five Years
Craft Computing's host responds to viewer questions: the new studio promised five years ago was shelved as construction costs soared from $30,000 to $75,000, and was replaced by a 168-square-foot garage conversion.