Complete Vibe Coding Tutorial for Beginners: Build and Launch a SaaS Product from Scratch

A full methodology for planning with ChatGPT, building in five steps with Hostinger AI Builder, and launching an invoice SaaS.
This article uses an invoice SaaS called Simple Voice to demonstrate the full Vibe Coding process from planning to launch. The core idea is that Vibe Coding is not one-sentence app generation, but continuous iteration through build, check, and fix. It recommends planning in ChatGPT with a real design system, producing 4–6 short build prompts, then building homepage, authentication, database, invoice workflow, and subscription logic in Hostinger AI Builder before testing, mobile optimization, Stripe integration, and launch.
Title
Complete Vibe Coding Tutorial for Beginners: Build and Launch a SaaS Product from Scratch
Meta Description
A complete Vibe Coding beginner tutorial: plan with ChatGPT, build with Hostinger AI Builder, and develop a SaaS product from scratch with sign-up/login, invoice management, and subscription billing—then publish it to a custom domain. Includes prompt design techniques and a step-by-step build methodology.
Article Content
It's not hard to have AI generate a beautiful page. What's hard is making it actually usable for real users—sign-up and login, data persistence, subscription billing, and data still being there after a refresh. That's exactly the problem this tutorial solves: using Vibe Coding to plan, design, build, test, and launch a complete invoice SaaS product from scratch.
The whole process is not as simple as "generate an app with one sentence." The core methodology is: first do deep planning with ChatGPT, then build step by step with Hostinger AI Builder, and finally deploy to a custom domain. In between, there's a lot of prompt design, design system selection, feature testing, and mobile optimization.
What Is Vibe Coding?
Vibe Coding is a way of building software by describing requirements in natural language and having AI generate the code. You don't need to hand-write every line of code. Instead, you describe what you want to build, AI generates the code, you test the result, find problems, and ask AI to improve it.
The basic workflow can be summarized in three steps: Build → Check → Fix. Create the first version, review what AI generated, identify issues, and keep iterating until the app works properly.
The most common mistake beginners make is opening an AI builder tool, typing "make me an app," and expecting a perfect product immediately. The quality of AI output depends on the quality of your guidance—the clearer the plan, the more specific the requirements, and the finer the step breakdown, the better the final result.
Projects suitable for Vibe Coding beginners include: landing pages, calculators, task trackers, invoicing tools, and small business tools. These projects are focused, practical, and easier to deliver completely. It's not recommended to start with the next Amazon-level complex platform right away.
Tool Selection: Why Use Hostinger AI Builder
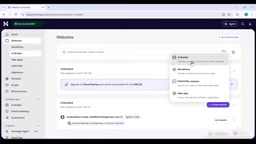
Beginners can choose Loveable, Base44, and Hostinger AI Builder, which can create complete applications with core features such as databases and user accounts. Experienced developers can use Cursor and Claude Code, but those require more technical decision-making.
This tutorial chooses Hostinger AI Builder because it integrates domain registration, hosting, payment integration, and AI building capabilities within the same platform. The author registered the jfdtutor.com domain and connected the site. Domain resolution may take from a few hours to a day or two, but you can continue building during that time.
The tool panel provides several useful features: AI credit viewing and purchasing (100 credits for about $5, 50 credits for about $20), project duplication (convenient for experimenting without affecting the main site), account sharing (team collaboration), and a completion sound. The built-in AI Agent can be used to chat at any time without consuming credits.
AI credits are a common billing unit on hosted AI building platforms like this. Unlike direct per-call charging, credits are usually designed as purchasable quota packages, and every generation, modification, or iteration during the build process consumes a certain amount. So it's important to understand the pace of credit consumption: the clearer the plan and the more precise the prompts, the less rework there is, and the less credits are wasted. This also explains why the author moves the most communication-heavy planning work into ChatGPT and only consumes build platform credits when it's time to actually turn ideas into runnable code.
Planning Phase: Designing the Entire Product with ChatGPT
This is the most critical and most easily skipped part of the whole process. The author did not plan directly in the AI Builder because that would consume credits and be less flexible. Instead, the complete planning work was done in ChatGPT.
Step 1: Generate Homepage Design Screenshots
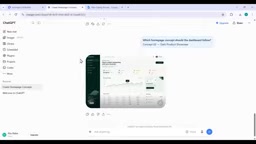
The first prompt asked ChatGPT to generate three homepage design screenshots in different styles for a premium invoicing SaaS called "Simple Voice." The key technique was attaching a design system file—the author downloaded Airtable's design system from getdesign.md, so ChatGPT could design based on real colors, fonts, and component specifications.
ChatGPT generated three options: minimalist, professional business, and creative. The author chose the second one—professional and clean, with a green palette that fits an invoicing product's positioning of "handling money."
A design system is a set of specifications that constrains a product's visuals and interactions, usually including color tokens, typography hierarchy, spacing rules, corner radius, shadows, and definitions of reusable components (buttons, input fields, cards). Its value is that it translates "looking good" into concrete rules AI can follow. If you only tell AI to "make it look professional," the generated result will be highly random. But after providing a real design system file, AI works within a clear palette, font weights, and component styles, and it's easier to keep visual consistency across different pages. This is exactly why the author downloaded Airtable's design system.
Step 2: Generate Dashboard Design
The third prompt focused on dashboard design, requiring sidebar navigation, a top bar with search and notifications, a create invoice button, total revenue/paid/pending/overdue statistic cards, revenue charts, and a recent invoices list. The result ChatGPT generated left the author "amazed."
Why generate screenshots first instead of directly generating build prompts? The author gives two reasons: first, you can see the general direction of the final result before starting; second, having AI "visualize" first and then output the build plan leads to deeper understanding.
Step 3: Generate a Step-by-Step Build Plan
The fifth prompt was the core of the entire planning phase—it asked ChatGPT to generate a 4-to-6-step build plan, with each step's prompt no longer than 2000 characters, each step focusing only on the current task, continuing from the previous step, and explicitly requiring the AI Builder not to redesign already completed sections.
This constraint is very important. The author points out that many AI building tools accidentally redesign earlier pages when executing later steps, causing previous work to be overwritten.
The prompt length limit (about 2000 characters) is not arbitrary; it is directly related to the model's context management and output stability. An overly long single prompt mixes multiple unrelated tasks together, and the model easily "forgets" earlier constraints later on, resulting in omissions or self-overwriting. After splitting the build into 4 to 6 short steps, each step is executed within a smaller decision space, and when something goes wrong, it's easier to pinpoint exactly which step and which sentence in the prompt caused the issue. This "small-step submission" approach is consistent with incremental development in software engineering.
Build Phase: Completing the SaaS in Five Steps
After receiving the step-by-step prompts generated by ChatGPT, the author began building gradually in Hostinger AI Builder.
Step 1 was building the homepage. AI Builder generated a complete homepage including product showcase, feature highlights, a three-step process explanation, template browsing, user reviews, and a pricing section. The author's first reaction was that it "didn't look like a rough AI-generated product at all."
Step 2 was building the authentication system and dashboard. AI Builder generated a sign-up form, login system, password reset, and a complete backend including settings, invoices, clients, and dashboard. The author created a test account and verified that account creation, dashboard access, and business settings modification were indeed functional.
Step 3 was building the database and core business logic. This step involved user profiles, client management, products and services, invoice line items, automatic amount calculation, and invoice statuses (draft/paid/pending/overdue). Each record belonged to the currently logged-in user, with data isolation between users.
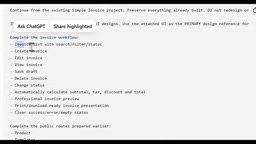
Step 4 was refining the invoice workflow and public pages. The invoice list supported search, filtering, status editing, saving drafts, and deletion. The previously reserved template page, product page, pricing page, and resources page were all filled with actual content.
Step 5 was implementing subscription logic. The free plan allowed up to 3 invoices per month, while the paid plan at $3/month offered unlimited invoices, including current plan display, billing status, and cancellation and renewal handling.
Testing and Launch
After all pages were built, the author performed complete end-to-end testing: creating clients, generating invoices, previewing invoices, and printing or saving as PDF. The generated invoices included sender information, client information, line items, tax, discounts, and totals.
Payment integration was completed through Hostinger's e-commerce module connected to Stripe. For mobile adaptation, the author used an optimization prompt to center text, fix dead links, and adjust responsive spacing.
Finally, the publish button was clicked, and the website went live on the custom domain.
Key Takeaways
The most valuable part of the entire project is not the final product itself, but this methodology: Plan → Build step by step → Test → Fix → Launch. The author repeatedly emphasizes that Vibe Coding is not about "generating an app with one sentence," but rather requires your continuous participation in planning, reviewing output, and making decisions.
A few techniques worth remembering: use real design system files to guide AI design; have AI visualize before building; generate step-by-step prompts instead of one giant prompt; explicitly require AI not to overwrite completed work; and actually test after each build step.
Once you understand this process, you can use the same way of thinking to build completely different applications.
Additional Background
Subscription billing and Stripe's role: A SaaS's payment capability is usually not implemented by the build platform itself, but handled by a professional payment service provider. Stripe handles payment information collection, subscription cycle management, charging and failed payment retries, and invoice and billing records. The platform side only needs to do two things: create subscriptions (or guide users to pay via a checkout page) and listen for payment status changes to determine whether the user is currently on the free or paid plan. In this tutorial, the distinction between "3 invoices per month" and "$3/month unlimited invoices" is enforced precisely through this status check, so synchronizing status after a successful payment is a step that must be tested.
One-line Summary
The complete methodology for planning with ChatGPT, building in five steps with Hostinger AI Builder, and launching a full invoice SaaS.
Paragraph Summary
Using the construction of an invoicing SaaS called Simple Voice as an example, this article fully demonstrates the entire Vibe Coding process from planning to launch. The core idea is that Vibe Coding is not "generating an app with one sentence," but continuous iteration through "Build → Check → Fix," and output quality depends on how clearly requirements are described and how finely steps are broken down. The author recommends first completing planning in ChatGPT—using real design system files to generate homepage and dashboard design screenshots, then producing 4 to 6 build prompts of no more than 2000 characters each, and then sequentially completing five build steps in Hostinger AI Builder: homepage, authentication system, database, invoice workflow, and subscription logic, testing each step in practice. Finally, launch is completed through end-to-end workflow verification, mobile adaptation, and Stripe payment integration.
Related articles

How Big Can Stars Really Get? The Physical Limits of the Largest Stars
Red supergiants are the largest stars by volume, with radii up to 2,000 times the Sun, engulfing the inner solar system. But there is no precise upper limit on stellar size—models predict up to 15,000 solar radii. The most massive blue stars are far smaller than red supergiants—biggest and heaviest are two different things.

Apple HomeView Smart Display Full Feature Breakdown: Wall-Mount or Desktop, $299
Apple launches HomeView, a $299 smart display with wall-mount and desktop options, 12MP camera for facial recognition, smart home control, music playback, and recipe step-by-step cooking. Full breakdown of watch faces, apps, privacy, and cooking integration.

Where Did the Promised New Studio Go? Craft Computing Answers After Five Years
Craft Computing's host responds to viewer questions: the new studio promised five years ago was shelved as construction costs soared from $30,000 to $75,000, and was replaced by a 168-square-foot garage conversion.