Configuring a WhatsApp Trigger in n8n: 3-Minute Automated Messaging Workflow Tutorial
Three steps to automate WhatsApp messages in n8n using Meta developer credentials and a Webhook trigger.
This article explains how to use n8n's WhatsApp Trigger to automate message responses. The process covers three steps: registering an app on Meta for Developers, adding the WhatsApp product and copying credentials (App ID, Client ID, Client Secret), then adding a WhatsApp Trigger node in n8n and completing the Webhook event subscription. Key challenges lie on the Meta platform side, particularly credential security and correct Webhook configuration. The setup is ideal for customer service auto-replies and notification workflows.
Connecting WhatsApp Automation with n8n
n8n is an open-source workflow automation platform that lets you connect a wide range of services into automated pipelines. This article is based on a hands-on tutorial that walks through how to configure a WhatsApp Trigger in n8n to enable automated message responses. The core of the entire process is establishing the credential connection between the Meta Developer Platform and n8n.
Note: the original tutorial is primarily a spoken walkthrough demo. The steps below have been reorganized into clear, actionable instructions for easy follow-along.
Step 1: Create a Meta Developer App
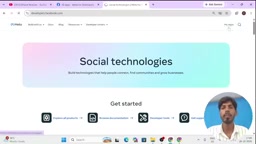
To use WhatsApp-related trigger functionality, you first need to register an application on the Meta (formerly Facebook) Developer Platform.
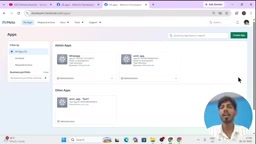
To do so, open a browser and search for "Meta for Developers" or "Facebook Developer Account." Once on the platform, click My Apps. If you aren't already logged in, sign in with your Facebook account.
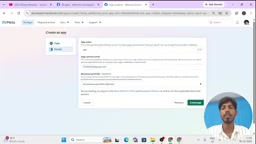
After logging in, click Create App, enter an app name (the tutorial uses "ek" as an example), then follow the wizard and click Next at each step. During the app type selection, choose the option that fits your use case. Finally, enter your Facebook account password to confirm, and your app will be created.
Step 2: Add the WhatsApp Product and Obtain Credentials
Once the app is created, you can add various Meta products to it, including Messenger, Instagram, WhatsApp, and App Events. This tutorial focuses on WhatsApp.
After adding the WhatsApp product, the critical next step is obtaining your app credentials. Copy the App ID — you'll need it when configuring the connection in n8n. In addition to the App ID, a complete credential setup typically involves parameters such as Client ID and Client Secret, which can be found on the Settings page in the Meta Developer dashboard.
Meta's WhatsApp Business API comes in two tiers: the Cloud API for small and medium businesses (hosted on Meta's servers, no infrastructure required) and the On-Premises API for large enterprises (self-hosted). n8n's WhatsApp Trigger node connects to the Cloud API, so when you add the WhatsApp product in the Meta Developer dashboard, you're working with the Cloud API version under the WhatsApp Business Platform. Also note that Meta enforces a test mode restriction on new apps: before submitting your app for review, you can only send messages to pre-registered test numbers, and incoming messages are similarly limited to whitelisted numbers. You'll need to complete the app review process before going live — this typically takes several business days.
Step 3: Configure the WhatsApp Trigger in n8n
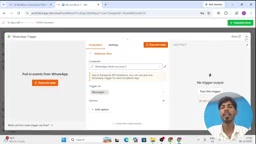
Back in the n8n workflow editor, create a new workflow and add a WhatsApp Trigger node. Double-click the node to open its configuration panel, then enter the credentials you obtained from the Meta platform (e.g., Client ID, Client Secret).
Once the credentials are verified, you can configure the trigger conditions — such as subscribing to specific events or specifying which phone number should receive messages. With the configuration complete, the workflow will automatically trigger whenever a WhatsApp message is received, kicking off the downstream automation actions.
Webhooks are the underlying mechanism that makes the WhatsApp Trigger work. When a WhatsApp user sends a message to your number, Meta's servers send an HTTP POST request to a URL you've registered in advance. n8n listens on that URL and uses the incoming request to start the workflow. This means your n8n instance must be deployed on a publicly accessible server (or temporarily exposed via a tunneling tool like ngrok) so Meta can successfully deliver the callback. When configuring the Webhook in the Meta Developer dashboard, you'll need to enter the callback URL generated by n8n along with a custom Verify Token. Meta will send a GET request to that URL for a handshake verification — the Webhook only activates after this check passes. If you're using n8n Cloud, the callback URL is already publicly accessible, so you can skip the server configuration steps.
Tips and Considerations
The trickiest part of this setup isn't on the n8n side — it's obtaining credentials from the Meta Developer Platform. A few things worth keeping in mind:
- Credential security: Your App ID, Client Secret, and similar values are sensitive. Never share them publicly or commit them to a code repository.
- Event subscriptions: The WhatsApp Trigger requires that you correctly configure the Webhook and subscribe to the relevant fields in the Meta dashboard to ensure message events are captured.
- Test before going live: Before deploying to production, use a test phone number to verify that the entire workflow triggers as expected.
The original tutorial notes that the author has a more detailed video on their YouTube channel covering the full walkthrough of event subscriptions and message routing.
Summary
With n8n's WhatsApp Trigger, developers and operations teams can quickly build automated messaging workflows suited for use cases like customer service auto-replies and notification broadcasts. The core process comes down to three steps: create an app on the Meta platform, obtain and copy your credentials, then configure the trigger node in n8n. Once you have a handle on credential management — the key piece of the puzzle — you'll be able to complete the entire automation chain with ease.
Related articles

Googlebook In-Depth Review: Can Google's New Laptop Replace the Chromebook?
In-depth Googlebook review: Google Book OS on Android 17, Pixel ecosystem integration, Gemini semantic search, and how it stacks up against Chromebook and MacBook Air on price and apps.

Python in Practice: Build an MCP Server from Scratch to Give LLMs Real-Time Web Data
Step-by-step guide to building an MCP server with Python and FastMCP, connecting it to Claude Code and Claude Desktop, and enabling LLMs to answer questions with live web data.

The Battle for ICANN's New Top-Level Domains: Meta and OpenAI Race to Claim .agent and .agi
Meta and OpenAI compete for .agent and .agi in ICANN's new TLD round; GTA VI nears launch amid leaks; Joe Rogan signs ~$250M Spotify renewal.