DeepSeek Harness Installation and Hands-On Tutorial: Getting Started with AI Agents from Scratch
Based on the Codex architecture, the DeepSeek Harness client extends local AI capabilities, and this tutorial details installation and plugin configuration.
This article introduces how to install and get started with the DeepSeek Harness client. Based on the Codex architecture, it supports reading and writing local folders and greatly expands capabilities via plugins, such as letting the AI read Bilibili content, generate videos, and connect to chat software. Installation involves two steps: set up Node.js (version 22+, on the D drive, verified with node -v), then install the Harness client. Plugins can be installed via chat (consumes credits), a marketplace (no credits), or the command line (advanced users).
After the DeepSeek Harness client launched, it extended the cost-effectiveness advantage of DeepSeek models to the local desktop: built on the Codex architecture, it can read and write local folders, integrate with a vast plugin ecosystem, and turn a chat window into a workbench for executing automated tasks and multi-agent collaboration. This article, based on a Bilibili tutorial, covers the key steps to get started from scratch—from environment setup to plugin configuration.
Why DeepSeek Harness Is Worth Installing
The web version of DeepSeekAd can only chat, while the Harness client fills in the local capabilities. According to the demonstration by the Bilibili creator in the tutorial, its interface is similar to the web version, but it can add local folders and directly read, modify, and save files—something the online version cannot do. Model selection is also centralized within the client, where several DeepSeek models are available.
What really sets it apart is the plugin mechanism. Harness follows Codex's plugin architecture, and installing quality plugins dramatically expands its capability boundary: letting the AI read content on Bilibili, reading content out for a knowledge base to manage, generating videos, organizing knowledge directories, and even connecting to chat software to converse with others. These scenarios are listed one by one in the tutorial, showing that the client is positioned not as "another chat box" but as an assemblable AI assistant foundation.
Step 1: Set Up the Node.js Environment
Installation has two major steps, the first being installing Node.js. Many AI tools (including Codex-type tools) are based on the Node.js environment, so you need to prepare it first.
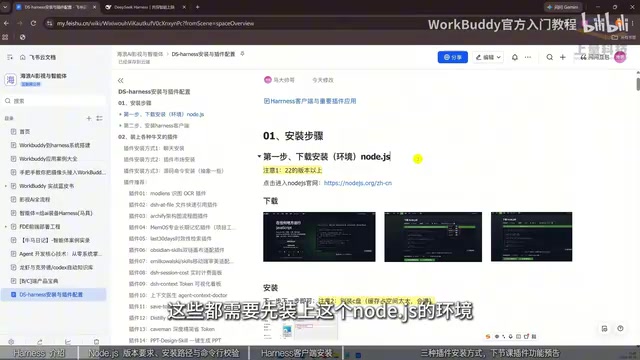
The tutorial gives two very specific points to note: preferably choose version 22 or above, not versions below 22; change the installation path to the D drive to avoid taking up C drive space and generating large amounts of cache files that fill up the system drive. When downloading, you can choose ZIP or MSI—MSI can be installed with a direct click, while ZIP needs to be extracted.
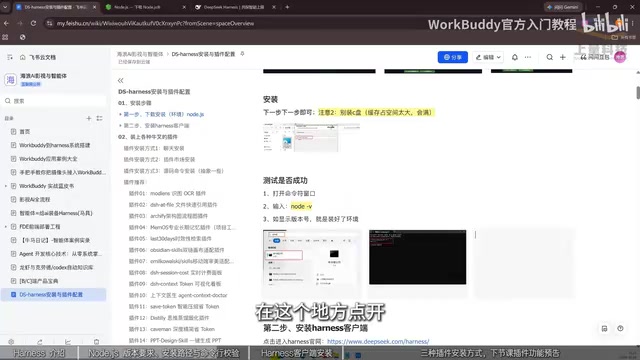
After installation, you must verify. Open the command line (type CMD if you can't find it) and enter node -v (with a space between node and -v). If a version number appears and is roughly around 20, the environment is ready. Don't skip this step, otherwise you may run into problems when installing the client later.
Node.js is a JavaScript runtime environment based on the Chrome V8 engine that lets JavaScript run locally on a computer outside the browser. Many modern AI tools and command-line applications rely on Node.js as their runtime foundation, because its package manager npm has the world's largest open-source library ecosystem, allowing developers to quickly integrate various functional modules. For ordinary users, installing Node.js is equivalent to preparing a "runtime environment" for subsequent software—without it, clients developed based on Node.js cannot start. The tutorial emphasizes that the version should be above 22 because newer versions usually include performance optimizations, security patches, and support for new features, while older versions may cause compatibility issues. Changing the installation path to the D drive is to prevent the system drive (usually the C drive) from being filled up by caches and dependency packages, which would affect system speed.
Step 2: Install the Harness Client
Once the environment is ready, click the link provided in the tutorial to go to the download page, which will offer the corresponding file based on your system. Windows users should choose the Windows version to download, right-click to open the installer, and again it's recommended to place the installation location on the D drive. Click "Install Now," and the interface will open automatically when finished.
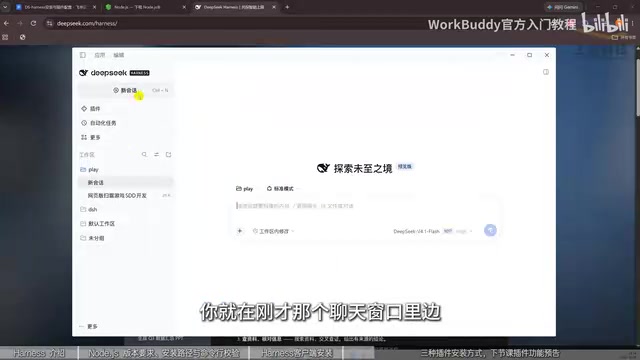
After installation, familiarize yourself with two areas first: one is the entry point for adding local folders—once added, the AI can read and write to that directory; the other is the model selection area. You can learn the rest as you go, but focus on plugins first, because the richness of plugins directly determines what Harness can do.
Three Ways to Install Plugins, Choose as Needed
The tutorial summarizes plugin installation into three paths, each with its own applicable scenarios.
Method 1: Let the AI install it itself. When you know the plugin name and its GitHub link, just send the link to it in the chat window and let it install itself. This is the most effortless way, but it consumes tokens and credits.
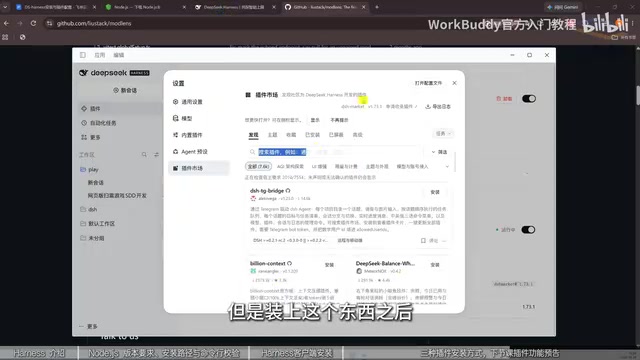
Method 2: Install via a plugin marketplace. Enter the marketplace name at "Add Plugin" (the tutorial uses the Markit marketplace as an example), click install, and once detected, click "Launch Now" to enter the marketplace and browse. In "More—Settings" you can find installed marketplaces, which contain a huge number of plugins, support search and filtering, and have recommended slots—one click installs them without consuming credits.
Method 3: Command-line installation. Take the "external vision plugin" mentioned in the tutorial as an example: native DeepSeek cannot read local images, but with this plugin installed it can recognize information such as the people and clothing in an image. To install, find the install command on the plugin page, copy it, and execute it in the command line. This method is a bit abstract for beginners, so the first two are more recommended.
If you don't know what plugins are available, you can just ask DeepSeek to give you a list of popular and useful plugins, then pick from them.
A plugin marketplace is a platform that centrally displays, searches, and installs plugins, similar to an app store on a phone. In Harness, marketplaces are maintained by third parties or officially, and users can add one by entering its name, after which they can browse the large number of plugins it contains. Marketplaces usually provide categories, search, filtering, and recommended slots to help users quickly find the plugins they need. Compared with letting the AI install automatically, installing from a marketplace usually doesn't consume tokens or credits, because the plugin package is distributed directly by the marketplace without the model generating installation instructions. The existence of the marketplace mechanism lowers the barrier to plugin discovery and installation, enabling non-technical users to easily extend the client's capabilities. The tutorial uses the Markit marketplace as an example, showing that after adding a marketplace you can install plugins with one click—this is the most economical and efficient way.
The command line is an interface for operating a computer by entering text commands, commonly seen in Windows CMD or PowerShell, macOS Terminal, and so on. In plugin installation scenarios, the command-line method usually requires users to copy the install command provided on the plugin page and paste it into the command line to execute. This method is abstract for beginners because it involves concepts such as paths, permissions, and environment variables, and there may be no graphical feedback after execution, so users must judge for themselves whether it succeeded. However, command-line installation often enables finer control, such as specifying the installation directory, choosing a version, or installing a development version of a plugin. For advanced users, the command line is also an effective means of troubleshooting installation issues. The tutorial recommends that beginners prioritize the first two methods and try the command line after becoming familiar, to lower the learning curve.
Common Pitfalls and Advice
- A Node.js version below 22 and installing to the C drive are the two easiest pitfalls to fall into, and the tutorial explicitly reminds you to avoid them.
- After installing Node.js, be sure to verify with
node -vand continue only once the version number meets the requirement. - Prefer installing plugins from the marketplace to save credits; chat-based installation suits specific plugins with known GitHub links; leave the command-line method for advanced users.
The tutorial author says the next lesson will explain in detail the installation methods and business value of the most commonly used plugins. For readers who want to build a personal AI workflow, getting the environment and client installed solidly first and then gradually expanding plugins is the more reliable path.
One-line Summary
Based on the Codex architecture, the DeepSeek Harness client extends local AI capabilities, and this tutorial details installation and plugin configuration.
Paragraph Summary
This article introduces how to install and get started with the DeepSeek Harness client. Based on the Codex architecture, the client supports reading and writing local folders and greatly expands its capabilities through the plugin mechanism, such as letting the AI read Bilibili content, generate videos, and connect to chat software. Installation has two steps: first install the Node.js environment, preferably version 22 or above and on the D drive, and verify with node -v after installation; then install the Harness client, choosing the version for your system, again preferably on the D drive. There are three ways to install plugins: letting the AI install automatically via chat (consumes credits), installing via a plugin marketplace (no credits consumed), and command-line installation (suitable for advanced users). The article also warns of common pitfalls, such as a Node.js version that's too low or installing to the C drive, and recommends prioritizing marketplace installation to save credits.
Related articles

FastAPI Learning Path: From Beginner to AI Project Practice
A Bilibili creator recommends *FastAPI Web Development: From Beginner to Advanced with Practical Projects*. This article outlines the FastAPI learning path: target audience, the 15-chapter six-part structure, project-driven learning, and practical directions from web backend to AI Agents, helping beginners avoid detours.

Reverse-Engineering Taobao's sign Signature Parameter with AI in 10 Minutes: A Practical Walkthrough
Based on a Bilibili hands-on demo, this article explains how to combine DeepSeek with vision models to automatically reverse-engineer Taobao's sign signature parameter, track dynamic titter and token values, and successfully scrape product data within ten minutes—while analyzing the capability boundaries and compliance risks of AI Agents in crawler reverse engineering.

LangChain+MCP from Beginner to Practice: A Deep Dive into the Bilibili Tutorial
A deep dive into a Bilibili LangChain+MCP tutorial: framework positioning, agent abstraction, and MCP protocol basics. Why not hand-build frameworks, and how beginners can follow the code-practice path.