DeepSeek Harness Step-by-Step Installation Guide: From Environment Setup to First Run

A beginner-friendly walkthrough for setting up DeepSeek Harness from Node.js to first run.
This guide, based on a hands-on Bilibili tutorial, walks beginner developers through the five key stages of getting DeepSeek Harness running locally: installing and verifying Node.js, installing Harness via the command line, applying for a DeepSeek API Key with sufficient balance, setting up an isolated workspace with Workspace Write permissions, and creating a desktop shortcut for daily use. It also highlights the five most common pitfalls: Node.js install failures, unsaved API Keys, insufficient balance, accidentally closing the terminal, and overly broad permission settings.
DeepSeek Harness is a tool that lets you invoke DeepSeek models directly from a local terminal to complete tasks, and it has been gaining traction in the Chinese developer community. That said, many beginners get stuck at environment configuration, API Key setup, and workspace settings. This article is a written walkthrough based on a highly-rated hands-on tutorial from Bilibili, walking you through every key step so you can avoid the most common pitfalls.
Step 1: Install the Node.js Runtime
DeepSeekAd Harness depends on Node.js to run, so installing it is the first prerequisite. Open your browser, search for Node.js, go to the official website, click Download, and select the Windows Installer on the left to download the main installer. Once downloaded, double-click it and click Next through the entire wizard — no special configuration is needed.
After installation, verify it worked. Press Win + R, type cmd, and press Enter to open a Command Prompt window. Type the version check command and press Enter. If the terminal returns something like v20.x.x, Node.js is correctly installed. If you get an error, uninstall and reinstall.
Step 2: Install Harness via the Command Line
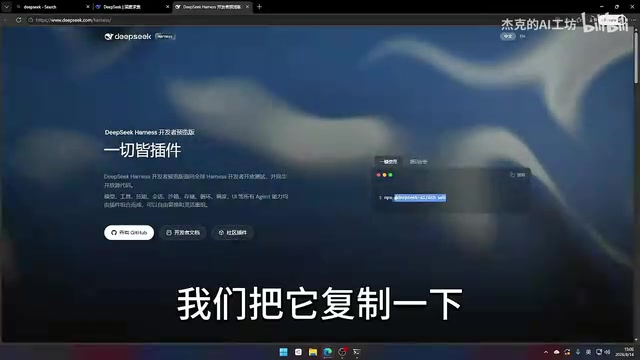
With the environment ready, you can install DeepSeek Harness itself. Go to the DeepSeek website, switch to Chinese in the top-right corner, find the Harness entry in the dropdown menu, and the page will provide an installation command.
Copy that command, paste it into your Command Prompt window, and press Enter. During execution you'll be prompted to type Y to confirm — do so and press Enter to begin the download. This step pulls in a number of dependencies and may take a while. Large files can appear to stall for a few minutes; this is normal, so just be patient.
Once the download finishes, the terminal will display a local HTTP link. Hold Ctrl and click it with the left mouse button to open it, or copy it manually into your browser's address bar. Read the prompt on the page and click Continue.
Step 3: Apply for and Configure an API Key
Harness has no built-in inference capability — it calls DeepSeek's online API — so configuring an API Key is mandatory.
Head back to the DeepSeek website and open the API Open Platform. Log in with your phone account. One critical prerequisite: your account needs sufficient balance. First-time users will need to top up. The tutorial notes that 10 CNY can last a long time for light usage, though actual consumption depends on the models you call and the volume of tasks.
After logging in, click API Keys in the left sidebar, then Create New API Key, give it a memorable name, and copy the generated key. Note: an API Key is typically shown in full only once at creation — save it immediately.
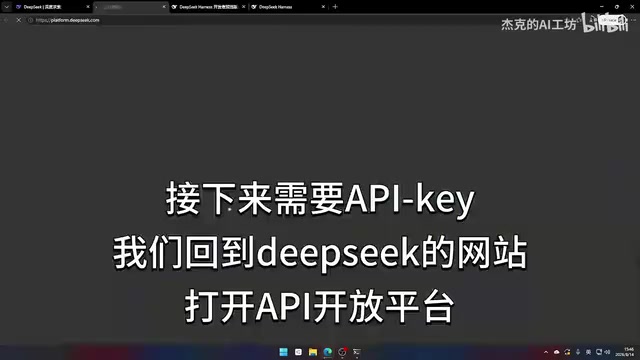
Paste the copied key into the Harness configuration page to complete authorization.
What is an API Key? An API Key (Application Programming Interface Key) is an identity credential string used to verify the caller's identity to a service provider and track usage for billing. DeepSeek's API uses token-based billing — tokens are roughly text fragments, with one token corresponding to approximately 1.5–2 Chinese characters. Pricing varies significantly across models: lightweight models like V3-Flash are extremely cheap, while flagship V3/R1 models can cost several to dozens of times more. For everyday testing, using Flash-series models is recommended to keep costs down. If your API Key is leaked, others can consume your balance, so never commit keys to public repositories like GitHub or send them in plaintext over chat apps.
Step 4: Create a Workspace and Choose a Model
Harness manages projects using Workspaces. It's best practice to use a separate folder for each project to avoid clutter and accidental modifications. Right-click in a suitable location to create a new folder, give it a memorable name, and then select that folder as your workspace in the configuration.
Next, configure the runtime parameters:
- Mode: The tutorial uses "Creative Mode"
- Model: Select the V4-Flash model (lightweight and fast, well-suited for everyday tasks)
- Permission scope: Select Workspace Write to restrict write access to the workspace folder — this is an important security setting that prevents Harness from accidentally modifying files outside your project
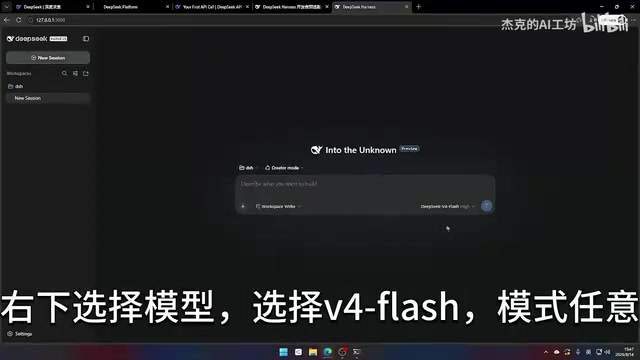
Once configured, run a quick test — ask it to introduce itself, for example — to verify the entire chain is working. One important reminder: do not close the Command Prompt window while using Harness, or the session will be interrupted.
What is Workspace Write permission? Workspace Write is a sandboxed access control mechanism. When Harness runs in AI Agent mode, it has the ability to autonomously read and write the file system. Without restrictions on permission scope, the model could accidentally modify or delete files outside the workspace — including system files or other projects — while executing a task. Locking permissions to the Workspace folder gives the AI a defined "operation sandbox": even if a task goes off course, the impact is strictly contained within that directory. This design philosophy is consistent with the principle of least privilege in containerization technology, and it's a security habit worth developing whenever using any AI tool with file system access.
Step 5: Create a Desktop Shortcut (Optional)
Manually launching Harness through the command line every time can be tedious. You can create a desktop shortcut to simplify the process.
Right-click an empty area of the desktop, select New → Shortcut, paste in the installation command (it also serves as the launch command), add a space followed by --verbose, click Next, and give it a name such as "DeepSeek Harness" or the abbreviation "DH".
Once created, close the existing Command Prompt window, then double-click the new shortcut. It will display an HTTP link on startup — hold Ctrl and click it to open. This becomes your standard daily launch workflow.
Bonus: Customize the Shortcut Icon
If you want the shortcut to look better, you can replace its icon with the DeepSeek logo. Go to the DeepSeek website, scroll down to the API documentation page, right-click the logo in the top-left corner, and select Save image as to save the PNG file.
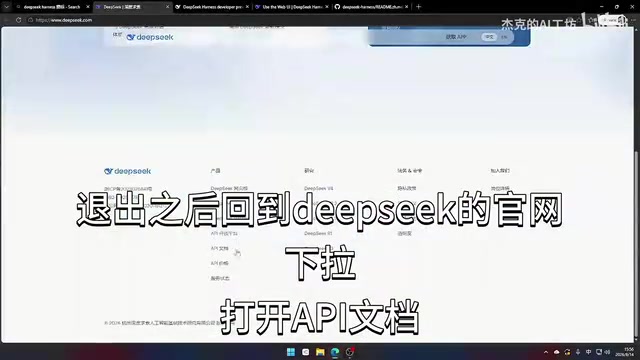
Since Windows shortcut icons require ICO format, search for a "PNG to ICO" online converter, upload the saved PNG, convert it, and download the ICO file. Back on the desktop, right-click the shortcut and go to Properties → Change Icon → Browse, then select the ICO file and confirm.
Summary: Common Pitfalls to Watch Out For
Overall, the installation barrier for DeepSeek Harness is not high, but beginners most commonly get stuck at these points:
- Node.js verification fails — usually caused by an incomplete installation or a PATH issue; reinstalling typically fixes it
- API Key not saved — the key is only shown once; if you miss it, you'll have to generate a new one
- Insufficient account balance — you need to top up before calling the API, or tests will fail immediately
- Accidentally closing the Command Prompt window — this will interrupt the session
- Overly broad permissions — always restrict to Workspace scope to minimize the risk of unintended changes
Following the steps above, most users should be able to complete the full journey from environment setup to a working first run without issues.
Related articles

How Big Can Stars Really Get? The Physical Limits of the Largest Stars
Red supergiants are the largest stars by volume, with radii up to 2,000 times the Sun, engulfing the inner solar system. But there is no precise upper limit on stellar size—models predict up to 15,000 solar radii. The most massive blue stars are far smaller than red supergiants—biggest and heaviest are two different things.

Apple HomeView Smart Display Full Feature Breakdown: Wall-Mount or Desktop, $299
Apple launches HomeView, a $299 smart display with wall-mount and desktop options, 12MP camera for facial recognition, smart home control, music playback, and recipe step-by-step cooking. Full breakdown of watch faces, apps, privacy, and cooking integration.

Where Did the Promised New Studio Go? Craft Computing Answers After Five Years
Craft Computing's host responds to viewer questions: the new studio promised five years ago was shelved as construction costs soared from $30,000 to $75,000, and was replaced by a 168-square-foot garage conversion.