LLM App Development in Practice: Setting Up the Environment for Function Calling & Tool Integration

Complete environment setup guide for LLM function calling & tool integration — from virtual env to frontend launch.
This article guides developers entering Stage 5 of LLM application development — function calling and tool integration — based on the "花菜编程" Bilibili tutorial series. It covers the full setup process: creating a virtual environment inside the `fastAPI` backend directory in PyCharm, configuring the `.env` file with database credentials and a Zhipu AI API key, running the SQL script to initialize 8 database tables, pulling frontend and backend dependencies in parallel, and launching the project backend-first before verifying with the admin account. Three common pitfalls — wrong venv path, unconfigured API key, and stale PyCharm cache — are highlighted to help developers build a solid foundation before tackling real tool integration.
Large language model application development enters its fifth stage, where the focus shifts from foundational groundwork to hands-on implementation. The core theme of this stage is Function Calling and Tool Integration, which lays the groundwork for subsequent topics like MCP, RAG, Agents, and multi-agent collaboration. This article is based on the teaching recordings by Bilibili creator "花菜编程" (Cauliflower Coding), and walks through the complete environment setup process — from obtaining the source code to launching the front and back ends — helping developers who want to jump in at Stage 5 get the project running quickly.
Stage Overview: From Dry Fundamentals to Hands-On Practice
Across the full LLM application development learning path, the first four stages are mostly foundational and can feel tedious. Starting from Stage 5, the project begins to take on the shape of a true "intelligent agent" — using function calling to enable the LLM to proactively invoke external tools, such as weather queries or time lookups.
According to the author's roadmap, upcoming topics will include MCP (Model Context Protocol), RAG (Retrieval-Augmented Generation), Agents, and multi-agent collaboration. Think of function calling as the first step in giving the model "hands and feet" — it determines whether the model can break out of pure text conversation and interact with real-world tools and data.
Developers who completed Stage 4 can continue directly from their existing codebase. Those starting from Stage 5 will need to first obtain the source code from the end of the previous stage (labeled as the "057 end source" or "058 start source" in the tutorial) as their baseline.
Function Calling is a key capability extension for large language models: developers pre-define a set of "tool functions" (e.g., querying the weather, getting the current time, searching a database) and pass their names, parameter formats, and descriptions to the model. When a user's question triggers a relevant need, the model doesn't generate an answer directly — instead, it outputs a structured "call instruction" telling the application layer which function to invoke and with what parameters. The application layer executes the function and returns the result to the model, which then generates a final response based on real data. This mechanism breaks the limitations of pure text conversation, enabling the model to interact in real time with external APIs, databases, and even operating systems. It is the core underlying capability for building Agents. MCP (Model Context Protocol) is an open protocol released by Anthropic to standardize how models connect with external tools and data sources — think of it as a "standardized interface layer" for function calling. RAG (Retrieval-Augmented Generation) compensates for a model's knowledge cutoff by dynamically retrieving from external knowledge bases at inference time. Together with function calling, these three form the foundational pillars of modern AI applications.
Creating a Virtual Environment: The Interpreter Path Matters
After downloading and extracting the source code, drag the project into PyCharm to open it. The backend lives in the fastAPI directory, and the first task is to create an isolated virtual environment.
When PyCharm shows "No interpreter" in the bottom-right corner, click to add a new interpreter and select a local interpreter. There's a common pitfall here: the virtual environment location must be placed under the backend path (i.e., the fastAPI directory). You need to manually browse to that folder and append -venv to the path.
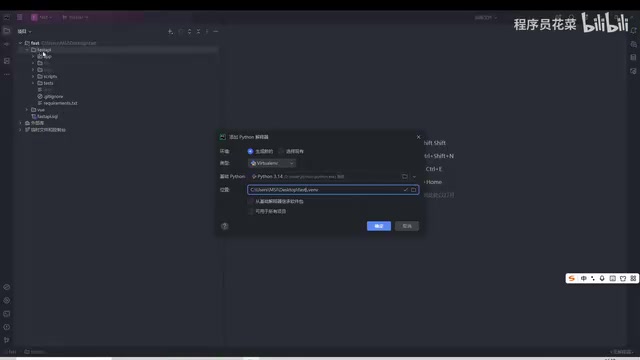
After confirming, wait for the progress bar to complete. Under normal circumstances, a -venv folder will be generated inside the fastAPI directory. If it doesn't appear immediately, it's usually a PyCharm cache refresh issue — close and reopen the project, or refresh the directory a few times. This kind of lag is more common on lower-spec machines and is not a configuration error.
The purpose of a Python virtual environment is to create an isolated package dependency space for each project, avoiding version conflicts between different projects. PyCharm generates a folder (named -venv here) containing an independent Python interpreter and site-packages at the specified path. When the project runs, it uses this directory's interpreter and dependencies rather than the system-wide environment. The reason for placing the virtual environment inside the fastAPI backend directory rather than the project root is that in a frontend-backend separated architecture, backend Python dependencies and frontend Node.js dependencies are managed entirely independently. PyCharm's Python interpreter only needs to be aware of the backend directory — this ensures that requirements file parsing and package downloads automatically correspond to the correct virtual environment, without accidentally pulling in the frontend directory.
Configuring the Database and API Keys: Use Your Own
Once the environment is ready, the next step is to set up the database and API keys. Open the .env file, which contains three key items to modify: the database name (fastAPI), the MySQL password, and the API key for Zhipu AI's (GLM) open platform.
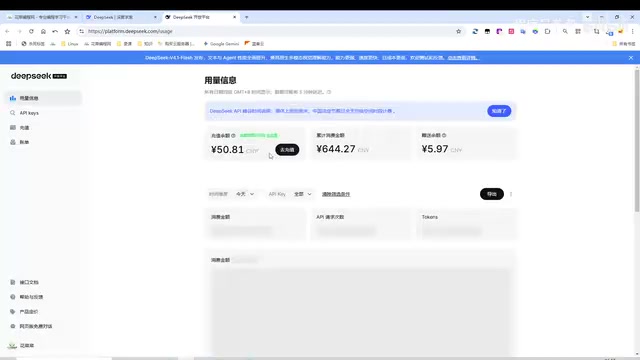
Obtaining the key is straightforward: visit the Zhipu AI open platform, add a small amount of credit, then go to the API Keys page to create a new key, and copy-paste it into the corresponding field in .env. The author explicitly emphasizes that any keys demonstrated in the tutorial will be deleted or replaced — readers must use their own keys for both security reasons and to avoid depleting someone else's quota.
Next, create a new MySQL data source in PyCharm's Database panel using the root account and your local password. After a successful connection test, apply the settings. Then right-click to create a new Schema named fastAPI, selecting a utf8mb4 collation. Finally, point the data source's default database to fastAPI and test the connection again to confirm success.
Initializing Tables and Pulling Dependencies
With the database set up, run the project's bundled SQL script to initialize the table structure. In PyCharm, right-click fastAPI.sql, select "Run SQL Script", locate the extracted script file, and execute it. After completion, the database should contain 8 tables — the accumulated data models from the previous stages.
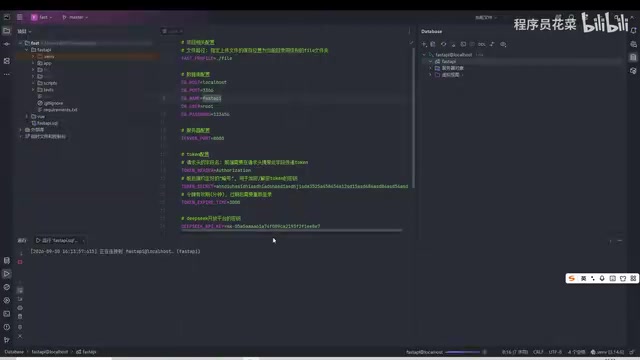
Once the table structure is ready, move on to pulling dependencies. You can run both in parallel to save time:
- Backend dependencies: Use PyCharm's visual interface for
requirements/pyprojectto download with one click - Frontend dependencies: Open a terminal in the
vuepackage directory and runnpm i(shorthand fornpm install)
Run both simultaneously and wait for the progress bars to finish. Managing frontend and backend dependencies separately is standard practice for full-stack projects — they don't interfere with each other.
npm i (i.e., npm install) reads the package.json file in the vue frontend directory and downloads all declared dependency packages into the local node_modules folder. The initial download can be large (Vue ecosystem projects typically have hundreds of transitive dependencies) and may take a few minutes on slower networks. Running it in parallel with the backend Python dependency download effectively reduces overall wait time. If npm is slow, you can switch to a domestic mirror before running: npm config set registry https://registry.npmmirror.com, then run npm i — the speed improvement will be noticeable.
Launch Verification: Backend First, Then Frontend
The startup order must be backend first, then frontend. Open a terminal in the fastAPI directory and run the startup command. If the terminal confirms a successful launch, you can Ctrl + click the backend URL to open it. Seeing a response of "你好,恭喜你成功启动了后端" (Hello, congratulations on successfully starting the backend) confirms the backend is running normally.
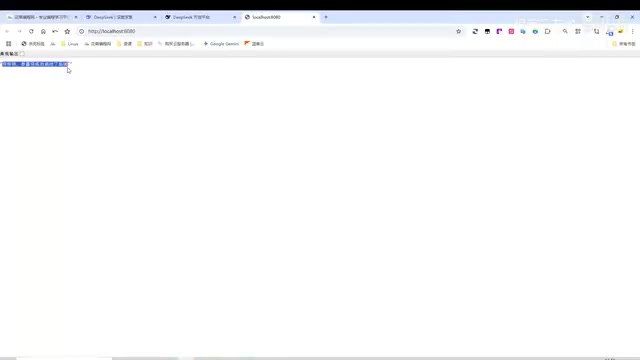
Once verified, you don't need to keep the backend terminal in the browser view (any 404s are typically favicon.ico icon requests and can be ignored). Switch over to launching the frontend. Run npm run dev in the vue package directory — the browser will automatically open the login page.
Log in using the superadmin account from the database's user table (username: admin, password: admin123). All modules — user management, role management, menu management, and the AI assistant chat — should be fully functional. Type a message in the AI assistant (Ctrl + Enter to send) and you should quickly receive a reply from "花菜编程网的 AI 助手" (Cauliflower Coding's AI assistant), confirming that the LLM API is also connected successfully.
Summary: Ready for Tool Integration
At this point, the project environment for Stage 5 is fully up and running. While this setup phase is still "preparatory work," it's the prerequisite for function calling and tool integration — only when the backend service, database, and LLM API are all running stably can you proceed to wire in external capabilities like weather tools and time tools in subsequent lessons.
Three common pitfalls in this process are worth reiterating: the virtual environment must be created inside the backend directory; the API key in .env must be replaced with your own; and when PyCharm's directory doesn't refresh, clearing the cache resolves it. Handle these details carefully, and you'll be well-positioned to dive into the genuinely exciting world of tool integration.
Related articles

Felix Rieseberg Personal Homepage
Felix Rieseberg's personal homepage sparks attention on Hacker News. This article covers the Slack engineer's technical background, the rise and fall of nativefier, and the value of a developer homepage as a tech calling card.

@ai-sdk/vue 3.0.306 Patch Release Syncs with [email protected] Update
@ai-sdk/vue 3.0.306 released, synced with [email protected]. A routine patch release for the Vercel AI SDK ecosystem with no public API changes; the Vue adapter layer stays version-aligned with the core package.

Gemini 4 Argon API Launches: The Era of Million-Token Output Begins
Google launches Gemini 4 Argon with sparse MoE architecture, up to 1M output tokens, and a 68.90% Vals Index score, available across API, AI Studio, and the Gemini app.