Mini-Split Heat Pump Installation Diary: A Full HVAC Upgrade for the Tech House

LTT installs a mini-split heat pump in the Tech House, detailing inverter tech, refrigerant connections, and HVAC cost savings.
Facing poor insulation, a stuffy upper floor, and unusable existing ductwork, Linus Tech Tips chose a mini-split heat pump for the Tech House renovation. The video covers how inverter compressors enable sustained low-speed dehumidification for superior comfort, the full copper line flaring and pressure-testing process, and a condensate drain horror story. The five-zone system cost ~$11,000 USD — far below the $25–30K quoted for a duct retrofit — and delivers independent zone control without damper complexity. The author's takeaway: mini-splits have been the obvious choice in Asia for decades, and North America is long overdue.
Summer temperatures keep climbing, and an old house with poor insulation and a perpetually stuffy upper floor needs a real solution. During the renovation of the "Tech House," Linus Tech Tips abandoned traditional gas-forced air systems and window units in favor of a mini-split heat pump system for whole-home heating and cooling. This isn't just an installation log — it's a thorough walkthrough of the engineering details that often get overlooked in North American HVAC upgrades.
Why Mini-Split Heat Pumps
The home's existing conditions made the decision complicated. The first floor already had ductwork roughed in for a gas forced-air system, which theoretically could be swapped out for a heat pump capable of both heating and cooling. But the problem: extending that ductwork to the upper floor would require re-insulating nearly all the existing ducts in terrible condition below — an enormous amount of work.
Another rejected option was following the previous owner's approach: jam a window AC unit wherever it fits. The author admits window units are actually far more efficient than portable floor units, but they're ugly — and since the walls were already opened up, there was every reason to do things properly.
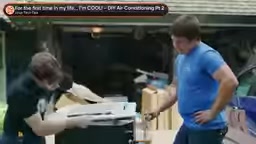
The final "door number three" was the mini-split heat pump system. Its advantages are clear: integrated heating and cooling, per-zone independent temperature control (something central ducted systems struggle to deliver), and in many home configurations, significant cost savings.
Inverter Compressors and Capacity Management
The biggest challenge for any HVAC system is capacity management — loads fluctuate dramatically throughout the day based on occupancy, equipment, and weather. Each indoor unit in this system offers roughly 9,000 BTU of cooling capacity or 12,000 BTU of heating. Given the actual space requirements, that's slightly oversized — only about a third of that capacity is typically needed.
The key is that modern inverter-driven evaporators don't need to run at full speed all the time. A traditional single-stage unit cycles between full-power cooling and off, while an inverter unit runs continuously at a reduced output. The benefit: far more effective dehumidification. The author emphasizes a commonly overlooked comfort principle: "It's not the temperature that makes you uncomfortable — it's the humidity." The comfort improvement from sustained low-speed dehumidification often outweighs simple temperature reduction.
This dynamic capacity is also what allows the same indoor unit to handle both a small bedroom and a sun-drenched open-plan space with large skylights.
How Inverter Compressors Work: An inverter compressor adjusts its speed in real time by varying the electrical frequency supplied to the motor, rather than switching between "on" and "off" like a traditional single-stage system. Conventional systems rely on thermostat thresholds to trigger start/stop cycles — each full-power startup draws a spike of energy, and frequent cycling prevents effective dehumidification, since moisture extraction depends on the evaporator surface staying consistently cold. Inverter units can modulate continuously between roughly 10% and 100% capacity, idling at minimal power as the target temperature is approached. This eliminates energy spikes from repeated startups and keeps the evaporator running long enough to continuously pull moisture from the air — critical in humid climates, where dropping relative humidity from 70% to 50% often delivers more perceived comfort than a 2–3°C temperature reduction. ENERGY STAR data shows inverter heat pumps typically achieve a 30–50% higher SEER (Seasonal Energy Efficiency Ratio) compared to single-stage systems of equivalent capacity.
Indoor Unit Installation and Lessons Learned
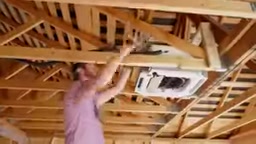
Ceiling cassette units have a handy quirk in North American construction: their width roughly matches standard joist spacing. That said, the author warns that specs vary by region — always verify the unit will fit between the framing before committing. He nearly made that mistake himself once.

The installation primarily involves connecting two refrigerant lines and one condensate drain line. The author uses a painful personal story as a warning: during cooling operation, indoor units produce significant condensate, and a hairline crack in a drain line at his own home went unnoticed — until a summer's worth of dripping water soaked through the drywall above the laundry room. Every condensate connection needs to be properly sealed.
The overall ceiling-mount process is described as "so much easier than it used to be" compared to four or five years ago. He also notes that with reasonable DIY skills, you can handle the indoor unit installation and insulation yourself, then bring in a licensed technician only for inspection and refrigerant charging — "surprisingly DIY-friendly work."
The Engineering Details of Refrigerant Line Connections
This is the most technically dense part of the process. Mini-split systems typically ship with pre-made copper line sets, plug-and-play — as long as the length happens to match your installation. In practice, it often doesn't. A licensed installer then needs to braze an extension onto the copper lines and adjust the refrigerant charge to account for the additional line volume.
The units ship pre-charged with inert nitrogen gas to keep moisture out. Water is the enemy of any refrigerant system — it's incompressible and extremely hard on compressors. The author also flags a safety point: when loosening fittings, keep your face clear — the internal pressure can send a nut flying. The nitrogen itself is harmless: "It makes up 78% of the air I'm breathing right now."
Cutting the line, deburring, flaring, sliding on the nut — each step matters. The author jokes about the classic blunder: flaring the tube before threading on the fitting. "Same as forgetting the heat shrink tubing before connecting water cooling fittings." For this line size, torque the fitting to 10–13 (on a digital torque wrench). He's also honest about one industry reality: the manufacturer's instructions don't recommend Nylog thread sealant, but "basically everyone uses it."
Understanding Flaring: Flaring is the most critical — and most error-prone — step in mini-split copper line connections. After cutting the tube, you deburr the inside and outside edges, then use a dedicated flaring tool to press the tube end into a standard cone angle (typically 45°). This creates a metal-to-metal seal against the fitting's matching taper, capable of holding system working pressure without solder or sealant. Flare quality directly determines whether the system leaks refrigerant: scratches, eccentricity, or uneven wall thickness on the cone surface will cause slow, long-term leaks. Nylog is a PTFE-based thread lubricant and sealant applied to flare fitting threads to distribute torque evenly and compensate for minor surface imperfections — which is why technicians use it almost universally, even though some manufacturers omit it from their instructions out of concern that excess product could contaminate the refrigerant circuit. Refrigerant R-410A (and R-32, which is gradually replacing it) circulates under high pressure in both liquid and gas states. Even trace moisture can react with the refrigerant to form acidic compounds that corrode compressor internals — the fundamental reason units are factory-charged with nitrogen for moisture protection.
Outdoor Unit, Defrost Logic, and Pressure Testing
The outdoor condensing unit is rated slightly below the combined capacity of all five indoor units — but that's never a real-world problem, since they'll never all run at full load simultaneously. Inside the outdoor unit are five electronic expansion valves, one per indoor unit, offering over 200 levels of precise control.
As a heat pump, the outdoor unit also includes a reversing valve to switch between cooling and heating modes. The heat pump's Achilles' heel is low-temperature heating: the colder it gets outside, the more heating you need — and the more the outdoor unit coil will frost over in heating mode. This unit operates down to -15°C; when it detects icing, it briefly switches to cooling mode to defrost, then switches back. The cycle is short enough that users barely notice. In non-temperate climates, a backup heating system is typically added for extreme cold.

After the indoor units are installed, the system needs a pressure test for leak detection. The author charges the system to about 50–60 PSI with nitrogen — not the 600 PSI operating pressure, because high pressure blows the soap bubbles away before you can see them. The test did reveal a slow pressure drop; tracing the line with soapy solution found the leak, the fitting was re-torqued to the 10–13 range, and pressure held steady at 104.7. Problem solved.
Heat Pump Defrost Explained: A heat pump in heating mode works on exactly the same refrigerant cycle as cooling — it just uses a four-way reversing valve to flip the direction of flow. The indoor coil, which previously absorbed heat from the room, now releases heat into it; the outdoor coil, now acting as the evaporator, "extracts" heat from outdoor air. As outdoor temperatures drop, the outdoor evaporator surface temperature drops with them, and water vapor in the air freezes onto the coil, blocking heat transfer. The defrost cycle briefly switches the reversing valve back to cooling mode, routing hot refrigerant through the outdoor coil to melt the ice, while the indoor side temporarily stops delivering warm air (some units run auxiliary electric heating strips to maintain supply temperature during this period). Modern inverter heat pumps use demand-based defrost strategies — sensing frost buildup via temperature sensors or pressure differential rather than fixed time intervals — minimizing unnecessary defrost cycles and improving low-temperature heating efficiency. This is why the unit in this video maintains usable heating capacity at -15°C.
The Cost Case: Why Mini-Splits Make Financial Sense
Commissioning turned out to be surprisingly straightforward: power on, the units automatically pair with each other, and since the extended line set length matched the factory refrigerant charge of six and a half pounds, the refrigerant is simply released and the system is ready to go.
On cost: the outdoor condensing unit plus five indoor units came to approximately CAD $15,000 (roughly USD $11,000). That's not cheap for a home upgrade — but compared to the quoted cost of retrofitting a full duct system (the author was quoted $25,000–$30,000 for his previous home a decade ago), it's a fraction of the price. He encountered the same economics at his Creator Warehouse: switching from ducted AC to mini-splits cut costs dramatically.
Another major advantage is zoned temperature control without the complexity of a baffle/damper system — one that creates back-pressure issues the moment you try to close off zones. Each zone has its own thermostat and can be controlled independently.
The one notable limitation: you can't heat one bedroom while cooling the living area simultaneously. The whole outdoor unit operates in one mode at a time. But the author points out this is true of any heat pump system, ducted or ductless. His conclusion is direct: if your home already has ductwork, going ducted probably makes more financial sense; if it doesn't, mini-splits are an excellent value, and "I can't believe North America took this long to embrace them — Asia has had this figured out forever."
Why Mini-Splits Dominated Asia First: The widespread adoption of mini-splits across Asia has clear historical roots. Japanese manufacturers like Daikin, Mitsubishi, and Hitachi led the residential split-system market from the 1970s and 80s onward, with inverter technology reaching mass production maturity in Japan first. Asian residential construction — predominantly reinforced concrete with relatively compact floor plans — was never well suited to central ducted systems, making wall-mounted splits the natural default. North America, by contrast, saw postwar suburban expansion drive massive adoption of wood-frame single-family homes with gas infrastructure built in, making gas forced-air heating the dominant standard. Cooling demand at higher latitudes was historically modest, and mini-splits were categorized as "a step up from window units" rather than a standalone category — leading to severely delayed market education. In recent years, climate change, electrification policy pushing out gas heating, and the compelling COP (Coefficient of Performance) advantage of inverter heat pumps over electric resistance heating have driven North American markets to rapidly catch up. States and provinces have introduced subsidy programs to encourage households to switch from fossil fuel heating to heat pumps, accelerating adoption significantly.
Related articles

Chain of Thought Isn't Just for AI: How Humans Can Use CoT to Improve Thinking Quality
Chain of Thought isn't just a prompt trick for large models. Starting from a Hacker News discussion, this article analyzes why CoT works for human thinking too, breaks down actionable ways to transfer it, and highlights the key differences between human CoT and machine CoT.
Cloudflare Teams Up with OpenAI: Closi…
Cloudflare Teams Up with OpenAI: Closing the Loop from Vulnerability Discovery to Defense with AI
Cloudflare uses OpenAI Daybreak to investigate security vulnerabilities and generate reviewable remediation plans, while developers use Codex to boost coding efficiency and quality.

Orca Multi-Agent Orchestration in Practice: A Guide to Parallel Collaboration with Claude and Codex
Orca is Stable AI's free open-source agent workbench supporting 34 agents like Claude Code and Codex in parallel. Learn its Git worktree isolation, multi-model orchestration, and mobile management.