n8n in Practice: A Guide to Building an AI Lead-Generation Workflow (Forms + Sheets + Email Automation)

Use five n8n nodes to connect forms, Sheets, Gmail, and Groq for a closed-loop automated lead reply.
Using a Lead Inquiry workflow as an example, this article demonstrates how to use n8n to automate the entire chain—"customer fills out form → stored in Google Sheets → owner notified → AI generates reply → customer receives email"—with fully visual, no-code configuration. It breaks down the field and authentication settings of the form trigger node, the column headers and field mapping for Sheets, the Expression concatenation for the Gmail notification, the Prompt design and model selection for the Groq LLM Chain, and the final AI reply email to the customer. The testing section records two typical problems: Groq request rate limits causing LLM errors, and the first email landing in spam. The author also explains the target audience and limitations, emphasizing third-party quotas and form authentication in production.
n8n in Practice: A Guide to Building an AI Lead-Generation Workflow (Forms + Sheets + Email Automation)
Use n8n to connect the entire chain—"customer fills out form → data stored → owner gets notified → AI auto-replies to customer"—with just 5 nodes.
Lead-form data scattered across inboxes, spreadsheets, and chat logs is one of the biggest operational headaches for small teams. Creators on Bilibili and YouTube have made n8n automation tutorials, but most only demonstrate a single node rather than a complete end-to-end flow covering "form trigger + spreadsheet storage + dual emails + AI reply." This article breaks down a reusable Lead Inquiry workflow, from building it from scratch to publishing and testing, explaining step by step the configuration logic of each node and the pitfalls to watch out for.
Overall Workflow Architecture: 5 Nodes Form a Complete Lead Loop
The workflow starts with an n8n Form trigger node and ends with two automatically sent emails. In between, data is stored in Google Sheets and reply content is generated by an AI model, with delivery handled by Gmail nodes.
The node order is as follows:
- Form Trigger (On Form Submission): Generates a publicly accessible lead-collection form
- Google Sheets (Append Row): Automatically writes form data as a new row in the sheet
- Gmail (Send Message): Sends a new-lead notification email to the business owner
- Groq LLM Chain: Calls an AI model to generate a personalized reply based on the customer's message
- Gmail (Send Message): Sends the AI-generated reply email to the customer
The entire flow relies on n8n's visual orchestration—no code required. Data passes between nodes via drag-and-drop field mapping, which is lightweight and maintainable enough for a standard lead-management scenario.
What is n8n: n8n is an open-source workflow automation tool, often compared to Zapier and Make. Its core form is a visual node editor: each node represents an action or data source (such as a form, database, HTTP request, or LLM call), connections between nodes define execution order, and data flows between nodes as JSON objects. Compared to pure-code solutions, n8n's advantage is that it can connect multiple SaaS services without glue code; compared to Zapier, it supports self-hosting, can integrate with any API on demand, and is more flexible with complex branching logic. The terms "node," "connection," "field mapping," and "Expression" mentioned in this article are all standard n8n concepts: field mapping means dragging a field from an upstream node's output into a downstream node's input field, while an Expression uses {{ }} syntax to embed dynamic variables or simple expressions in the configuration.
Trigger vs. Action: n8n nodes are roughly divided into trigger nodes and action nodes. Trigger nodes are responsible for starting the entire workflow—for example, the On Form Submission used here triggers when a user submits the form; Append Row, Send Message, and LLM Chain are all action nodes that only run after being triggered upstream. Understanding this distinction helps troubleshoot "workflow won't start" issues—usually the trigger node isn't configured correctly, or the wrong URL is being used (the Test URL only works when you manually click Execute Step; the Production URL only becomes externally available after Publish).
Step 1: Configure the Form Trigger Node
Create a new workflow in the n8n Dashboard, name it Lead Inquiry, and add the first node: the n8n Form On Form Submission trigger.
The form needs 4 required fields:
- Name: Text input type, set to Required
- Email: Choose the Email type; n8n will automatically validate the format and throw an Invalid Email error for non-email input
- Phone: Text type, also set to Required
- Message: A text area for the customer to describe their needs
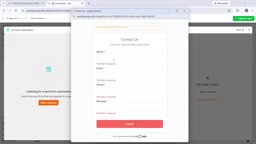
For form authentication, the tutorial chooses Authentication: None, meaning the form URL is fully public. For internal use, you can enable authentication so only authorized users can access the form. Set the form title to "Contact Us" and the description to "Enter the required data to get quick Response."
After configuration, click Execute Step and n8n generates a test URL. Open it to see the rendered form page; fill in test data and submit, then return to the n8n editor—the output panel on the right will show the received data.
Step 2: Automatically Store Leads with Google Sheets
Immediately after the form node, add a Google Sheets node and choose the Append Row in Sheet operation. This step requires three things.
Create the sheet and column headers
First create a new Sheet in Google Drive, name it "Lead Inquiry," and create 5 column headers in the first row: name, email, phone, message, submitted at (date column). It's recommended to bold the headers for easier viewing later.
Connect the Google account
Back in the n8n Google Sheets node, click Sign in with Google to authorize. According to the tutorial demo, once one Google node in the same workflow is authorized, subsequent Gmail and Sheets nodes automatically reuse the same account—no need to log in again.
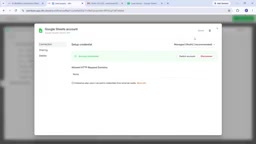
After authorization, the node lists all available Sheets files under that Google account. Select "Lead Inquiry" and the corresponding worksheet.
Field mapping
After selecting Map Each Column Manually mode, n8n reads the sheet headers and you simply drag the form output fields into the corresponding columns. For the date column, map directly to the form's built-in submitted at field.
Click Execute Step and switch to Google Sheets to check—if configured correctly, the new data is already in the sheet. From then on, every time a customer submits the form, the data is automatically appended to this table.
Step 3: Send the New-Lead Notification Email to the Owner
After the data is stored, the next node is Gmail's Send Message. The business owner needs to know about new leads right away.
Configuration points:
- To: Enter the owner's business email address
- Subject: Use n8n's Expression mode to concatenate variables, e.g. "You got a new lead from {{ $json.name }}", so the subject shows exactly who submitted
- Message Type: The tutorial first chooses Text mode for testing, then can switch to HTML formatting once confirmed working
- Email body: Drag the form's name, email, phone, and message fields into the body, so the owner sees the complete lead information when opening the email
After running the test, the tutorial confirms the owner's inbox successfully received a properly formatted new-lead notification. Note: the tutorial demo uses the Gmail trial version, so an n8n promotional message appears at the bottom of the email; this disappears after switching to production mode or self-hosted deployment.
Step 4: Integrate an AI Model to Auto-Generate the Customer Reply
This is the most valuable part of the entire workflow—letting AI generate a targeted, friendly-toned reply based on the customer's specific message.
The tutorial uses an LLM model provided by the Groq platform. You need to create an API Key on the Groq website, then paste it into the n8n Groq node.
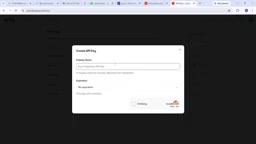
Regarding model selection, the tutorial chooses Qwen 3.8, considering its output quality good. Once credentials are configured, n8n automatically generates a set of LLM Chain nodes. The "When Chat Message Received" trigger node isn't needed in an automation flow and can be deleted.
Prompt design
The Prompt needs to reference the message content passed from the form node, inserting variables with {{ }} syntax. The tutorial's Prompt roughly reads: "Based on what the user submitted, write a short, friendly reply email." The AI combines the customer's message field to generate personalized reply text.
After running the test, the AI successfully generated a reply like "Thanks for reaching out, I'd be happy to help..."
Where Groq and LLM Chain fit: Groq is not a model itself but a platform providing inference acceleration. Through its self-developed LPU chips, it lets open-source large models (such as Llama, Qwen, Mixtral, etc.) return results with extremely low latency, and it offers an OpenAI-compatible API. So integrating Groq in n8n is essentially "trading one API Key for the ability to call multiple open-source models," allowing you to switch models at any time without changing the workflow structure—which is exactly why the article's rate-limit issue could be resolved by "just switching a model."
LLM Chain vs. a plain LLM node: The "Chain" nodes in n8n (such as LLM Chain, Basic LLM Chain) are an orchestration layer wrapped on top of the base chat model, typically including a Prompt template, optional Memory, and an Output Parser. It allows upstream data to be injected into the Prompt template before being passed uniformly to the model, making it more suitable than a plain Chat Model node for tasks like "take form fields and generate an email." The article's mention of deleting the "When Chat Message Received" trigger node is also because that node belongs to the chatbot scenario and is irrelevant to a form-driven automation flow—keeping it would just add a useless extra trigger entry to the workflow.
Step 5: Send the AI Reply to the Customer
The last Gmail node is responsible for sending the AI-generated reply to the customer.
- To: Map the form's Email field
- Subject: Set to "Thanks for reaching out"
- Message: Take the AI-generated text from the Groq node's output
Important reminder: In the Gmail node, the data source for the To field must be the form node, not the previous Gmail node. In the Expression editor you can use the node selector to switch to the Form Trigger node's output data.
Publishing and Live Testing: Pitfalls and Solutions
After configuring the workflow, click Publish to activate it. After publishing, a Production URL is generated—use this URL to submit real form data and verify the full chain.
The tutorial runs two rounds of testing. The first round goes smoothly: data is written to the sheet, the owner receives the notification, and the customer receives the AI reply. The second round surfaces two problems:
- LLM node error: It says "The service is receiving too many requests from you," i.e. the Groq request rate limit was hit. The solution is to switch to another model in the Groq node, then republish the workflow.
- Email delivery delay: The customer-side email doesn't reach the inbox immediately and needs to be checked in the spam folder. This is fairly common in real deployments too, especially on the first send.
After switching models and republishing, the second round of testing completes successfully. Note that in n8n, after modifying any node configuration, you must republish the workflow for the changes to take effect on the Production URL.
Who This Solution Is For
The applicable scenarios for this workflow are fairly clear:
- Freelancers and small service teams: Those with a simple inquiry form who need to respond quickly to every lead
- Operations staff who want to improve customer experience with AI but don't write code: n8n's visual orchestration lowers the barrier to automation
- Businesses that need centralized lead-data management: Google Sheets acts as a lightweight CRM for easy follow-up and filtering
The limitations should also be stated clearly: this solution depends on the availability and quotas of third-party services (Google, Groq). If lead volume is high, Groq's free quota may not be enough, requiring an upgrade to a paid plan or switching to another LLM provider. Also, in production, it's recommended to enable authentication on the form to prevent malicious submissions.
Related articles

Felix Rieseberg Personal Homepage
Felix Rieseberg's personal homepage sparks attention on Hacker News. This article covers the Slack engineer's technical background, the rise and fall of nativefier, and the value of a developer homepage as a tech calling card.

@ai-sdk/vue 3.0.306 Patch Release Syncs with [email protected] Update
@ai-sdk/vue 3.0.306 released, synced with [email protected]. A routine patch release for the Vercel AI SDK ecosystem with no public API changes; the Vue adapter layer stays version-aligned with the core package.

Gemini 4 Argon API Launches: The Era of Million-Token Output Begins
Google launches Gemini 4 Argon with sparse MoE architecture, up to 1M output tokens, and a 68.90% Vals Index score, available across API, AI Studio, and the Gemini app.