PyTorch for Beginners: Setting Up Anaconda + VSCode Environment

A reproducible PyTorch environment setup path based on a Bilibili course, covering Anaconda virtual environments, editor configuration, and GPU version installation verification.
Based on the first chapter of Bilibili creator Chen Yu's three-hour PyTorch introductory course, this article lays out a reproducible environment setup path for beginners. Core content includes: using Anaconda to create isolated virtual environments to avoid Python version conflicts across projects; avoiding Chinese paths during installation and verifying with conda -V; recommending the lighter VSCode with Chinese language pack, Python, and Jupyter plugins; creating a Python 3.9 environment with conda create, confirming GPU and CUDA version with nvidia-smi, then installing v2.0 or v2.1 from the official website with pip—emphasizing the PyTorch CUDA version must not exceed the local version and that switching sources is not recommended; finally verifying GPU activation with torch.cuda.is_available() and explaining VSCode interpreter switching and Jupyter kernel configuration.
PyTorch is one of the most mainstream frameworks in deep learning today, but many beginners get stuck on the very first step: environment setup. This three-hour quick-start course by Bilibili creator Chen Yu devotes its first chapter to environment setup. Based on that content, this article lays out a clear, reproducible configuration path.
Why You Need Anaconda: Virtual Environments Are Key
Many beginners are used to installing Python and various libraries directly on their machine, but when working on deep learning projects, different projects often depend on different versions of Python and third-party packages. If everything is crammed into the same environment, version conflicts are almost inevitable.
In the video, the creator gives a typical scenario: Project One needs Python 3.9, Project Two needs Python 3.7, and the machine only has one base environment. Installing both versions at once will inevitably lead to dependency chaos. The value of Anaconda lies in its ability to create multiple isolated virtual environments, with each project using its own independent environment without interference.
This design philosophy is worth adopting from the very beginning—it will pay off later when installing PyTorch and switching between CPU/GPU versions.
Virtual environment: Essentially an independent directory containing a specific version of the Python interpreter, tools like pip, and a set of third-party libraries. When you activate a virtual environment, the python and pip commands in the terminal point to the copies inside that directory rather than the system-wide installation. This way, Project A can install numpy 1.24 in Environment A while Project B installs numpy 1.26 in Environment B, and neither overwrites the other. On top of this, Anaconda also provides the conda package manager, which can manage both Python packages and non-Python dependencies (such as CUDA runtime libraries), and comes pre-installed with common scientific computing libraries like numpy and pandas, saving you the trouble of installing them one by one.
CUDA is a parallel computing platform and programming model introduced by NVIDIA. PyTorch's GPU acceleration works by calling the graphics card through CUDA. The CUDA version shown by nvidia-smi is the highest CUDA runtime version supported by the graphics driver; the PyTorch installation package bundles the CUDA runtime library it was compiled against. Therefore, as long as the CUDA version bundled with PyTorch does not exceed the driver's supported maximum, it will run normally without needing to install the full CUDA Toolkit separately. This is also the technical reason behind the principle stated in the article that "the CUDA version corresponding to PyTorch cannot exceed the local CUDA version."
Installing Anaconda: Avoid the Chinese Path Pitfall
The installation process itself is not complicated: download the version for your system from the official website, check all options during installation, and choose an installation path. But the video repeatedly emphasizes one detail—the installation path must not contain Chinese characters.
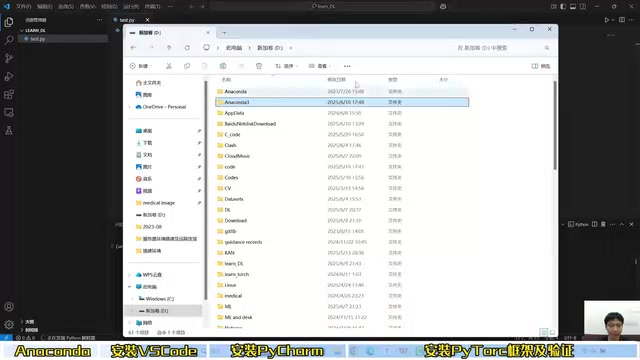
Paths with Chinese characters may cause errors later at runtime, a problem that many beginners easily overlook. It is recommended to create a folder with an English name on a non-system drive such as D: as the installation directory.
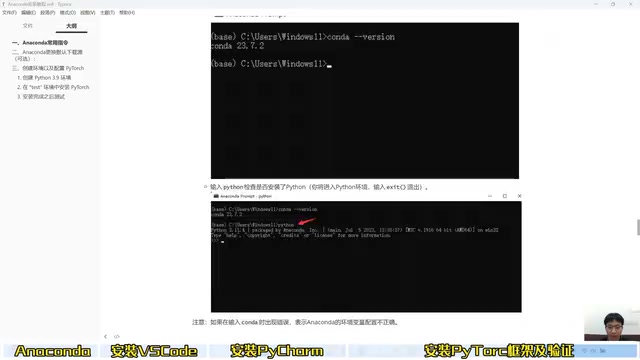
After installation, open Anaconda Prompt from the Start menu and enter conda -V to verify. If the version number displays normally (the creator's demo showed 23.4.1; the actual version depends on your installation), the installation was successful. If you see "conda is not recognized as an internal or external command," it usually means the environment variables have not been added, and you need to manually add the installation path and the Scripts directory to the system Path variable.
Choosing an Editor: VSCode vs PyCharm
The video introduces two editors, VSCode and PyCharm, with a clear preference: VSCode is lighter, starts faster, has a rich plugin ecosystem, and is completely free; PyCharm is heavier, the Professional edition is paid, and while the Community edition is usable, startup and indexing times are noticeably longer.
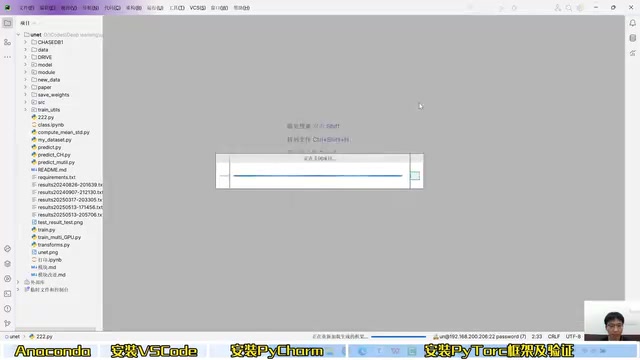
The creator personally uses VSCode more often. After installing VSCode, you need to install a few key plugins: the Chinese language pack (Chinese), the Python plugin, and the Jupyter Notebook plugin. After installing the Chinese pack, restart the editor to switch to the Chinese interface.
Create a new .py file in VSCode; the bottom-right corner will show the current Python environment, which defaults to the base environment. Write a line of print("hello world") and run it. If the terminal outputs normally, the editor and environment are configured successfully.
Creating an Independent Environment and Installing PyTorch
In Anaconda Prompt, run conda create -n unit python=3.9 to create a new environment. The video notes that Python 3.9 is compatible with most libraries and is a relatively safe choice. Enter Y to confirm during creation, then activate it with conda activate unit; the command-line prefix will change to the environment name.
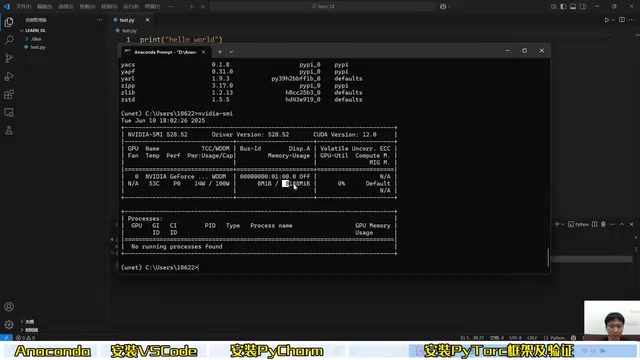
Before installing PyTorch, you need to check your graphics card. Enter nvidia-smi in the terminal to view the GPU model and CUDA version. Users with a dedicated GPU (such as an RTX 4060 with 8GB VRAM and CUDA version 12.0) can install the GPU version; devices without a dedicated GPU, such as business laptops, should install the CPU version.
Go to the PyTorch official website and select a previous version. The creator recommends v2.0 or v2.1 and using the pip command to install. The key principle is: the CUDA version corresponding to the chosen PyTorch version must not exceed the local CUDA version. For example, if your machine has CUDA 12.0, you can install PyTorch with CUDA 11.8 or 11.3, but not 12.1.
Regarding installation time, the GPU version may take five to ten minutes or even longer, while the CPU version usually finishes within ten minutes. The video specifically warns: do not switch to a mirror source when installing PyTorch, because using a mirror may result in downloading the CPU version instead of the GPU version—unless the network truly cannot download it, in which case you can consider switching sources or changing networks.
pip vs conda: These are two different package installation methods. conda retrieves pre-compiled packages from the Anaconda repository or the conda-forge channel and can handle cross-language dependencies; pip retrieves Python packages from PyPI. The PyTorch official website provides pip installation commands by default because PyTorch officially maintains wheel packages on PyPI for each CUDA version, with filenames containing identifiers like cu118 and cu121. When using domestic mirror sources, the mirror site may not have fully synced all CUDA variants, or the index cache may point to the CPU version (filename containing only cp39 without the cu identifier), causing pip install torch to actually install the CPU version. Therefore, the first installation should prioritize the official source, and only consider acceleration solutions after confirming that torch.version.cuda outputs a non-None value.
Verifying the Installation and Jupyter Configuration
After installation, enter python in the terminal to enter the interactive environment and execute import torch and torch.cuda.is_available(). Returning True means the GPU version was installed successfully; returning False means you currently have the CPU version.
The creator compares performance differences in the video: the same project might finish in ten minutes on a GPU but take an hour or even a day on a CPU. However, he also reassures beginners without a dedicated GPU—the CPU version is completely sufficient for the introductory stage, and computing power issues can be solved later by renting cloud servers or using lab servers.
To switch environments in VSCode, click the bottom-right corner and select "Add New Interpreter," locate conda.exe in the Anaconda installation directory, load it, and select the corresponding environment. For Jupyter Notebook files, you need to select a kernel. If prompted to install the kernel on first run, click OK, or manually run pip install ipykernel. Jupyter's characteristic is that it outputs the result of the last statement by default, which differs from regular Python scripts.
Final Thoughts
Environment setup is the first hurdle in deep learning and also the most easily overlooked step. Getting these three things right—Anaconda virtual environments, editor configuration, and PyTorch version matching—will ensure smooth progress in your subsequent learning. The creator says the installation documentation will be posted in the comments section, and common issues such as accidentally installing the CPU version or VSCode failing to run will be addressed in the next episode.
One-line Summary
A reproducible PyTorch environment setup path based on a Bilibili course, covering Anaconda virtual environments, editor configuration, and GPU version installation verification.
Paragraph Summary
Based on the first chapter of Bilibili creator Chen Yu's three-hour PyTorch introductory course, this article lays out a reproducible environment setup path for beginners. Core content includes: using Anaconda to create isolated virtual environments to avoid Python version conflicts across multiple projects; avoiding Chinese paths during installation and verifying with conda -V in Anaconda Prompt; recommending the lighter VSCode over PyCharm and configuring the Chinese language pack, Python, and Jupyter plugins; creating a Python 3.9 environment with conda create, confirming the GPU and CUDA version with nvidia-smi, then selecting v2.0 or v2.1 from the official website and installing with pip—emphasizing that the PyTorch CUDA version must not exceed the local version and that switching sources is not recommended; finally, verifying whether the GPU version is active with torch.cuda.is_available(), and explaining how to switch interpreters in VSCode and configure Jupyter kernels.
Related articles

RePlan-VLA: Progress-Aware Replanning Breakthrough for Long-Horizon Robotic Manipulation
The RePlan-VLA framework converts VLA models' short-horizon capabilities into reliable long-horizon execution through progress-aware adaptive replanning, improving success rates by 21.9% and 10.4% on RoboCasa365 and CALVIN, and validating real-world deployment on a Franka Research 3 robot.

Geometric Bridge Flow Matching: A New Breakthrough in Blind Rigid Motion Correction
Geometric bridge flow matching enables blind rigid motion correction in head CBCT, achieving 37.1 dB PSNR and 0.27 mm RPE on simulated data in ~9.1 minutes, outperforming existing methods.

Google Releases Gemini 4 Hydrogen: 2.5x Faster Without Sacrificing Intelligence
Google releases the lightweight Gemini 4 Hydrogen: 2.5x faster task completion, AA Intelligence Index of 54 beating its flagship sibling, 7.3s single-step on Agent Arena faster than Claude and GPT rivals, four thinking levels with pay-as-you-need pricing, now available across AI Studio and more.