The Complete Guide to Claude Code Skills: Installation, Creation, and Management

Everything you need to know about Claude Code Skills — from installation to creation and management.
This guide covers the full lifecycle of Claude Code Skills: what a Skill is (a reusable Markdown-based capability module), how it differs from a Plugin, three ways to install them, how to write your own SKILL.md, auto vs. manual triggering, and where to find quality Skills. Ideal for both beginners and power users looking to extend Claude Code.
What Is a Skill: Packaging Expert Knowledge Into Reusable Modules
One of the key reasons Claude Code has gained such wide adoption — beyond the powerful Claude model family underneath — is its rich Skill ecosystem. Yet many users still aren't sure how to work with it. This guide walks through the full lifecycle of Skills: what they are, how to install them, how to create them, how they're triggered, and how to manage them.
A Skill is Claude Code's extension mechanism — think of it as a "capability pack." At its core, it's a Markdown file containing prompts and workflows tailored to a specific task.
Background: The Relationship Between Claude Code and LLMs
Claude Code is Anthropic's AI coding assistant, powered by the Claude family of large language models (LLMs). Claude models are known for their long context windows (up to 200K tokens) and strong ability to follow complex instructions — making them especially well-suited for tasks that require reading large codebases or executing multi-step workflows. The Skill mechanism leverages these strengths directly: by injecting structured Markdown instructions into the context, it guides the model to handle specific tasks with expert-level precision, without requiring any fine-tuning of the model itself.
For example: once you install a "Make a Presentation" Skill, you can simply say "make me a slide deck" and Claude Code already knows how to structure it, what format to use, and what steps to follow. Similarly, a "WeChat article formatting" Skill can convert Markdown directly into publish-ready HTML. In short, Skills transform Claude Code from a general-purpose AI assistant into a domain-specialized one.

Skills have three defining characteristics: reusable (write once, use in every conversation), shareable (install and use Skills others have written), and auto-triggered (Claude Code automatically matches the right Skill to your request without manual specification). Essentially, a Skill is a way to package expert knowledge into a reusable, portable module.
Background: Why Markdown Works So Well as a Prompt Container
The core file in a Skill —
SKILL.md— uses Markdown format, and that's not arbitrary. Markdown is a lightweight markup language that's both human-readable and structurally clear. LLMs encounter Markdown extensively in their training data (technical docs, READMEs, wikis), so they parse its structure with high fidelity. Writing prompts as Markdown files is essentially a form of persistent prompt engineering — it takes complex instructions that would otherwise need to be typed manually each time and crystallizes them into a file that gets automatically injected into context at the start of every conversation, enabling repeatable expert-level behavior.
Skills vs. Plugins: What's the Difference?
New users often confuse Skills and Plugins. The file structure makes it easy to distinguish them:
- A Skill is a self-contained capability directory. Its core file is
SKILL.md, which defines the purpose, prompts, rules, and workflow. It can also include example files, reference materials, or scripts. It's a focused module for solving one specific type of task. - A Plugin is more like a complete installation package. It typically includes a
plugin.jsondescriptor and can contain multiple Skills, as well as other components like Hooks, Agents, and MCP Servers.
One sentence summary: Skills are capability modules; Plugins are containers that bundle those modules with other components.
How to Install Someone Else's Claude Code Skill
Before installing a Skill, you need to know where to put it. Claude Code supports two locations:
- Project-level directory: the
.claude/skillsfolder inside a project's root directory. Only active for that project — ideal for project-specific skills like custom code style guides or deployment workflows. - User-level directory: the
.claude/skillsfolder in your home directory. Available across all projects — ideal for general-purpose skills like making presentations, writing documentation, or formatting articles.
Once you know where to put it, there are three installation methods:
Method 1: Manual Copy
The simplest approach. If someone shares a Skill as a directory, just download it and place it in one of the locations above. For example, if you find a Skill on GitHub, download the folder and drop it into .claude/skills — Claude Code will automatically detect it the next time it starts.
Method 2: One-Line Install via Third-Party Tools
Skill-sharing sites often provide a single install command. These commands automatically download the Skill files and place them in the correct directory, saving you the trouble of manually cloning a repo. Commands starting with bunx or pnpm dlx work the same as npx — they just use different package managers. Use whichever one is installed on your machine.
Background: Package Manager Ecosystem and How Install Commands Work
Installing Skills via
npx,bunx, orpnpm dlxborrows from the modern JavaScript/Node.js package management paradigm. npm (Node Package Manager) is the world's largest software registry;npxlets you execute remote packages without installing them globally. Bun is a high-performance JavaScript runtime that's gained popularity in recent years, andbunxis its package execution tool. pnpm uses hard links to save disk space. The underlying logic is the same across all three: download the specified package from a remote registry and run its install script, automatically handling file copying and directory creation. The Skill ecosystem piggybacks on this mature infrastructure to dramatically lower the distribution and installation barrier — even non-technical users can install a Skill with a single command.

Method 3: Install via Plugin
If you're installing a full Plugin rather than an individual Skill, you can do it directly from the Claude Code chat interface using a slash command. If the plugin is in the official marketplace, just run the command. If it's from a third-party marketplace, you'll need to add that marketplace first, then install. Once installed, the Skill is immediately available — no extra steps needed.
Regardless of which method you use, the end result is the same: Skill files end up in the right place, and Claude Code picks them up automatically.
How to Create Your Own Claude Code Skill
A Skill is a folder containing a required SKILL.md file as its core, optionally accompanied by supporting files (reference docs, example templates, Python or Bash scripts). A simple Skill needs only SKILL.md; more complex ones can split content across multiple files, which Claude Code will read automatically when needed.
How to Write SKILL.md
SKILL.md has two parts:
Part 1: Front matter at the top of the file, wrapped between two lines of dashes. Common fields include:
name: the skill's name, which also becomes its slash commanddescription: tells Claude Code what this skill does and when to use it
Background: The YAML Front Matter Specification
The metadata block at the top of
SKILL.md— wrapped between dashes — follows the widely-adopted YAML Front Matter convention. This format was popularized by Jekyll (a static site generator) and later adopted by Hugo, Hexo, and many other tools; it's now the de facto standard for attaching structured metadata to Markdown files. YAML (Yet Another Markup Language) stores configuration as key-value pairs with syntax that's simple enough to read and write without any programming background. In the Skill context, thenameanddescriptionfields essentially define an "identifier" and a "semantic index" for the prompt — Claude Code's dispatch system parses this metadata to decide when and how to activate a given Skill.
The description field is critically important — it's exactly what Claude Code uses to decide whether to auto-trigger the Skill.
Part 2: The body, where you write the specific instructions you want Claude Code to follow: how many steps, what each step involves, formatting requirements, and any caveats. At its core, this is just writing prompts in a file.

If writing it by hand feels tedious, there are two easier approaches: you can ask Claude Code directly in the chat to create one (e.g., "Create a Skill for writing commit messages") and it will generate the file and place it in the right location automatically. Or you can use the built-in Skill Creator, which guides you through the creation process step by step, helps you test it, and suggests improvements — especially helpful for beginners.
How to Trigger and Manage Skills
Auto-Trigger vs. Manual Trigger
Once a Skill is installed, there are two ways to trigger it. With auto-triggering, you barely need to think about it — Claude Code reads the descriptions of all installed Skills and automatically invokes the right one when your input matches. This is why the description field matters so much: it directly determines how accurately auto-triggering works.
Background: The Semantic Matching Mechanism Behind Auto-Triggering
Skill auto-triggering doesn't rely on simple keyword matching — it leverages the LLM's semantic understanding. At the start of a conversation, Claude Code loads the
descriptionfields of all installed Skills into context. When a user submits a request, the model evaluates at a semantic level which Skill's description best matches the intent, and activates accordingly. This mechanism resembles the semantic retrieval step in RAG (Retrieval-Augmented Generation), but lighter-weight — no vector database required; matching happens directly within the LLM's attention mechanism. This also explains why the quality of your description wording directly affects trigger accuracy: the more specific and natural-sounding the description, the higher the recall rate for auto-triggering.
Manual triggering uses slash commands — type "/skill-name" in the chat box to invoke a specific Skill precisely.
Background: The Origins of Slash Commands as an Interaction Pattern
Slash commands are a long-established command-line interaction paradigm, dating back to IRC chat rooms where instructions like
/joinand/quitwere standard. Slack, Discord, and other modern messaging platforms popularized the pattern further, making it the go-to way to trigger structured actions within a conversational interface. Claude Code brings this pattern into the AI assistant context: typing/skill-namegives users precise, explicit control over which Skill to invoke. This design serves both power users (who prefer explicit control) and casual users (who prefer zero-friction auto-triggering).
For actions with side effects — like deploying code or sending messages — letting Claude Code decide autonomously whether to execute carries some risk. In these cases, you can add a parameter to the front matter to disable auto-triggering and require manual invocation only. Conversely, if you want a Skill to operate silently in the background without appearing in the slash command menu, that can also be configured via a parameter.
Viewing and Managing Installed Skills
There are two ways to see what Skills are installed: typing a slash / in the chat box lists all available Skills and commands (type further to filter), or you can use the /skill command specifically, which displays only installed Skills in a cleaner view.
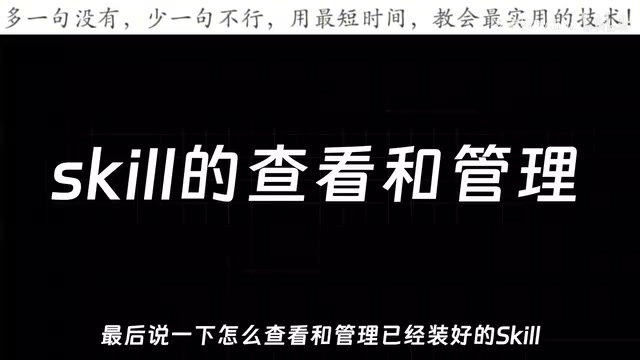
Disabling or deleting depends on how the Skill was installed. For manually installed Skills: to disable, add a parameter to the SKILL.md front matter to prevent auto-triggering; to delete entirely, just remove the folder. For Skills installed via a Plugin: use the /plugin command to open the plugin management interface and handle it from there.
Where to Find More Quality Skills
The Claude Code Skill ecosystem is already quite rich. Here are three recommended sources:
- Official Plugin Marketplace: Open it by typing
/pluginin the chat box. It lists plugins from Anthropic and community-verified contributors — quality is reliable, and it's the most recommended starting point. - Third-Party Skill Sharing Sites: Various community-run aggregator sites collect Skills contributed by users worldwide. You can browse by category, check leaderboards, and view install counts.
- GitHub: Search for "Claude Code Skill" or "Claude Code Plugin" to find a large number of open-source projects. Many of the highest-quality Skills debut on GitHub first.
Whether you're in development, design, or content creation, you'll find Skills that fit your workflow. Once you internalize the core concept — Skills are capability modules; Plugins are containers — everything else (installation, creation, triggering, and management) falls into place naturally.
Key Takeaways
Related articles
CriticGen: A New Framework That Transforms AI Evaluation into Actionable Improvement Feedback
CriticGen proposes a generation-aware evaluation framework that transforms AI assessment from passive scoring to an active optimization loop, achieving 73.17% answer improvement and 93.28% non-degradation rate.
Vercel AI SDK workflow-harness Update Analysis
Deep analysis of Vercel AI SDK workflow-harness 1.0.107 update: architecture design, engineering practices, and developer value for building reliable AI apps.
Rootless Containers Explained: Principles, Benefits, and Leading Implementation Approaches
A deep dive into rootless container principles and security benefits, comparing Podman, Docker Rootless mode, and Kubernetes integration with practical migration advice.