YOLO Learning Roadmap: From Version Evolution to Source Code Deep Dive

A practical 3-step roadmap for learning YOLO: version evolution, video learning, and deep source code debugging.
This article outlines an efficient YOLO learning path for beginners: start with a shallow read of classic versions (V1, V3, V4) to understand the evolutionary logic, use video resources to build an overall knowledge framework quickly, then choose one recent version and deeply debug the source code to master implementation details — moving from conceptual understanding to true hands-on mastery.
Introduction: Why YOLO Deserves Systematic Study
As one of the most iconic algorithm families in computer vision, YOLO (You Only Look Once) has gone through numerous iterations since its inception. First proposed by Joseph Redmon et al. in 2015 and published at CVPR 2016, YOLO's revolutionary contribution was reframing object detection as a single regression problem — predicting bounding boxes and class probabilities simultaneously in a single forward pass, completely overturning the two-stage detection paradigm dominated by the R-CNN family.
Understanding this historical context is crucial. Before 2015, object detection was ruled by R-CNN variants: R-CNN (2013) required separate feature extraction for each region proposal, making it extremely slow (~2 seconds per frame); Fast R-CNN (2015) improved speed by sharing convolutional feature maps; Faster R-CNN introduced the Region Proposal Network (RPN) for end-to-end training, but remained a two-stage framework with inference speeds of only 5–10 FPS. YOLO pushed inference speed to 45 FPS (and Fast YOLO to 155 FPS), a milestone breakthrough at the time. This "look only once" design philosophy made real-time object detection possible and cemented YOLO's lasting relevance in both industry and academia.
For beginners just entering the field of object detection, facing the sprawling version landscape from V1 to the latest release often raises a natural question: Is it enough to just learn the latest version? Can earlier versions be skipped entirely?
This seems reasonable, but it misses a fundamental principle of technical learning. This article outlines a more effective YOLO learning path for beginners — one that avoids blindly chasing the newest release while also not getting lost in a sea of papers.
Part 1: Version Evolution — Understanding the Logic Matters More Than Memorizing Details
Classic Versions Cannot Be Skipped
YOLO has many versions, but that doesn't mean early ones can simply be ignored. The recommendation for beginners is to do a "shallow read" of the classic versions — you don't need to dissect every technical detail, but you should understand the core idea behind each generation.
Before diving into individual versions, it's worth understanding the two major paradigms in object detection. Two-stage detectors (e.g., R-CNN, Faster R-CNN) first generate region proposals via an RPN, then classify each one — achieving high accuracy but at the cost of speed, typically around 5–10 FPS. One-stage detectors (e.g., YOLO, SSD) merge proposal generation and classification into a single step, completing all predictions in one forward pass, trading a small amount of accuracy for orders-of-magnitude speed gains. It's worth noting that SSD (Single Shot MultiBox Detector, 2016) is another important single-stage detector that evolved in parallel with YOLO, each taking a different approach to multi-scale detection — SSD predicts directly on feature maps at different scales, while YOLO gradually developed a more systematic feature fusion mechanism. Understanding this paradigm distinction is the foundation for grasping YOLO's design motivation and for making informed algorithm choices in real projects.
Here's a practical breakdown of what to focus on:
- YOLO V1: Understand how the one-stage detection framework was originally conceived, building an intuitive sense of "end-to-end detection." V1 divides the image into a 7×7 grid, with each cell predicting 2 bounding boxes and class probabilities. This established the foundational framework of grid partitioning and multi-box prediction, but was limited to predicting a single class per cell — causing significant missed detections in dense scenes, a limitation that drove subsequent improvements.
- YOLO V3: Widely used in industry for a long period. V3 adopts the Darknet-53 backbone (with residual connections) and draws on Feature Pyramid Network (FPN) ideas to perform detection at three scales — 13×13, 26×26, and 52×52 — dramatically improving detection of multi-scale objects, especially small ones. It's a classic case study in modern multi-scale detector design.
- YOLO V4: Focus on what new modules it introduced on top of its predecessors. Led by Alexey Bochkovskiy, V4 systematically integrates CSPNet (Cross Stage Partial Network, which reduces computation while preserving gradient flow), PANet (Path Aggregation Network, which strengthens bottom-up feature propagation), Mosaic data augmentation (random four-image stitching to expand receptive fields and diversify training samples), and other "Bag of Tricks" — making it a masterclass in deep learning engineering optimization. Studying it teaches you how to organically combine scattered techniques into a more powerful system.
Focus on the "Improvement Logic," Not Isolated Facts
The key to studying each version isn't memorizing which tricks were used — it's understanding the causal chain of technical evolution: What bottleneck did the previous version hit? Why did the next version make a particular change?
For example, in V1, each grid cell could only predict a single class, causing serious missed detections in crowded scenes. V2 therefore introduced Anchor-based mechanisms, using K-Means clustering on the training set to generate prior box shapes, allowing multiple candidate boxes of different shapes per location — while also introducing Batch Normalization to stabilize training. This "problem → solution" perspective is far more valuable than memorizing parameter configurations in isolation. When you connect the improvement motivation of each generation, you build a coherent mental model of the YOLO family — and this evolutionary thread is itself a condensed history of object detection.
Part 2: Learning Strategy — Use Video Resources, Don't Grind Through Papers
The Efficiency Advantage of Video Learning
For beginners, here's a very practical recommendation: don't spend the bulk of your time grinding through original research papers. Papers are slow to read, and for learners with weaker foundations, the high barrier often leads to frustration.

The good news is that video resources covering YOLO are abundant, with systematic tutorials available for virtually every major version. Through video, you can quickly grasp the core differences between versions, understand each generation's improvement direction, and build your own knowledge map in a relatively short time.
Building an Overall Understanding Is the First Goal
The goal at this stage is clear: understand the conceptual thread running through YOLO's versions as efficiently as possible. You don't need to be able to reproduce anything from scratch yet — instead, form a clear mental map of the technology's evolution as a foundation for deeper study later.
Part 3: Deep Dive into Source Code — The Critical Leap from "Getting It" to "Actually Knowing It"
Why You Must Debug the Source Code Yourself
Listening to someone else explain things — whether via video or blog — has a fundamental limitation: you don't actually have a firm grasp of many implementation details. You understand the big picture, but the specifics at the code level remain a black box.
This is exactly where beginners most commonly get stuck — and most commonly overlook. One principle worth emphasizing repeatedly is:
You must go deep into the source code. You must go deep into the details.
"Debug-style source reading" means setting breakpoints and stepping through execution to observe the shape, value changes, and control flow of each tensor as real data flows through the network — rather than statically browsing code text. The Ultralytics YOLOv5 or YOLOv8 repositories are ideal targets: both have clean code structure, solid documentation, and active communities. In practice, start from the entry point in detect.py or predict.py and set breakpoints at key nodes: when the dataloader outputs, observe image tensor shapes and normalization; when the Backbone outputs, note the feature map dimensions at each scale; when the detection Head outputs, understand how raw predictions are decoded into bounding box coordinates; inside the loss function, trace the positive/negative sample assignment logic (e.g., IoU threshold settings, the scoring mechanism of TaskAlignedAssigner) and loss component weights; during the NMS post-processing stage, observe the confidence threshold and IoU threshold filtering. At each breakpoint, cross-reference tensor shapes and values against the paper's formulas. This bidirectional "code ↔ formula" verification is the fastest way to eliminate blind spots — and a complete source walkthrough typically takes one to two weeks.
How to Choose a Version for Source Code Study
After completing the "shallow read" phase of the first two stages, you can move into hands-on source code work. The recommendation here is pragmatic:
- Pick one relatively recent version — don't fixate on the absolute latest
- Differences between recent versions are limited; pick whichever feels comfortable
- No need to go through multiple versions — thoroughly working through one is more than enough
By completing a full debug walkthrough, you'll be able to see exactly how every detail in the source code is implemented and truly understand what each line of code is doing. Only by going deep into the details can you claim to have genuinely mastered the technology.

Part 4: Complete Learning Path Summary
Putting it all together, a clear and actionable YOLO learning roadmap can be broken down into three steps:
Step 1: Shallow Read of Classic Versions
Use video resources to quickly grasp the core ideas and evolutionary logic of classic versions like V1, V3, and V4, building an overall conceptual framework. Focus on understanding what specific problems each generation solved on top of its predecessor: from V1's grid-based detection framework (7×7 grid, end-to-end regression), to V2's Anchor mechanism and multi-scale training, to V3's multi-scale feature fusion (three-scale detection heads), to V4's engineering tricks integration (CSPNet, PANet, Mosaic). This evolutionary thread is itself a condensed history of object detection. This stage prioritizes breadth and efficiency — don't get bogged down in implementation details.
Step 2: Master the Environment and Core Workflow
This covers environment setup, model inference, custom dataset construction, and training — the essential practical skills for object detection. This is the bridge between theory and practice and cannot be skipped. Focus on familiarizing yourself with data annotation formats (YOLO-format .txt label files), the meaning of training configuration parameters, and deployment-related knowledge such as model export (ONNX, TensorRT).
Step 3: Deep Source Code Reading
Choose a relatively recent version and read the source code line by line via debugging, going deep into every implementation detail. Key areas to focus on: the data preprocessing pipeline (Letterbox resizing, Mosaic augmentation specifics), model forward pass (tensor dimension transformations across modules), loss calculation and positive/negative sample assignment (Anchor-based or Anchor-Free assignment strategies), and post-processing (NMS IoU computation and greedy filtering). This is the decisive step that takes you from "getting it" to "actually knowing it."
Conclusion
YOLO intimidates many beginners for two common reasons: either they try to jump straight to the latest version while skipping the fundamentals, or they attempt to read every paper and make painfully slow progress.
The path described in this article offers a more balanced approach — first build macro-level understanding through video, then work through the micro-level details via source code. There are no shortcuts in technical learning, but there are more efficient paths. For anyone aiming to go deep into computer vision or even embodied intelligence, thoroughly mastering one version of YOLO is far more meaningful than skimming ten versions superficially.
It's worth highlighting that YOLO holds significant value in the field of Embodied AI. Embodied intelligence enables agents like robots and autonomous vehicles to perceive, reason, and act through interaction with the physical environment — and object detection is a core component of their perception stack. Robotic arm grasping requires precise object localization; navigation and obstacle avoidance depends on real-time detection; human-robot collaboration demands real-time recognition of human poses. YOLO is a preferred detection backbone for embedded and embodied scenarios because of its fast inference speed, support for acceleration frameworks like TensorRT, and ease of deployment on edge devices. Systematically learning YOLO means you're laying a solid foundation for entering the complete embodied intelligence technology chain of perception → planning → execution.
The YOLO family has gone through nearly a decade of evolution from V1 to the latest version, with each improvement reflecting deep insight into the detection problem. Studying along this evolutionary thread systematically, you gain not just the ability to use a tool, but a transferable analytical mindset for understanding technology.
Related articles

An OpenAI Researcher's Deep Dive: The Truth About 10,000 AI Agents and Recursive Self-Improvement
OpenAI researcher Noam Brown breaks down multi-agent systems, recursive self-improvement, and alignment risks — from 10,000 agents cracking Millennium Problems to the Hugging Face incident.
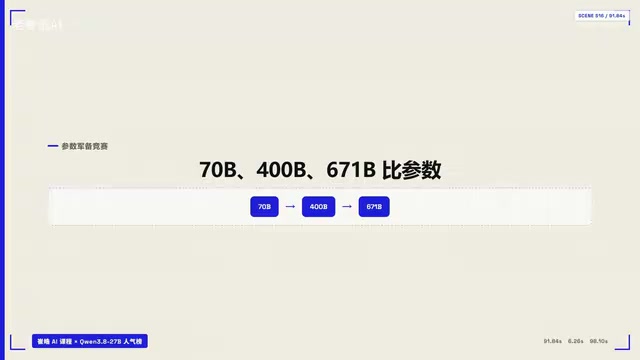
27B Dense Model Tops Hugging Face All-Time Likes: Frontier-Level Agentic Ability on 16GB VRAM
A 27B dense model from Hangzhou tops Hugging Face's all-time likes chart. Quantized to 16GB VRAM, a single RTX 4090 delivers frontier-level Agentic performance locally.
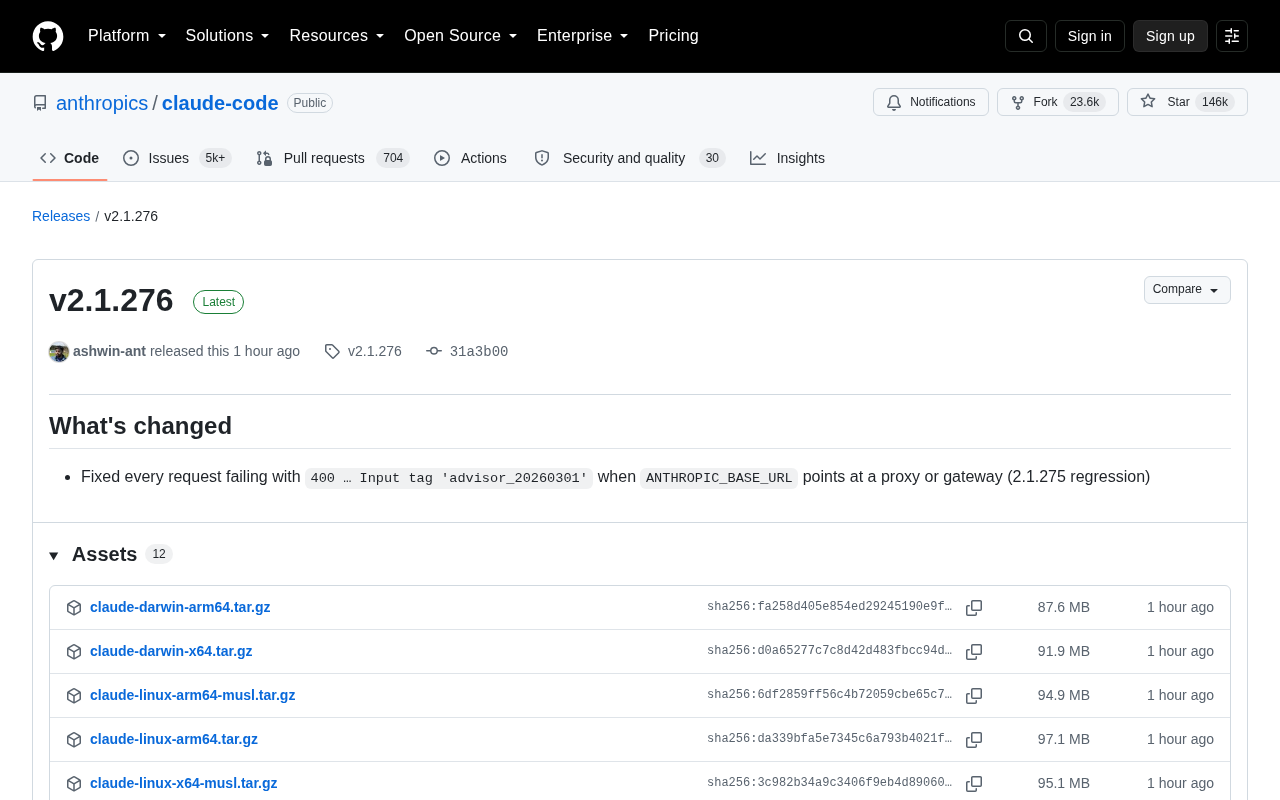
Claude Code v2.1.276 Released: Fixes Proxy/Gateway 400 Error Regression
Claude Code v2.1.276 fixes a critical regression from v2.1.275 where all requests via proxy or gateway failed with a 400 error (Input tag 'advisor_20260301'). Upgrade now.