AI Coding Agents: Building and Deploying a Website from Scratch — Docker Containerization to HTTPS End-to-End

A complete guide from AI-generated code to production deployment with Docker, VPS, and HTTPS certificates.
This article walks through the full pipeline of building and deploying a website using AI coding agents: generating a static site with Cloud Code and Astro.js, containerizing it with Docker multi-stage builds, deploying to a VPS via rsync, and configuring HTTPS with Certbot and Let's Encrypt. It emphasizes that coding agents solve only the code generation part — the real challenge lies in the DevOps knowledge needed to go from localhost to a live, secure production website.
Many people assume that AI coding agents like Cloud Code or Codex make it easy to build a website. But in reality, prompts alone are far from enough — turning code into a truly live website with a secure connection is where the real challenge lies.
This article is based on a complete tutorial from the YouTube channel NeuralNine, walking through how to go from development to containerization, server deployment, and HTTPS encryption using an AI Agent — all without writing frontend code yourself. This guide is particularly suited for two types of people: complete beginners with no technical background, and developers who know their stuff but don't want to touch CSS/JavaScript/HTML.
Why AI Coding Agents Aren't Enough on Their Own
The author makes his core point right at the start: coding agents only solve a small part of the entire workflow. After you have Cloud Code generate a beautiful static website, the steps that actually need tutorial guidance are everything that follows — how to package it into a Docker image, how to purchase and configure a VPS server, how to upload files with rsync, and how to obtain a Let's Encrypt certificate via Certbot for HTTPS.
Here it's important to understand the capability boundaries of AI coding agents. Cloud Code is Anthropic's command-line coding agent based on the Claude model, capable of understanding project context and autonomously writing and modifying code. Codex is OpenAI's similar tool. The core strength of these agents lies in code generation and refactoring, but they fundamentally run in local development environments and lack direct control over network configuration, server management, SSL/TLS certificates, and other infrastructure-level operations. The DevOps knowledge domain encompasses continuous integration, continuous deployment, infrastructure as code, monitoring and alerting, and many other dimensions — it's the critical bridge that transforms code into reliable online services.
This perspective is valuable. A huge amount of current AI coding content stays at the "how to write good prompts" level, while production deployment knowledge is often overlooked. Between a project that only runs on localhost and a website with security certificates accessible on the public internet lies an entire DevOps knowledge stack.
The tech stack used in this tutorial is very clear:
- Coding Agent: Cloud Code (considered the strongest by the author, though he mentions the newly released Kimi K2 as worth watching)
- Frontend Framework: Astro.js (ideal for static content-driven websites)
- Containerization: Docker + Docker Compose
- Hosting Service: hosting.com VPS (Linux server with root access)
- HTTPS: Certbot + Let's Encrypt
Regarding Kimi K2, this is a large language model released by Moonshot AI in 2025, built on a trillion-parameter-scale Mixture of Experts (MoE) architecture. The defining characteristic of MoE architecture is that while the total parameter count is massive, only a subset of expert networks are activated during each inference pass, maintaining powerful capabilities while controlling computational costs. Kimi K2 has shown outstanding performance on multiple coding benchmarks and is considered a strong competitor to Claude and GPT, reflecting the increasingly fierce competition in the AI coding agent space.
Setting Up the Framework with Astro, Letting the AI Agent Fill in Content
One practical technique from the author: manually create the Astro project framework first, then hand it off to the AI Agent. Initialize the project via npm create astro@latest (or pnpm) and select the basic template — this provides the Agent with clear working boundaries and structure.
Astro.js is a modern web framework centered on content, with a core design philosophy of "zero JavaScript by default" — by default, it sends no JavaScript code to the browser, outputting only pure static HTML and CSS. This gives it a significant performance advantage over SPA (Single Page Application) frameworks like React and Vue. Astro supports "Islands Architecture," allowing JavaScript components to load only in localized areas that need interactivity while keeping the rest of the page purely static. For personal homepages, blogs, documentation sites, and other content-driven websites, Astro generates extremely small build artifacts with blazing-fast load times, making it ideal for deployment on lightweight web servers.
Next comes providing two things needed for the design: design ideas and asset materials. The author places an AI-generated avatar image into the source/assets directory, then describes the entire website structure to Cloud Code in natural language — avatar on the left, title "Mike Smith AI" on the right, subtitle slogan, three feature icons (Reliable, Efficient, Cutting-edge), five services (MLOps, Agentic Systems, Fine-tuning, RAG Pipelines, Compliance Checks), and finally a contact section, specifying a navigation-blue and white alternating color scheme.
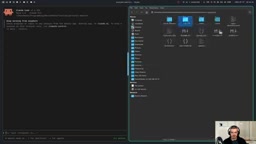
The result is impressive: the author only needs to press enter a few times to run build commands, and the website is automatically generated. While the first attempt may not be perfect, you can iterate through continued conversation to adjust details. The author deliberately doesn't focus on "how to prompt" because most readers are already familiar with that — the real substance is in the deployment phase.
Docker Containerization: From localhost to Portable Deployment
This is the critical leap from "it runs" to "it's deployable." The author uses a multi-stage build Dockerfile strategy:
FROM node:22-bookworm-slim AS build
WORKDIR /app
RUN corepack enable
COPY . .
RUN pnpm install --frozen-lockfile
RUN pnpm build

FROM nginx:1.27-alpine
COPY --from=build /app/dist /usr/share/nginx/html
Multi-stage builds are an important feature introduced in Docker 17.05, solving the classic problem of bloated container images. In traditional approaches, build toolchains (such as the Node.js runtime, npm packages, compilers) remain in the final image, potentially inflating production images to hundreds of MB or even several GB. By defining multiple FROM instructions, the build stage and runtime stage are completely separated: the first stage uses a Node image to install dependencies and build the Astro project with the full development toolchain; the second stage only copies build artifacts (static HTML/CSS/JS files in the dist directory) from the first stage. Combined with an Alpine Linux minimal base image, the final image can be compressed to the 10-30MB range. Nginx serves here as a high-performance static file server, delivering high-concurrency file distribution with extremely low resource consumption.

The accompanying docker-compose.yaml defines the web service, maps container port 80 to host port 80, and sets restart: unless-stopped for stability. During the build process, the author encountered a typical issue: pnpm throwing interactive errors in CI environments. The solution was setting ENV CI=true and adding a .dockerignore file to exclude node_modules, dist, .astro, .git, and other irrelevant files.
This CI compatibility issue is worth elaborating on: pnpm is an efficient Node.js package manager that achieves disk space savings and faster installation through hard links and content-addressable storage. The --frozen-lockfile parameter ensures the installation process strictly follows the lock file without accidentally updating dependency versions. In CI environments, pnpm may trigger interactive prompts (such as corepack confirmation dialogs), but Docker builds are non-interactive and cannot respond to stdin input. Setting the ENV CI=true environment variable is an industry-standard practice that tells various tools they're in an automated environment and should skip all interactive prompts, adopting default behavior instead.
Notably, the author emphasizes that these Docker configuration files themselves can also be generated by the coding agent — you don't have to type every line manually.
VPS Server Deployment and File Upload
With the container ready, you need a server. The author chose hosting.com's VPS plan (the video's sponsor), configured with Ubuntu 24.04 LTS at a Frankfurt node. After logging into the server via SSH as root, you have full terminal control.
For file upload methods, the author lists three options — Git repository push, SCP, and rsync — and goes with his preferred rsync:
rsync -avz --progress personal-website root@<IP>:/root/personal-website
rsync is a powerful file synchronization tool in Unix/Linux systems, with its core advantage being incremental transfer — by comparing checksums between source and target files, it only transfers the parts that have changed rather than doing a full upload every time. The parameter -a means archive mode (preserving permissions, timestamps, symbolic links, etc.), -v means verbose output, and -z enables transfer compression. Compared to SCP's full copy approach, rsync is significantly more efficient for subsequent update deployments; compared to Git push, rsync doesn't require configuring a Git repository on the server and avoids transferring unnecessary content like .git history to the production server. For frequently iterated personal projects, rsync provides the most direct deployment path.
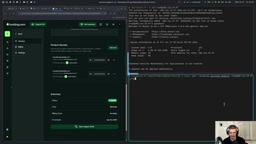
After the upload is complete, the server still lacks a Docker environment. The author demonstrates the complete process of copying and pasting commands from Docker's official Ubuntu installation page: updating packages, installing certificates, adding the repository, and executing the installation. With Docker installed, a single docker compose up --build gets the entire website running. At this point, visiting the server IP shows the website live — but the connection isn't secure yet, with no HTTPS indicator in the browser address bar.
Configuring HTTPS Certificates with Certbot: Encrypting an IP Address
This is the most technically substantial part of the entire tutorial. HTTPS certificates are typically bound to domain names, but the author demonstrates an advanced technique: requesting a Let's Encrypt certificate for a bare IP address.
To understand the technical background: Let's Encrypt is a free Certificate Authority (CA) operated by the Internet Security Research Group (ISRG). Since launching in 2015, it has issued billions of certificates, dramatically advancing HTTPS adoption across the web. The underlying ACME (Automatic Certificate Management Environment) protocol defines the automated certificate issuance workflow: applicants place specific verification files at the /.well-known/acme-challenge/ path on their web server to prove control over that server to the CA — this is known as HTTP-01 validation. Certbot is the most popular client implementation of the ACME protocol.
The author first creates certbot/www and letsencrypt directories, then writes an Nginx configuration file that includes an ACME challenge location (pointing to /.well-known/acme-challenge/) in the port 80 server block for certificate verification.
Next, a new certbot service is added to docker-compose using the certbot/certbot:latest image, with shared volumes mounted (the web service mounts the certbot directory and letsencrypt directory as read-only). The author specifically notes: HTTPS support for IP addresses requires Certbot version 2.x or above (his tested version 57 meets this requirement), because it uses the short-lived certificate profile — the only type supported for IP certificates.
Typically, Let's Encrypt certificates are valid for 90 days and support automatic renewal, but certificates issued for IP addresses are a special case. Since ownership verification for IP addresses is more complex than for domain names (IP addresses can be reassigned), Let's Encrypt only supports short-lived certificates with a 7-day validity period. This is the fundamental reason why production environments strongly recommend using domain names.
The core command for requesting the certificate specifies the short-lived profile, IP address, certificate name, and email. Upon success, the certificate is saved at /etc/letsencrypt/live/<IP>/fullchain.pem with the private key at privkey.pem, valid for only 7 days.
The final step is modifying the Nginx configuration to actually serve HTTPS:
- Port 80 returns a 301 redirect, routing all HTTP traffic to HTTPS
- A new port 443 server block is added, with
ssl_certificateandssl_certificate_keypointing to the certificate paths - The letsencrypt directory is mounted in the web service so the container can access the certificates
After running docker compose down and docker compose up --build again, visiting the IP address finally shows "Connection is secure" in the browser — the HTTPS website is officially live.
Summary: The Complete Technical Path for AI-Powered Website Building
The true value of this tutorial isn't how magical it is to generate a website with AI, but rather that it fills the gap between prompt and production deployment that's widely overlooked. The author repeatedly emphasizes that "coding agents aren't enough," reminding us that while AI can accelerate code generation, containerization, server operations, and certificate management still require solid foundational knowledge.
It's worth noting that the tutorial omits domain name purchase for demonstration purposes, configuring HTTPS directly with an IP address — this is only a short-term solution (certificate expires in 7 days). In production environments, you still need to register a domain name and request standard long-term certificates (90-day validity with automatic renewal support). Additionally, a complete production deployment should also consider firewall configuration, log monitoring, automated CI/CD pipelines, and other aspects that the tutorial doesn't cover but are equally important operational knowledge.
For developers who want to quickly have a personal website, this "Astro + Docker + VPS + Certbot" combination, paired with AI coding agents, genuinely provides a path with a lower barrier to entry that's also closer to real production workflows.
Related articles

Gaussian Process Bandit Optimization: Exploration Strategies and Inference Regret Guarantees
Cumulative regret guarantees in Bayesian optimization fail to reflect final recommendation quality. This article examines a new study that provides inference regret guarantees for Gaussian process bandit optimization through exploration query strategies and fill distance analysis, validated on hyperparameter optimization and control tasks.
The Most Detailed Codex Guide on Bilibili: From Installation to Real-World Practice
The most detailed Codex guide on Bilibili: from app store installation to daily work mode configuration, with a real coffee shop project demonstrating file organization, data extraction, dashboard creation, and other practical tasks. Learn to use Plan Mode and desktop pets to leverage Codex efficiently.

Appearance Compensation in Volume Rendering: Why RGB Accuracy Cannot Guarantee Density Correctness
Volume rendering research reveals that volumetric data perfectly reproducing external RGB views may still contain density errors: appearance compensation can double central density and keep external rays unchanged even when L2 error exceeds 14.52%. Density recovery depends on appearance capacity, spatial resolution, and measurement design.