Auto-Convert Blog Posts into X Tweets and LinkedIn Posts with n8n
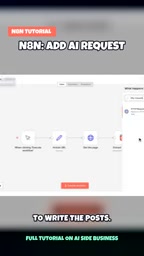
Use n8n's HTTP node with the Gemini API to auto-generate multi-platform social media posts from blog content.
This article explains how to configure an HTTP request node called "Write the Posts" in n8n to send blog article text to the Gemini API and automatically generate social media copy for platforms like X and LinkedIn. Key configuration points include setting the HTTP method to POST, using Gemini's OpenAI-compatible chat completions endpoint, and giving nodes clear descriptive names. The OpenAI-compatible endpoint allows the same request structure to be reused across other compatible providers, reducing vendor lock-in. This fetch→process→distribute automation pattern also extends to use cases like rewriting podcast transcripts, generating multilingual announcements, and batch-producing e-commerce copy.
Why Automate Multi-Platform Content Distribution from a Single Blog Post
Content creators and marketing teams often face the same pain point: after writing a blog post, they still have to manually rewrite it into a Twitter/X thread and a professional LinkedIn post. The repetitive work is time-consuming and makes it easy to fall behind on distribution. With the automation tool n8n, you can chain together the entire pipeline — "fetch article → call an LLM to rewrite → generate multi-platform copy" — so every blog post automatically produces matching social media content.
This YouTube tutorial demonstrates the core step: how to configure an HTTP request node in n8n that sends the article body to the Gemini API and instructs the model to write platform-appropriate posts.
The Core Node: Write the Posts
The key node in this workflow is named Write the Posts. It's essentially an HTTP request node with a clear responsibility — take the article text extracted by upstream nodes, send it to the Gemini API, and issue the instruction to "write social media posts for me."
The first step in configuration is renaming the node. Clear node naming matters a lot in visual workflow tools like n8n. As your workflow grows longer and more complex, a descriptive name lets you understand what each step does at a glance, and makes future maintenance and debugging much easier.
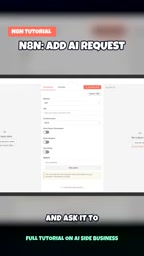
Key Configuration: HTTP Method and Request Endpoint
Inside the Write the Posts node parameters, two settings determine whether the request succeeds.
Set the HTTP Method to POST
Because you are sending data to the Gemini API (the article body), the HTTP method must be set to POST, not GET (which is used for reading). This is a fundamental rule of REST API calls: use POST to submit content.
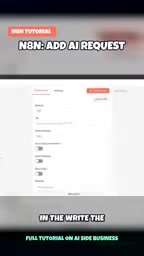
In REST APIs, the choice of HTTP method follows semantic conventions: GET is used to read a resource from the server and carries no request body; POST is used to submit data to the server, with the data transmitted inside the request body. When calling an LLM API, you need to bundle the article text, system prompt, model name, and other parameters into a JSON request body — this is inherently a "submit data" operation, so POST is required. If you mistakenly use GET, the request body will be ignored, the API won't receive the article content, and the call will fail or return an empty result.
Use an OpenAI-Compatible Endpoint
The request URL should be Gemini's OpenAI-compatible chat completions endpoint. This is a technical detail worth paying attention to in the tutorial: Gemini exposes an interface compatible with OpenAI's format, meaning the same request structure can be reused directly with other OpenAI-compatible providers.
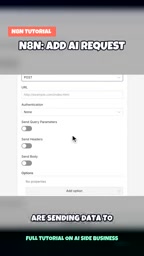
The practical value of this compatibility is flexibility to switch: you use Gemini today, and if you want to switch to another OpenAI-protocol-compatible model tomorrow, you only need to change the endpoint URL and API key — no need to rewrite the entire node's request body. For users who want to reduce vendor lock-in risk or compare outputs across different models, this is a genuinely useful design.
An "OpenAI-compatible endpoint" refers to a third-party AI provider offering an interface that follows OpenAI's Chat Completions API specification — specifically the /v1/chat/completions path and corresponding JSON request/response structure. OpenAI's interface format has effectively become an industry standard: the request body contains fields like model and messages, and the response returns the generated text at choices[0].message.content. Google Gemini, Groq, Together AI, Mistral, and others all provide endpoints compatible with this format, allowing users with existing OpenAI integration code to switch underlying models with zero or minimal changes. In workflow tools like n8n, this means you only need to maintain one HTTP node configuration template and can freely switch between model providers by swapping the base_url and API key — dramatically lowering migration costs and vendor lock-in risk.
Where This Approach Can Take You
Although this material focuses on configuring a single node, it reflects a general automation pattern: fetch → process → distribute. Once you've mastered the technique of "calling an LLM via an HTTP node," you can apply it to a wide range of scenarios — such as rewriting podcast transcripts into email newsletters, converting product changelogs into multilingual announcements, or batch-generating different marketing copy styles for e-commerce product descriptions.
When building these kinds of workflows, a few lessons are worth keeping in mind: name your nodes clearly; clearly distinguish between POST (submit) and GET (read); and prefer OpenAI-compatible endpoints to preserve flexibility. Get these fundamentals right, and the rest is simply a matter of tuning your prompts for different platforms — making X tweets short and eye-catching, and LinkedIn posts more professional and structured.
Summary
This tutorial covers just one segment of a complete workflow, but it highlights several essentials of content automation with n8n: using an HTTP request node as the bridge to an LLM, setting the correct request method, and leveraging OpenAI-compatible endpoints. For creators looking to reduce repetitive content repurposing and improve distribution efficiency, this is a path well worth trying out hands-on.
Related articles

Googlebook In-Depth Review: Can Google's New Laptop Replace the Chromebook?
In-depth Googlebook review: Google Book OS on Android 17, Pixel ecosystem integration, Gemini semantic search, and how it stacks up against Chromebook and MacBook Air on price and apps.

Python in Practice: Build an MCP Server from Scratch to Give LLMs Real-Time Web Data
Step-by-step guide to building an MCP server with Python and FastMCP, connecting it to Claude Code and Claude Desktop, and enabling LLMs to answer questions with live web data.

The Battle for ICANN's New Top-Level Domains: Meta and OpenAI Race to Claim .agent and .agi
Meta and OpenAI compete for .agent and .agi in ICANN's new TLD round; GTA VI nears launch amid leaks; Joe Rogan signs ~$250M Spotify renewal.