Best Image-to-Prompt Tool for ComfyUI: Complete Local Installation Guide for the DeepSeek 1B Model
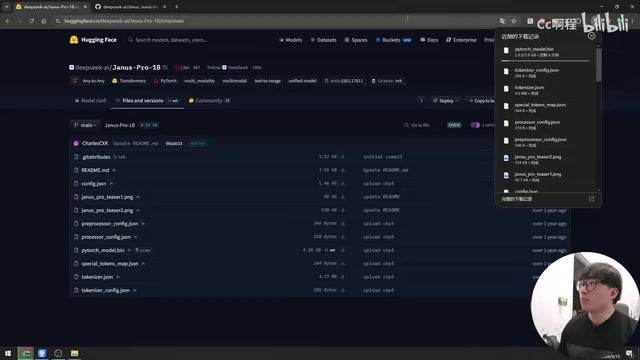
Run DeepSeek's 1B image-to-prompt model in ComfyUI on an RTX 3060 — lightweight, fast, and high quality.
This guide walks through deploying the DeepSeek Janus Pro image-to-prompt model in ComfyUI. The 1B version (~4 GB) runs smoothly on an RTX 3060 laptop, dramatically lowering the hardware bar for high-quality reverse prompting. Key steps include cloning the Janus Pro custom node, downloading the model, and installing a specific wheel dependency via ComfyUI's built-in Python environment. The wheel installation step carries the most risk — it updates core libraries like `transformers` — so backing up your virtual environment beforehand and ensuring you're not touching the global Python environment are both essential precautions.
Why Choose the DeepSeek Reverse-Prompt Model
In ComfyUI image-to-prompt workflows, the quality of the reverse-engineered prompts directly determines how accurately the subsequent image generation performs. Models we've commonly relied on in the past — such as Joy-Caption — deliver decent results but demand significant VRAM and hardware resources, making them a real struggle to run on typical consumer-grade GPUs.
This guide introduces a reverse-prompt model based on the DeepSeek open-source project. Its standout feature is the lightweight 1B-parameter version. Compared to large models that routinely require massive VRAM, this 1B model is "extremely, extremely light on VRAM." The author tested it on a laptop with an RTX 3060 and it ran smoothly, with the reverse-prompt quality still being "absolutely top-notch." For users with limited hardware who still want high-quality results, this is an exceptionally cost-effective choice.
The model comes in two versions — 1B and 7B. Users with ample VRAM can try the 7B version, but the author's clear recommendation is that 1B is more than sufficient for the vast majority of use cases.
"Image-to-prompt" (also called reverse prompting) is the process of having a multimodal model analyze an image and automatically generate text prompts that describe its content, style, composition, and other characteristics. This technique is highly practical for image repainting, style transfer, and precise replication — when you have an image you love but have no idea what prompts generated it, a reverse-prompt model can "reverse-engineer" it for you. DeepSeek's Janus Pro is a unified multimodal framework that supports both image understanding (reverse prompting) and image generation. Its 1B-parameter version retains strong image-text comprehension while keeping the model compact — which is precisely why it can run efficiently on consumer-grade GPUs.
Pre-Installation Prep: Nodes and Model Files
The core of the entire installation process is actually quite simple: you only need two custom nodes and one model file.
Step 1: Clone the project node. Find the project URL and clone the reverse-prompt node (the Janus Pro-related node) into ComfyUI's custom nodes directory. This step is the foundation that allows the workflow to recognize the reverse-prompting functionality.
Step 2: Download the model files. Navigate to the model download page and download all the corresponding files. The 1B version weighs in at approximately 4 GB; download time will depend on your connection speed. The author suggests using the download time to simultaneously prepare other necessary files to save overall installation time.
The Critical Step: Installing the Wheel File
This is the step most likely to go wrong in the entire tutorial — pay close attention.
From the DeepSeek project's requirements folder page, you'll find an additional dependency — the so-called "wheel" file. Clone this wheel project into the designated target directory. The author specifically emphasizes that once this step is done, the installation is essentially 70% complete.
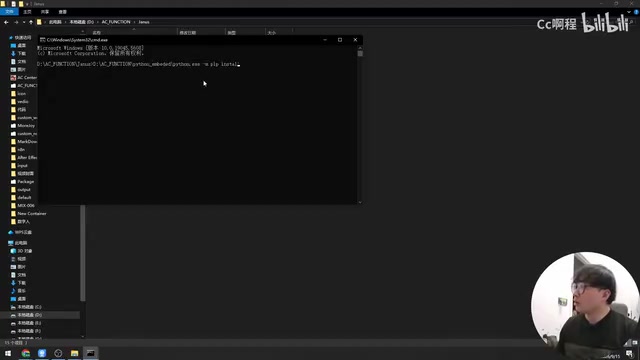
Before installing the wheel, make sure you first navigate to your ComfyUI installation directory. Enter the cloned target directory and invoke ComfyUI's built-in Python virtual environment via cmd. You can run the following command first to verify the environment is correct:
python.exe -m pip list
If it successfully lists all installed packages, the virtual environment is correctly targeted. Once confirmed, navigate back to the cloned directory and run the install command:
pip install ./(corresponding wheel file)
Strongly Recommended: Back Up Your Virtual Environment First
The author repeatedly stresses this point: the installation process will update several key components, including the transformers library, which will be updated as a side effect. For this reason, he recommends backing up the entire virtual environment before proceeding.
This advice comes from hard-won experience — the author ran into trouble the first time he installed this on his office computer because he accidentally installed the dependencies into the global environment, and uninstalling them caused further problems. The issue was eventually resolved by using an isolation layer. The whole point of backing up is simple: if something goes wrong, you have a way to roll back. After the installation is complete, you can also take the opportunity to update pip and any necessary components.
A "wheel" (file extension
.whl) is a pre-compiled Python package format that installs faster and offers more predictable dependency management compared to building from source. Certain deep learning dependencies — such as operator libraries tightly bound to specific CUDA versions — can't be obtained in environment-compatible versions directly from PyPI, so project maintainers provide pre-compiled wheel files for manual installation viapip install ./xxx.whl. One critical thing to keep in mind: ComfyUI has its own isolated Python virtual environment (typically in thepython_embededfolder within the installation directory). If you runpip installin the command line without explicitly calling that environment's Python/pip, the dependencies will be installed into the system's global Python environment. This means ComfyUI won't be able to find them, and your system environment may get polluted with conflicts that are difficult to roll back.The simplest way to back up a Python virtual environment is to copy the entire folder: just copy ComfyUI's
python_embeded(orvenv) directory to another location. To restore, simply overwrite the original directory with the backup. Thetransformerslibrary (Hugging Face'stransformers) is a core dependency shared by many AI nodes — a version upgrade can cause incompatibility errors in other nodes that rely on it, which is precisely why backing up matters most here. If disk space is tight, you can also runpip freeze > requirements_backup.txtto record the current list of package versions as a reference for troubleshooting.
Deploying the Model and Verifying It Works
Once the wheel is installed, you're into the final deployment phase.
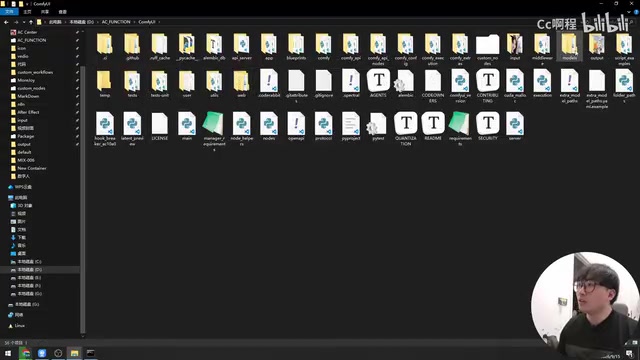
First, following the project instructions, create the corresponding folder structure under ComfyUI's models directory. Navigate into the models directory, create a model folder, then create subfolders according to the naming requirements. Once the folder structure is in place, move all the previously downloaded model files into it.
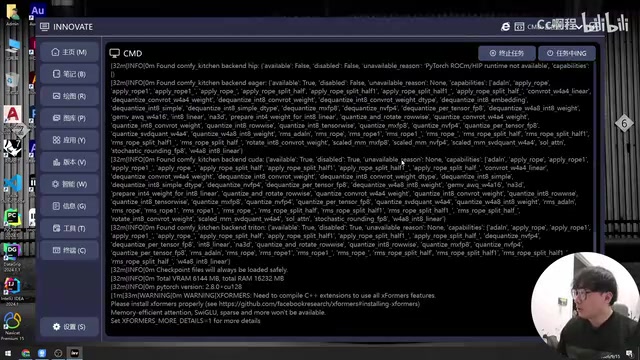
After placing the model files, you can launch ComfyUI. Watch the console during startup — if all components load correctly with no errors, the installation was successful. The author notes that loading will be a bit slower on a laptop, and this process will also update transformers and other important components, which again underscores the importance of backing up beforehand.
Building the Reverse-Prompt Workflow
Once ComfyUI launches successfully, create a new workflow to test the reverse-prompting:
- Find the loader node starting with "J" (the Janus loader) and load the model
- Add the
understanding-related node and connect it - Add a
load imagenode to load the image you want to reverse-prompt - Click Run to start loading the model and generating reverse-prompt output
The author tested this on an RTX 3060 laptop — the 1B model ran "without any strain" and successfully output reverse-prompt results. With the full workflow verified, as long as you follow the steps carefully, a fresh installation should go smoothly.
Summary and Practical Tips
The greatest value of this DeepSeek-based ComfyUI reverse-prompting solution is achieving high-quality results at an extremely low hardware barrier. The core advantages can be summarized in three points: lightweight model (the 1B version is only ~4 GB), VRAM-friendly (runs smoothly on an RTX 3060), and excellent reverse-prompt quality.
For users ready to give this a try, two key reminders: first, always back up your virtual environment before installing the wheel file — don't make the same mistake the author did; second, always confirm you're working with ComfyUI's built-in Python environment rather than the system global environment — this is the key to avoiding dependency conflicts.
As long as you keep these two points in mind, the entire installation process is quite manageable and well worth trying for anyone looking to upgrade their ComfyUI reverse-prompting experience.
Related articles

LynnReal-Omni: 32B Unified Video Diffusion Model Goes Open Source with Multi-Task Coverage in Four Steps
LynnReal-Omni is a 32B unified video diffusion model on MiniMax H3, covering text-to-video, pose guidance, style transfer, restoration in 4 steps. Flash version generates 540p video in 377ms on one H100.

Anthropic Co-Founder: AI 'Kill Switch' May Need to Be Mandatory by Law
Anthropic's co-founder tells the BBC that AI 'kill switches' may need to be legally mandated. We analyze the industry logic, technical challenges, and the tension between regulation and innovation.

The AI Data Center Boom Is Colliding With Cities Scarred by Heavy Industry
The AI data center boom is clashing with post-industrial communities. Philadelphia's case reveals structural conflicts between AI growth, energy use, water, and environmental justice.