Building an Automated LinkedIn Content Publishing Workflow with n8n + Vertex AI + Gemini

Use n8n to connect Vertex AI and LinkedIn into a daily scheduled, one-click-approved content pipeline.
The article breaks LinkedIn content operations into five stages—research topics, generate copy, create visuals, human approval, and auto-publish—orchestrated with n8n into a workflow that runs on a daily schedule. The research node calls Vertex AI's Gemini model via HTTP Request and attaches the Google Search tool so topics are based on real search results; a second AI node plays the role of "social media creative strategist" and produces structured output, generating both copy and image prompts in one call; images are generated by nano banana Pro, and the Base64 result is decoded into binary via the Limit and Convert to File nodes. Before publishing, a Gmail dual-email mechanism inserts human approval, and only after passing does it call the LinkedIn API to publish. The author highlights practical pitfalls such as Service Account authentication, passing binary data, explicitly fetching binary, and Continue on Errors.
Break LinkedIn content operations into five stages—"research topics → generate copy → create visuals → human approval → auto-publish"—and connect them with n8n. The whole pipeline can run on a daily schedule, and all you need to do is click "Approve" in your inbox.
Overall Architecture: Five Nodes Forming a Content Assembly Line
The core idea of this workflow isn't complicated, but there are plenty of details in how the nodes connect that are worth unpacking.
The starting point is the Schedule Trigger, set to fire at a fixed time each day (6 AM in the demo). It then flows into the Vertex AI research node, which calls Google's Gemini model via HTTP Request, paired with the Google Search tool, so the AI can dig through search engines for real problems.
The research results go to a second AI node, which plays the role of "social media creative strategist," turning the problems into posts that fit LinkedIn's tone and outputting structured content: a hook, a solution, a call to action (CTA), plus visual prompts and layout instructions for the image generation model.
Once the copy is ready, the Vertex AI image generation model (nano banana Pro in the demo) is called to create the visual. The Base64-encoded response needs to be decoded and converted into a file. The final stage is the Gmail approval node—first send the image in a separate email, then send an email with an approval button. Only after you click "Approve" does it actually call the LinkedIn API to publish.
Vertex AI Configuration: Service Account Is the Key
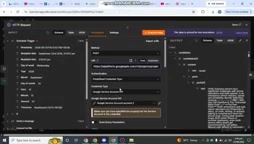
The author spends a considerable amount of time in the video on authentication, because it's the most likely place for the entire chain to get stuck.
In the Google Cloud console, you first need to secure free credits (roughly $300 in credits after applying), then go to API & Services → Agent Platform, and select the Gemini model you want to use from the model list. Clicking "View code" gives you the calling code directly—toss it into ChatGPT to format it, and it'll be adapted for n8n's HTTP Request node.
Authentication follows the Service Account route: after creating a service account, you get a file containing an email address and a private key. In n8n, choose "Predefined Credential → Google Cloud API," fill in the region and service account email, and set the scope URL so the service account has permission to access the Cloud API.
The request header is set to Content-Type: application/json, and the body uses a role: user structure with a prompt. The author uses the HVAC industry as an example, having the AI search for and list five specific pain points in that industry.
You might not have noticed, but the research node has a Google Search tool specifically attached, which lets the model get real-time search engine results instead of just "making up" problems from its training data—this is what ensures the authenticity of the content topics.
Service Account is an identity type in Google Cloud used for machine-to-machine (M2M) authentication. Unlike a regular user account, it has no password; instead, it proves its identity through a key pair (containing a unique email address and a private key). When calling protected APIs like Vertex AI from an automated workflow, you usually can't use a personal account for interactive authorization, so a service account becomes the standard approach: the caller signs the request with the private key, Google verifies the signature to confirm which service account is accessing it, and then decides whether to allow it based on the IAM permissions bound to that account.
Scope, on the other hand, is a concept in the OAuth 2.0 system used to limit which APIs or read/write ranges a credential can access. Filling in the scope URL in n8n's "Predefined Credential → Google Cloud API" is essentially telling Google: what resources the token being issued wants to access (for example, Cloud Platform APIs). If the scope isn't configured or is wrong, even if the service account itself has IAM permissions, the request will be rejected due to "insufficient token permissions." This is why the author says this is the most likely place to get stuck—authentication is a dual check of IAM permissions and OAuth scope, and neither can be missing.
Content Generation: Structured Output Lets Downstream Nodes Catch the Ball
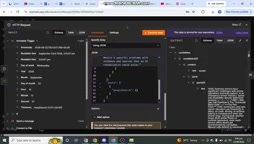
The research node's output feeds directly into the next AI node. There are two key points in the prompt design here.
First, role setting: the system message explicitly states "You are a social media creative strategist," and requires the post to contain the three elements of hook, solution, and CTA. Second, forced structured output: the prompt requires the model to return in a specified format, so that subsequent n8n nodes can reliably extract the headline, supporting text, CTA, and the visual content and layout fields used for image generation.
How well this step is done directly determines whether the image node can run successfully. If the AI returns free text, downstream parsing will fail. The author's approach is to have the model output both the copy and the "prompt for the image model" at the same time, solving two needs in one call and reducing workflow branches.
Image Generation: From Model Selection to Base64 Decoding
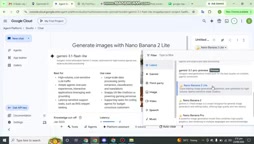
Image generation also goes through Vertex AI. The author's path is: enter Vertex AI Studio, find the image generation model in the model list, expand it and go to the code area, switch the language to cURL, copy the URL, headers, and endpoint, then have ChatGPT convert it into a format usable by the HTTP Request node.
The demo uses nano banana Pro. The request body structure is content → role: user → parts → text, filling the visual prompt generated in the previous step into the text field. The author mentions a pitfall here: quotes and spaces cause errors, and the problem was only solved after converting to JSON.
What's returned is Base64-encoded image data, which requires two processing steps: first use a Limit node to restrict to one item (because two items were returned, which would cause errors in subsequent processing), then use a Convert to File node to decode the Base64 and convert it into a binary file. After downloading and verifying, the image indeed contains the title, explanatory subtitle, and CTA text from the copy.
Base64 is a scheme for encoding arbitrary binary data (such as a PNG or JPEG image) into a plain text string. It uses 64 printable characters to represent byte content, allowing images to be safely stuffed into text-only carriers like JSON or HTTP bodies for transmission. The image generation model doesn't return the file itself, but a long Base64 string, so n8n must then restore it into a real binary file before it can be emailed or uploaded to LinkedIn.
Limit node here solves the item count problem: n8n passes data between nodes as an "item array," and if a single API call returns two items, downstream nodes like file conversion or LinkedIn upload that "expect a single input" can easily fail or produce duplicates. The Limit node trims the data to one item, ensuring the downstream chain gets a definite single result.
Convert to File node is responsible for decoding the Base64 text into binary data and attaching it to the item's binary property, so that subsequent Gmail attachments and LinkedIn binary file uploads can reference it. This also explains why the LinkedIn publishing stage needs to "explicitly fetch binary data"—nodes don't automatically carry the upstream binary property by default, and you need to manually retrieve it and pass it to the publishing node.
Human Approval: Gmail's Dual-Email Mechanism
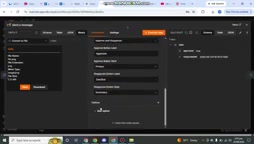
Fully automated publishing is risky, so the author inserts a human checkpoint before publishing.
Two Gmail nodes are used here. The first node handles sending the attachment—that is, the generated image—because n8n's Gmail approval node itself has no attachment field, so it has to be split into two steps. The second node uses the Send and Wait for Response operation, with the response type set to approval, offering Approve / Disapprove options. After the email is sent, it waits indefinitely for your click.
After getting the approval result, a conditional node judges it: if true, go down the LinkedIn publishing branch; if false, loop back to research → generate copy → generate image → convert to file → send email and start over.
This design idea is very practical: AI handles bulk output, and humans only handle the final "yes/no" decision. It preserves automation efficiency while avoiding unreviewed content being posted directly to a public platform.
Send and Wait for Response is a "blocking" human-in-the-loop node in n8n: when the workflow reaches this step it suspends, and only after the recipient clicks the response button in the email (configured here as approval type, i.e., Approve / Disapprove) does it continue running with the user's choice. It turns email into a human-computer interaction interface for the workflow, which is very suitable for scenarios like approvals and confirmations that require a human to make the call.
Why must it be split into two emails? The reason is that this approval node itself is only responsible for "displaying the question + collecting the choice" and doesn't provide an attachment field, so it can't carry the image in the same email. So the author's solution is: the first email uses a regular Gmail node to send the image attachment, letting the person see the final result first; the second email uses the approval node to send a confirmation email with buttons. This way the approver gets complete information (image + choice buttons) instead of blindly approving plain text. Understanding this makes it clear that the "dual email" isn't redundant design, but a reasonable workaround forced by the node's capability boundaries.
LinkedIn Publishing: Two Pitfalls with Credentials and Binary
After approval, call the LinkedIn node to publish. You first need to connect your LinkedIn account credentials in n8n, set source to post, operation to create, set media category to image because you're posting an image, and use data as the input field name, corresponding to the output of the previous Convert to File node.
The author mentions two practical issues in the demo. First, the binary file isn't uploaded to LinkedIn by default, so you need to explicitly fetch that line of data to let the LinkedIn node access it. Second, you need to enable Continue on Errors in the node settings, otherwise if any step errors out, the entire workflow breaks.
After solving these two points, once approved, you can see the published post on LinkedIn, complete with image and text.
OAuth credentials are the standard authorization method for connecting third-party platforms (like LinkedIn): you click to connect the account in n8n, go through the authorization page and agree, and the platform issues a refreshable, revocable token that n8n uses to post on your behalf, without having to write your account password into the node. Compared to manually filling in an API Key, OAuth is more secure and more compliant with platform norms, but the cost is a longer authorization process and scopes that need to be confirmed one by one. This is another common "sticking point" in automation, second only to service account authentication.
Continue on Errors is a node-level fault-tolerance switch in n8n. By default, any step throwing an error terminates the entire workflow; once enabled, even if that node fails, the workflow continues executing subsequent nodes. The reason the author enables it on the LinkedIn publishing node is that the publishing stage involves multiple uncertain factors such as credentials, binary files, and API rate limits. If an error occurs midway, the entire chain breaking would completely void that day's content. Enabling it at least lets the workflow finish the remaining steps, making it easier to troubleshoot or trigger subsequent compensation logic.
What's Worth Borrowing from This Workflow
Setting aside the specific n8n node configuration, there are three ideas in this approach worth transferring to other scenarios.
Use real search instead of model imagination. Attach the Google Search tool to the research node, so content topics are based on actual search engine results rather than the model's training data. This approach can be applied to any content scenario that needs to "find real pain points."
One AI call produces both copy and image prompts. Force structured output so one node serves two downstream branches at once, reducing call count and parsing complexity.
Put human approval before publishing, not after generation. The approval email includes the image, so the decision-maker sees the final result, not a half-finished product. The choice of where to place it matters more than the approval itself.
The tech stack for the whole chain isn't complicated—n8n handles orchestration, Vertex AI provides Gemini's text and image capabilities, Gmail serves as the human-computer interaction interface, and the LinkedIn API handles final distribution. The real barriers are OAuth authentication and passing binary data between nodes; these two places require a few rounds of debugging.
Related articles

Anthropic IPO Countdown: The Compute Cost Ledger Behind a $2 Trillion Valuation
Anthropic's IPO targets up to $2 trillion — double its Series H valuation. We break down the timeline, compute cost logic, and the key question investor day must answer.

Anthropic IPO Prospectus Revealed: Behind 12x Revenue Growth, the Twin Tests of Compute Costs and Customer Concentration
Anthropic filed its IPO prospectus: 2025 revenue up 12x to $4.6B, net loss $42B including $34B non-cash. Breaking down compute costs, $2T valuation logic, customer concentration risks, and founder control.
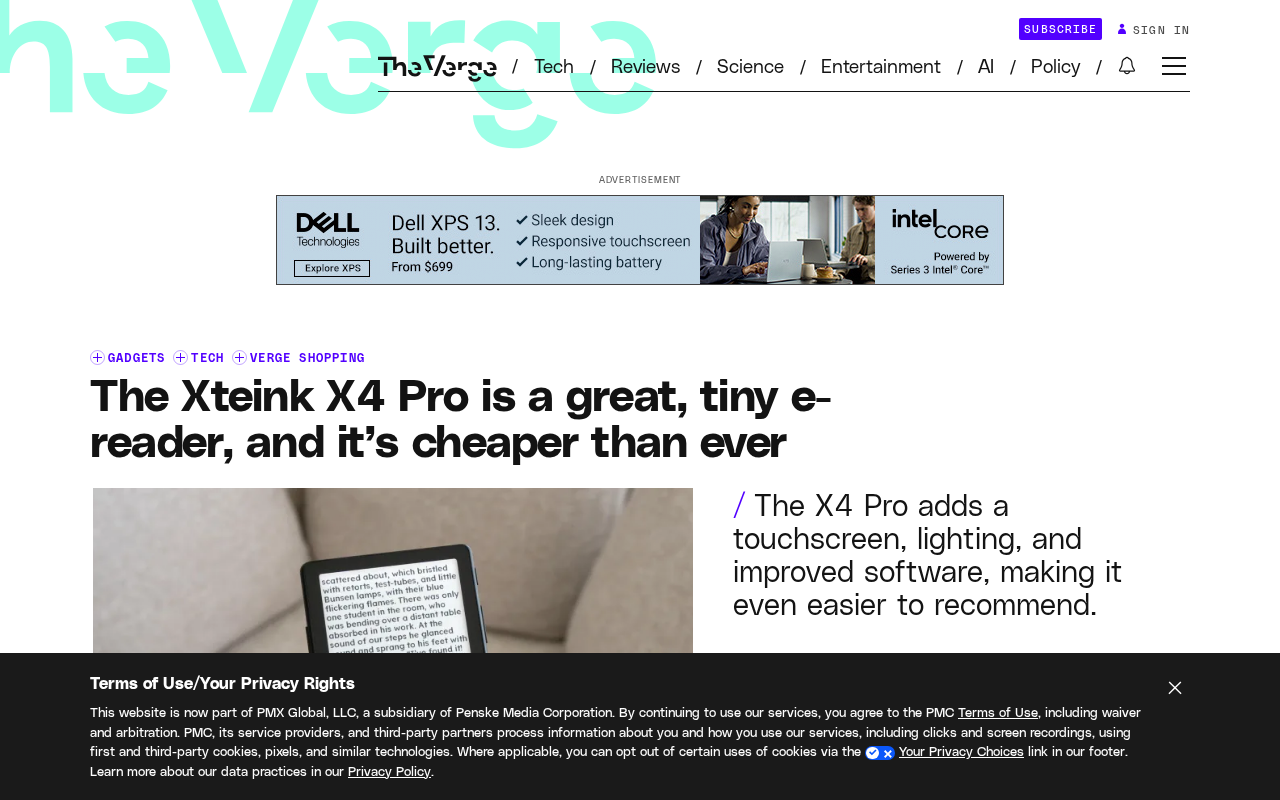
Xteink X4 Pro Review: A Mini E-Reader That Fits in Your Pocket, Now More Affordable
Xteink X4 Pro is a 4.26-inch mini e-reader, smaller and thinner than a 6-inch Kindle, magnetically attachable to phones, and cheaper than ever. We analyze its screen, design, use cases, and value.