Claude Code Full-Stack Installation Guide: Terminal Environment Setup and Dependency Configuration Explained
Based on a Bilibili tutorial, this article outlines the complete path and key considerations for installing Claude Code from scratch on Windows.
Based on a Bilibili creator's tutorial, this article walks through the complete process of setting up a Claude Code terminal environment on Windows from scratch. It first introduces Claude Code's four usage methods (terminal, IDE, Web, App) and explains why the terminal method is best for developers to get started quickly; then emphasizes that Git and Node.js must be prepared as dependencies before installation, provides verification methods, and suggests installing Node and Git on the C drive by default; subsequently demonstrates installing Claude Code itself via the npm command from the official website in PowerShell, without needing administrator privileges, with claude.exe found under .local/bin in the user directory after installation. The article finally reminds readers: installation complete doesn't mean it's ready to use — subsequent API authentication and other configuration steps are needed, and these are the key to whether it can be used smoothly.
Anthropic's Claude Code is quickly becoming a favorite in developers' terminals. It embeds Claude's code comprehension and generation capabilities directly into the command line, letting you write code, debug, and refactor all in one go within the terminal. But many people get stuck at the very first step — installation. A Bilibili creator recently published a tutorial that walks through the complete process of setting up a Claude Code terminal environment on Windows from scratch. This article, based on that tutorial, lays out a clear installation path.
First, Understand: How Many Ways Can You Use Claude Code?
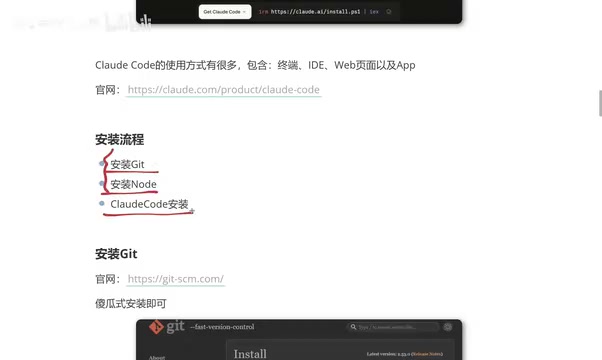
According to the creator, Claude Code currently offers four usage methods: terminal command line, IDE plugin integration, web browser, and a standalone App. The official website (claude.com) lists these entry points on its "Get Claude Code" page, covering desktop, developer tools, and web scenarios.
Among these, the App has a relatively high barrier to use in China, IDE integration suits users already deeply tied to editors like VS Code, and the Web version has relatively limited functionality. The creator chose to demonstrate the terminal method because it "matches the vibe of most programmers" and is the most direct. For those who want to get started quickly without fussing over the environment, the terminal is indeed the path of least resistance.
The difference between Claude Code and the Claude web version: The Claude web version is a general-purpose chat interface, suitable for Q&A, writing, and brainstorming; Claude Code, on the other hand, is a tool designed specifically for programming workflows. It can directly read and write local files, execute terminal commands, run tests, and submit Git commits — essentially a programming assistant with "Agent capabilities." When used in the terminal, Claude Code treats the current working directory as the project root, autonomously planning multi-step operations and calling tools to complete them, rather than just passively answering. This is also why it needs a Node.js runtime environment and Git support — it must interact deeply with the local development environment, not just stay in a chat box.
Two Essential Dependencies Before Installation: Git and Node.js
Claude Code itself is an npm package that runs on the Node.js environment, and also depends on Git for version management-related operations. So the first step of terminal installation isn't installing Claude Code — it's preparing these two foundational tools first.
Installing and Verifying Git
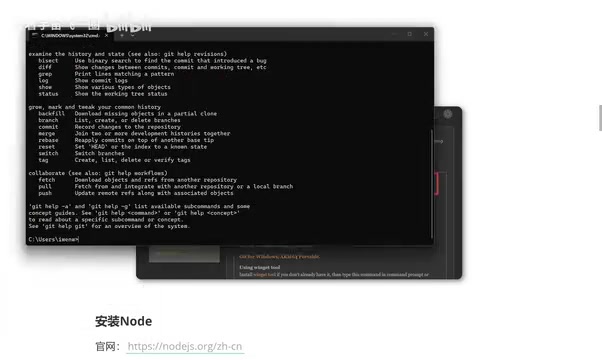
Git installation is a typical Windows wizard-style process, which the creator described as "foolproof installation" — download the installer and click Next all the way through. After installation is complete, open the command line and type git; if no error like "not recognized as an internal or external command" appears, the configuration was successful.
Choosing and Installing a Node.js Version
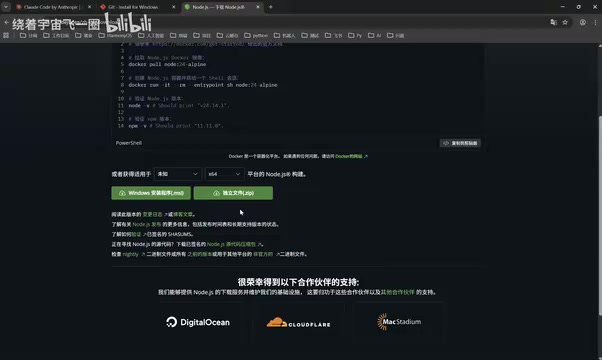
Node.js is also deployed via an installer. The Node version the creator demonstrated was 24.13.0, while the latest version at the time was already 24.14.1, so he directly chose the latest version. One detail here: both Node and Git are small in size, and the creator suggested installing them on the C drive by default.
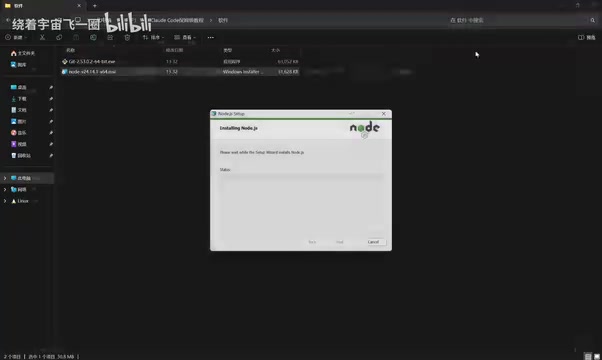
His reasoning is that as long as the C drive still has several GB or more of free space, there's no need to fuss over switching drives. To verify whether Node is installed successfully, run node -v in CMD; if it outputs a version number, it's working properly.
Why install via npm, and when you need nvm: npm (Node Package Manager) is the package manager installed alongside Node.js, and Claude Code is distributed precisely as a global npm package — so you must have Node.js first before running the installation command. After installation, claude.exe is placed in the .local/bin under the user directory, rather than Node's default global directory. This is the behavior of Claude Code's own installation script, not npm's default rule. If you need to switch between different Node versions across multiple projects in the future, you can consider using a version management tool like nvm-windows, but if you're just running Claude Code, installing a relatively recent LTS or Current version is sufficient.
Installing Claude Code Itself
Once both dependencies are ready, installing Claude Code itself requires just one command.
Opening the Terminal and Running the Installation Command
The creator used Windows PowerShell, which can be opened by simply searching "PowerShell" in the search bar. Regarding whether administrator privileges are needed, he specifically clarified: "Many people previously said it must be run as administrator — that's actually not required." It can be run with normal privileges.
The installation command comes from the very top of the Claude Code official homepage; copy it and paste it into PowerShell to run. The installation process takes a few minutes, depending on network conditions. When version number information appears in the terminal (such as 2.1.104), the installation is complete.
Confirming the Installation Path
After successful installation, the creator reminds you to remember where the executable file is stored. On Windows, Claude Code is installed in the .local/bin folder under the user directory, where you can find a claude.exe executable. Confirming this file exists means the installation step has truly succeeded.
Installation Complete Doesn't Mean It's Usable
It's worth noting that the creator explicitly emphasized at the end of the tutorial: after installing Claude Code, you still can't use it directly, because necessary configuration steps are still missing. This video only covers the installation phase; configuration will be covered in subsequent lessons.
This also aligns with Claude Code's product logic — it needs to integrate with Anthropic's API account system, involving authentication, environment variables, and other settings. For users following along with the tutorial, successful installation is only the first half; the subsequent configuration is the key to whether it can be used smoothly.
Looking at the entire process, Claude Code's installation barrier isn't high — the core is just Git + Node.js + one npm installation command. What really needs attention is version compatibility and confirming the installation path, to avoid not being able to find the entry point during subsequent configuration. For developers wanting to experience terminal-based AI programming, this is a path worth walking through.
API Authentication and Environment Variables: When you first run claude after installation, Claude Code will guide you through login authentication, typically in two ways — using an Anthropic account via browser OAuth authorization, or configuring the ANTHROPIC_API_KEY environment variable. For users in China, network reachability and API access policies also need to be considered; common approaches include configuring a proxy or using a third-party gateway compatible with the Anthropic API, and pointing to an alternative endpoint via environment variables like ANTHROPIC_BASE_URL. These configurations aren't written into the code repository but saved in user-level configuration files, so there's no need to repeat the setup when switching projects. Understanding this authentication logic helps avoid the confusion of "it's clearly installed but keeps saying unauthorized."
One-line Summary
Based on a Bilibili tutorial, this article lays out the complete path and key considerations for installing Claude Code from scratch on Windows.
Paragraph Summary
Based on a Bilibili creator's tutorial, this article walks through the complete process of setting up a Claude Code terminal environment on Windows from scratch. The article first introduces Claude Code's four usage methods (terminal, IDE, Web, App) and explains why the terminal method is best for developers to get started quickly; then emphasizes that Git and Node.js must be prepared as dependencies before installation, provides verification methods, and suggests installing Node and Git on the C drive by default; subsequently demonstrates installing Claude Code itself via the npm command provided on the official website in PowerShell, without needing administrator privileges, with claude.exe found under .local/bin in the user directory after installation. The article finally reminds readers: installation complete doesn't mean it's ready to use — subsequent API authentication and other configuration steps are needed, and these are the key to whether it can be used smoothly.
Related articles

CSS Anchor Positioning: A New UI Positioning Approach Without JavaScript
A deep dive into CSS Anchor Positioning: from anchor-name and position-anchor to the anchor() function, position-area shorthand, position-try-fallbacks, anchor-size, and upcoming anchor queries.

New AI Chart Interaction: Continuous Follow-up Questions and Visualization in Conversation
Explore a new AI interaction method for continuously generating charts in conversation. Use the /visualize command to ask follow-up questions and visualize answers in the same chat window, improving data analysis efficiency.

Cursor Merges Into X Subscription: Paid Plans Share Unified Usage Pool, Grok Model Coding Usage Doubled
Cursor joins The X Subscription with a unified usage pool and doubled Grok coding quota. Third-party models shift to API pricing. Existing users can keep or migrate plans.