Complete Guide to Building AI Apps with Dify from Scratch: Five App Types and Workflows Explained
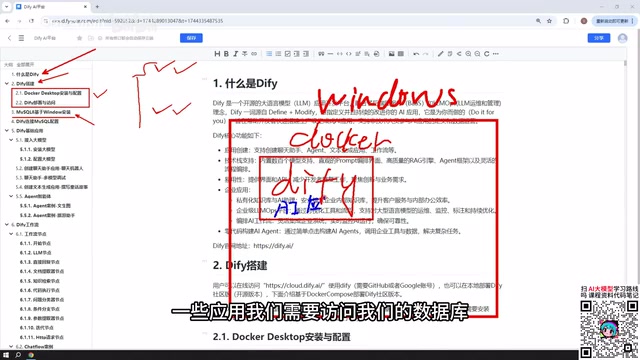
A complete guide to building AI apps with Dify, from Docker deployment to five app types and publishing.
Dify is a low-code AI application platform for enterprises and individuals, enabling visual orchestration of LLMs, external tools, and databases into deliverable products. This guide covers three deployment options with a focus on local Docker on Windows, five app types (Chatbot, Text Generator, Agent, Chatflow, Workflow), model integration using affordable cloud APIs like DeepSeek and Qwen, and publishing options including public web, website embedding, and API access.
What Is Dify: A Low-Barrier AI Application Building Platform
Dify is, at its core, an AI application platform. Its value lies in wrapping the otherwise complex process of large model development into a visual interface, enabling both enterprise-level and personal AI applications to be deployed quickly. Without writing mountains of glue code, you can connect large language models, external tools, and databases to build a working product.
For those looking to get into AI agent development, Dify lowers the barrier on two fronts: you don't need to write calling logic from scratch, and it provides a visual workflow orchestration interface. This is why tutorials promising to "build 20+ apps from zero" are credible — the platform handles the repetitive work, freeing learners to focus on application design.
Three Deployment Options: Local Docker, Source Code, and Official Cloud
Dify offers three deployment paths, each suited to different scenarios. The tutorial uses a local deployment approach based on Windows Docker, which is also the most recommended option for learners and internal enterprise use.
- Official cloud platform: The most convenient option — use Dify's officially hosted version directly, with an interface identical to a self-hosted instance. However, if your AI app needs to access a local database or local environment, you'll need an intranet tunneling tool to expose your machine's IP to the public network.
- Source code deployment: Best for developers who need deep customization.
- Local Docker deployment (used in the tutorial): Install Docker on Windows, then deploy Dify. Your local MySQL or other environment can be called directly by Dify — especially handy for internal enterprise applications in production.
There's one important network detail here: once Docker is installed, Dify's network can communicate with MySQL running on the Windows host machine, as well as with virtual machines deployed via VMware. In other words, whether your database lives on Windows itself, inside a Docker container, or in a VM — all are viable options, offering a high degree of flexibility.
Docker is a containerization technology that packages an application and all its dependencies into an isolated "container," ensuring consistent behavior across any machine. For a complex application like Dify — which is composed of multiple services including a web server, database, and vector store — Docker Compose can start all services with a single command, eliminating the need to install and configure each one individually. On Windows, you first install Docker Desktop, which uses WSL2 (Windows Subsystem for Linux 2) under the hood to provide a Linux runtime. Once installed, services inside the Dify container can access local ports on the Windows host through Docker's virtual network bridge — which is the technical foundation that allows it to connect directly to a local MySQL instance.
Database Integration: Why Install MySQL 8
The tutorial dedicates a section to installing MySQL 8 on Windows for a straightforward reason: AI applications built in Dify often need to read data from a database to enable data-driven intelligent interactions. Setting up the database first, then explaining how to configure Dify's connection to MySQL, is a natural logical sequence.
If you're already familiar with MySQL installation, this section can be skipped. The database doesn't have to be in any specific location — local installation, Docker container, or virtual machine can all be connected to Dify. This reflects one of the key advantages of local deployment: flexibility in environment integration. Configuring the connection is a critical step for getting AI applications to actually "use data" and cannot be skipped.
Dify's Five Core Application Types
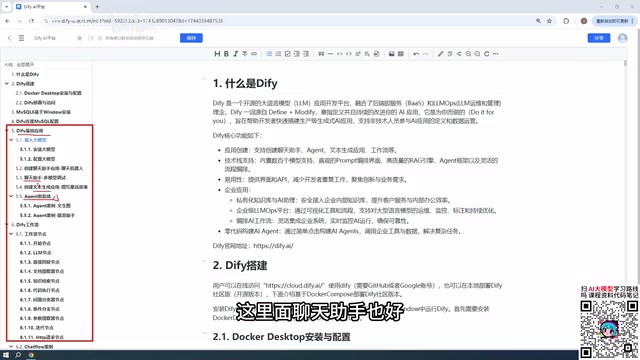
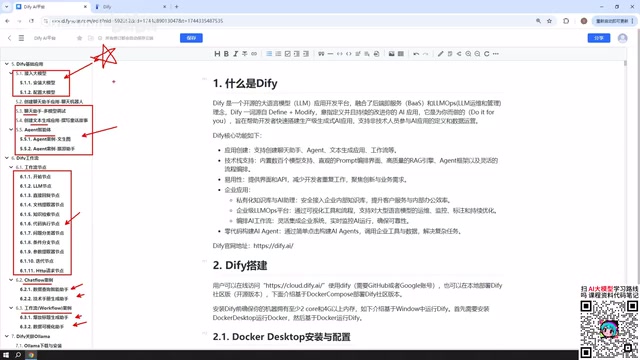
When creating an application in Dify, you can choose from five types. These form the backbone of the entire course and cover the full spectrum from simple conversations to complex orchestration.
Three Basic Application Types
- Chatbot: The most fundamental form — conversational interaction with an AI model.
- Text Generator: Has the model produce content in a single pass, such as writing articles, generating documents, or drafting stories and novels.
- Agent: The key difference from the previous two is its ability to call tools and systematically complete user instructions. For example, first scraping a webpage and then analyzing its content — multi-step tasks like these are exactly where agents excel.
Workflows: Chatflow and Workflow
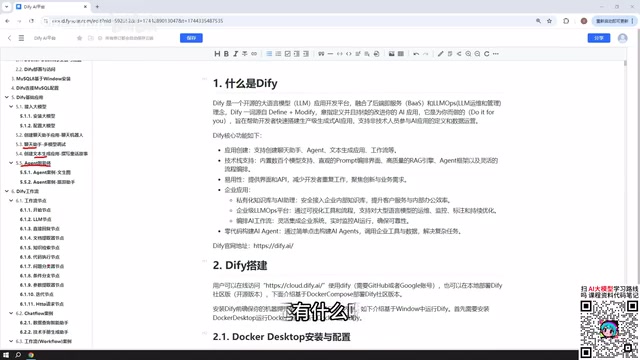
Beyond the three basic app types, workflows represent a more advanced and powerful capability in Dify, further divided into two categories:
- Chatflow: Supports multi-turn conversation with the workflow.
- Workflow: Designed for one-off tasks — input something and get a result directly, without ongoing dialogue.
The core difference between the two is whether conversational interaction is supported. Workflows are composed of individual "nodes," each representing a functional module; arranging them together forms a complete processing pipeline. The tutorial covers most of the commonly used nodes provided on the official site, with hands-on examples for over a dozen of them.
Connecting Large Models: Prioritize Paid Cloud Models
All of these applications interact with large language models, so connecting a model is the first step. The tutorial's recommendation is clear: prioritize paid cloud models over locally deployed smaller models.
Available options include paid models like DeepSeek and ChatGPT, as well as options like Baidu's ERNIE Bot and Alibaba's Qwen that offer free token allowances. Free token quotas are typically in the millions — more than enough for learning and testing.
Don't be put off by the word "paid." Take DeepSeek as an example: topping up ten yuan (roughly $1.40 USD) goes a very long way — the tutorial author mentioned having charged ten yuan and not yet spending even one yuan after extended use. The cost is minimal. The reason local models (such as smaller models deployed via Ollama) aren't recommended is that models with fewer parameters offer limited capability, resulting in a poor real-world application experience.
Of course, if your machine is powerful enough, or you're running an enterprise-grade cluster, running DeepSeek's open-source large model via Ollama (the largest parameter version can be over 400 GB after download) is entirely feasible and will deliver better results. The tutorial also includes examples covering Dify's integration with local Ollama models.
A token is the basic unit large language models use to measure the length of input and output. Roughly speaking, about 1.5 Chinese characters correspond to 1 token, and about 4 English characters correspond to 1 token. Cloud models are typically billed by token consumption: input tokens (content you send to the model) and output tokens (content the model returns) are priced separately. API pricing for models like DeepSeek and Qwen has dropped to extremely low levels — just a few yuan per million tokens. Some platforms also offer free credits upon new user registration, more than sufficient to complete all the experiments in this tutorial series. Another advantage of using a cloud API over local deployment is that it requires no local GPU resources, so even an ordinary laptop can run all Dify applications smoothly.
Publishing Applications: From Internal Use to Public Launch
Applications built in Dify aren't limited to use within your own deployed platform — there are quite a few publishing options:
- Publish as a public website: Generate a publicly accessible link to put the application on the internet. For local deployments, you'll need an intranet tunneling tool to bridge internal and external networks.
- Embed in your own website: Integrate the application as a component within a website you develop.
- Access via API: Connect via API (including Python API) for programmatic use by other systems.
This step elevates Dify from a "local experimentation tool" to a "deliverable product capability" — whether serving external users or integrating into internal business systems, there's a clear path to deployment.
Intranet tunneling is a technique for exposing services on a local network to the public internet. Since home broadband and corporate intranets typically lack a fixed public IP, external users cannot directly access a locally deployed Dify instance. Intranet tunneling tools (such as frp, ngrok, Cloudflare Tunnel, etc.) relay traffic through a public server, assigning the local service a publicly accessible domain name or IP address. For local Dify deployments intended only for internal team use, accessing it directly within the LAN is sufficient. However, if you need to publish applications externally or have Dify's webhook functionality receive external requests, intranet tunneling must be configured. In enterprise environments, deploying Dify on a cloud server with a public IP is a more stable alternative.
Summary
The structure of this Dify tutorial series is clear and logical: from understanding the platform and Docker deployment to database integration, then through the five core application types (Chatbot, Text Generator, Agent, Chatflow, and Workflow) with hands-on practice for each, and finally model connection and application publishing. For those looking to systematically learn AI application development, this learning path links visual orchestration, data integration, and production deployment into a complete chain. Combined with rich practical examples, it's far more accessible than working through documentation alone.
Background Notes
The core mechanism of an Agent is typically referred to as ReAct or a tool-calling loop: after receiving a user instruction, the model autonomously determines which tools to call and in what order, then decides on the next action based on the results returned by those tools — repeating this until the task is complete. This is fundamentally different from a chatbot's single-turn Q&A — an agent has the iterative capability to "plan → execute → observe → re-plan." Common callable tools include web search, code execution, database queries, and file read/write operations. Dify's Agent application encapsulates this loop logic; users only need to configure the tool list and system prompt, without manually implementing the scheduling and dispatch code.
Related articles
DeepSeek Harness Hands-On: Build Your Own Coding Agent for Free
DeepSeek Harness hits 190K GitHub stars as a free Claude Code alternative. This hands-on review covers installation, plugin models, full traceability, and driving Claude Code as a subprocess.
A DeepSeek Kernel Engineer's Confession: Being Replaced by the AI I Trained
A DeepSeek kernel engineer reveals how AI evolved from a doc-lookup assistant to a kernel master in one year — and why he's accelerating his own replacement.
DeepSeek Harness One-Month Retrospective: Highlights, Risks, and the Road Ahead
DeepSeek Harness one-month retrospective: Plugin ecosystem, Codex Kernel, supply chain risks, talent strategy, and the cloud Agent path ahead.