Complete Guide to fal.ai API Key Setup and n8n Integration

Connect fal.ai's AI media generation to n8n automation workflows using the official integration node.
This guide covers how to integrate fal.ai's AI media generation into n8n automation workflows in four steps: generate an API key in the fal.ai dashboard; add the official fal.ai node in n8n; save the key as a credential and run a Generate Media test; and optionally use HTTP Request nodes for models not yet covered by the official integration. Once connected, generation outputs can be piped into Google Drive, Telegram, and other downstream nodes to build full end-to-end AI automation pipelines.
Connecting fal.ai's AI generation capabilities to an n8n automation workflow used to require manually building a collection of HTTP request nodes. But with n8n's introduction of an officially verified fal.ai integration node, the entire process has been dramatically simplified. This guide walks you through every step, from creating an API key to running your first media generation.
Step 1: Create an API Key on fal.ai
The starting point is generating a callable credential on the fal.ai side. After logging into fal.ai, go to the Dashboard and find the API Keys section, then click to create a new key.
Once generated, copy the key immediately and store it somewhere safe. This is critical — the key is equivalent to access rights to your fal.ai account, and anyone who holds it can run paid generation tasks. In other words, a leaked key isn't just a security issue; it can directly incur charges.
Step 2: Add the fal.ai Node in n8n
Open n8n, click the plus button in your workflow, and search for "FAL.AI". n8n now provides an officially verified fal.ai integration, which means you no longer need to build everything from scratch with raw HTTP requests — unless you want finer-grained control.
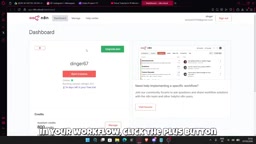
One thing to note: if you can't find fal.ai in the node list, the integration may not yet be installed on your instance. In that case, the instance owner needs to install it first before collaborators can use it.
fal.ai is a cloud inference platform focused on AI media generation, offering API access to models for text-to-image, image-to-image, video generation, speech synthesis, and more. Its core strength lies in highly optimized inference acceleration for popular open-source models like Stable Diffusion, FLUX, and Kling — generation tasks that might otherwise take tens of seconds can often complete in just a few seconds. The platform uses a pay-as-you-go model, so users don't need to manage GPU infrastructure and pay directly based on API calls or the duration of media generated. n8n's official integration node wraps fal.ai's queue-based asynchronous call mechanism — it automatically polls for results after submitting a task, completely transparently to the user. This is the main convenience advantage over writing raw HTTP requests.
Step 3: Configure Credentials and Run Your First Generation
After adding the fal.ai node, choose to create new fal.ai credentials, paste in the API key you copied from fal.ai, and save.
With credentials ready, use the simplest possible task to verify connectivity: select Generate Media, pick a model, and enter a prompt. For example, choose an image generation model, type a short text description, and run the node. If everything is set up correctly, n8n will send the request to fal.ai and return the generated file or result.
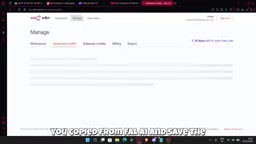
This step serves both as a functional test and as the best way to understand the input/output structure of the fal.ai node.
Alternative: Using the HTTP Request Node
If you prefer manual control, or need to call models not yet covered by the official node, the HTTP Request node works just as well. The approach is to send a POST request to the endpoint corresponding to your target model, with your fal.ai key in the Authorization header.
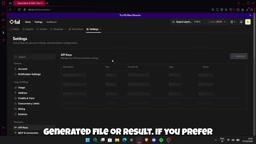
Since each model has its own specific endpoint and input body, the easiest approach is to open the model's page on fal.ai and check its API tab — it will give you the exact call parameters. This method offers maximum flexibility but comes with higher maintenance overhead, making it best suited for scenarios with specific customization needs.
fal.ai's API follows an asynchronous queue pattern: the caller first submits a task to the
/fal-ai/{model-id}endpoint, and the server returns arequest_id; you then poll the status endpoint until the task completes before retrieving the result URL. The official fal.ai node handles this polling logic internally and automatically. When using raw HTTP request nodes, you need to split these steps manually, or use fal.ai's/queue/submitand/queue/status/{request_id}endpoints in combination with n8n's Wait node to achieve the same effect. The Authorization header format isKey YOUR_API_KEY(note the prefix isKey, not the more commonBearer) — this is one detail that's easy to get wrong.
Security Considerations
One rule you must follow: never paste your fal.ai key directly into a public workflow, a frontend application, or a shared screenshot.
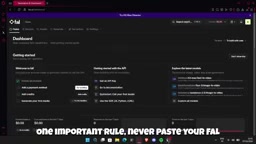
The correct approach is to store the key in n8n's credential system, where it will be hidden and protected — it won't be exposed when the workflow is exported or shared. Given that the key can trigger paid tasks, this rule is especially worth taking seriously.
Full Flow Recap and Ways to Extend
The complete setup path is straightforward:
- Create an API key on fal.ai
- Save it as a credential in n8n
- Add the fal.ai node
- Select a model
- Run your first generation
Once that's working, the real value starts to emerge. You can pipe the generation output into Google Drive, Google Sheets, Telegram, or any other node n8n supports, building end-to-end automation pipelines — for example, automatically generating images and archiving them to cloud storage, or pushing results to a messaging app. This is the real appeal of the n8n + fal.ai combination: turning AI generation capabilities into orchestratable, reusable automation building blocks.
Related articles

Google's AMIE Clinical Study Published in The Lancet: First Real-Clinic Validation of AI-Powered Medical History Taking
Google's AMIE conversational diagnostic AI study is published in The Lancet, marking the first prospective real-clinic validation of a patient-facing AI system, with 90% DDx alignment.

UstaWork: A Workflow Control Plane for Multi-Agent AI Coding Collaboration
UstaWork is a multi-agent AI workflow control plane that splits coding into plan, implement, review, and merge stages with flexible human approval and context cost controls.

Claude Opus 5.5 Builds a Retro J2ME Shooter From a Single Prompt
A Reddit user used one prompt to have Claude Opus 5.5 build a complete 3D J2ME shooter — integer engine, procedural art, MIDI music, TTS audio, and a 500KB JAR that runs on a 20-year-old phone.