Cursor for Beginners: Build a Complete Project from Scratch with AI

Cursor integrates LLMs into a code editor so anyone can build runnable projects through natural language.
Cursor is an AI-powered code editor that deeply integrates large language models into a familiar IDE-like interface, with core interactions happening in a right-side chat panel. It offers three modes: Agent (AI writes and fixes code autonomously), Ask (targeted Q&A), and Manual (developer-controlled). Using a student management system as a hands-on example, the article covers the full workflow from tech stack selection and code generation to automatic dependency fixing and feature validation — while emphasizing that a local Python and database environment is a required prerequisite.
What Is Cursor: A New Choice for AI-Powered Coding
Cursor is an AI code editor that has gained significant attention in recent years. It deeply integrates large language models into a traditional code editor, enabling developers — and even people with zero programming background — to generate, modify, and run code through natural language conversation.
In terms of interface layout, Cursor closely resembles mainstream IDEs like VS Code and PyCharm, which lowers the migration cost for experienced users. It consists of three main panels: a project directory on the left, a code display area in the center, and the AI chat panel on the right — which is the core of the tool. Most of your work happens in that right-side panel: you ask questions or give instructions to the AI, and the directory structure and code are automatically generated in the other panels.
To get started, simply visit the Cursor official website to download the installer. You'll need to register an account before using it. Once installed, it's recommended to create a dedicated working directory as your workspace (e.g., E:\Cursor\WorkerSpace) before starting any project.
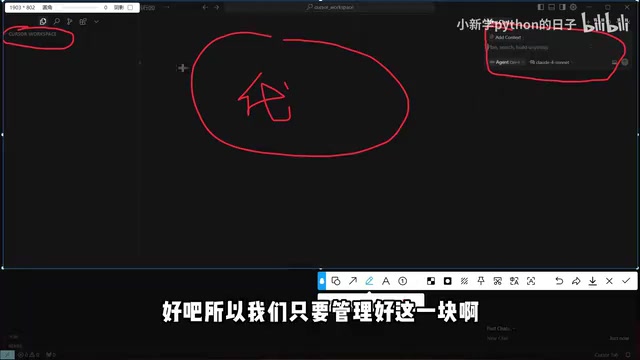
Three Chat Modes: Agent, Ask, and Manual
Understanding Cursor's chat modes is key to getting the most out of the tool. It offers three modes, each suited to different use cases.
Agent Mode: AI Takes the Wheel
In Agent mode, the AI proactively handles the entire workflow — creating file structures, writing code, and automatically detecting and fixing errors. If your goal is to have AI directly produce a runnable project, this is the mode to use.
Ask Mode: Targeted Q&A
Ask mode works more like a consulting assistant. It answers specific questions you pose without taking over the coding process or batch-creating files. When you need technology recommendations, concept explanations, or architectural advice, Ask mode is the better fit.
Manual Mode: Developer in Control
Manual mode returns full coding control to the developer, with AI only offering reference suggestions. This is best suited for users with some coding experience who prefer to stay in charge of their own codebase.
In short: use Agent when you want AI to write code for you, Ask when you want answers to questions, and Manual when you just want reference hints.
Model Selection: Prioritize Claude for Production Projects
The right-side chat panel also lets you switch between underlying AI models, including both free and premium options.
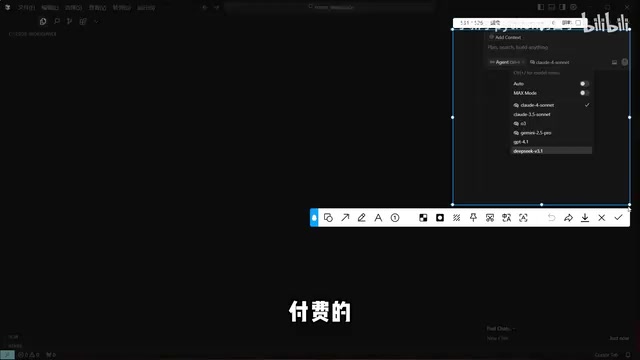
Based on the original video author's hands-on experience, if your project is destined for a real production environment, it's recommended to go with Claude models for code generation. The author considers it one of the strongest models available for coding tasks, and argues that its API costs are negligible compared to the overall value of a production project. For non-code-generation tasks — like asking questions in Ask mode — the choice of model is much more flexible, and free models can handle those just fine.
It's worth noting that this "best model" assessment reflects one creator's subjective opinion. Your actual choice should be based on your project budget and the specific task at hand.
Claude is a family of large language models developed by Anthropic. Current major versions include Claude 3.5 Sonnet, Claude 3 Opus, and others. Anthropic emphasizes model "trustworthiness" and code generation accuracy during training, which makes Claude particularly strong at handling complex programming tasks, long-context understanding, and multi-file collaboration. Beyond Claude, Cursor also supports OpenAI's GPT-4o, Google's Gemini series, and more. These models differ in response speed, per-call cost, and areas of strength: GPT-4o offers well-rounded capability with faster responses; Claude Opus provides deeper reasoning but at a higher cost; free models (such as hosted versions of certain open-source models) are well-suited for low-cost everyday Q&A. A practical strategy is to use a free model for technical research and switch to a paid model when generating actual code — balancing cost and quality.
Hands-On Demo: Building a Student Management System from Scratch
The original video walks through the entire process of building a student management system using Cursor from a complete beginner's perspective — a highly instructive example.
Step 1: Technology Stack Consultation
The author started by using Ask mode to query Claude: "Can I use Python to develop a student management system? Please recommend a tech stack." They also clarified it was a small-scale project. The model responded with a framework-based tech stack recommendation.
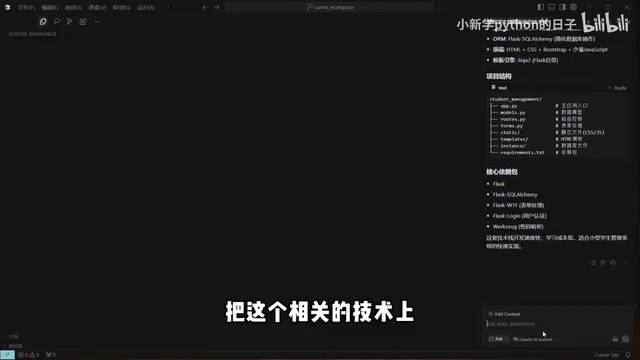
Step 2: Switch to Agent Mode to Generate Code
Once the approach was confirmed, the author switched to Agent mode and let the AI start writing code. The AI first planned the project structure, then built the directory step by step, generating pages for login, registration, and student management, along with a startup script and documentation.
During generation, new or modified content is highlighted in yellow and red, and you're asked whether to save each change. You can confirm them one by one, or wait until everything is generated and click Accept All. There's also an auto-run option — when enabled, the AI won't ask for your approval before executing commands, ideal for users who want full hands-off automation.
Step 3: Automatic Error Fixing and Launch
This is one of Cursor's most valuable features in action. When launching the app, a dependency version compatibility issue came up — and the AI automatically reinstalled the correct version of the dependency and resolved it on its own.
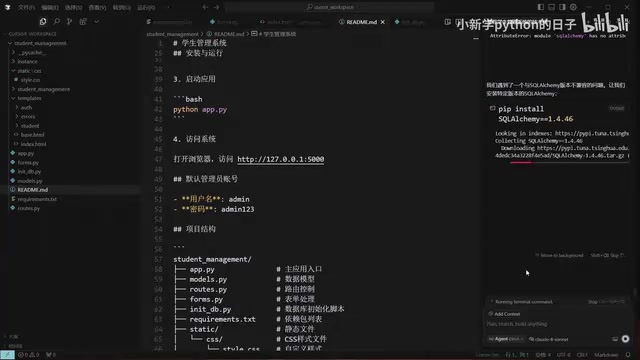
The author noted that this kind of compatibility issue could take an experienced developer half an hour to debug — and an inexperienced one potentially two hours or more — while the AI "found it instantly." After the database initialized successfully, the app started at 127.0.0.1:5000. Pasting the address into a browser revealed a fully functional login interface.
Step 4: Feature Validation
After logging in, the author demonstrated adding students and editing their information — all working as expected. One detail surfaced during testing: the error message for student ID validation was in English, which could easily be changed to Chinese by asking the AI. There were also errors when accessing features like "Grade Records" — because those were marked as "to be implemented" and the AI had only completed the student management module.
The fix is straightforward: simply ask the AI in the chat to implement all the planned features one by one. The demo skipped some for time, but in a real scenario, you'd just hand the full requirements to the AI and come back 30 to 60 minutes later to a complete project.
A Key Prerequisite: Don't Overlook Your Dev Environment
One thing beginners often overlook: whether it's installing dependencies or starting a Flask server, the entire workflow relies on a properly configured Python environment on your local machine.
In other words, Cursor handles the code writing — but running that code still depends on your local setup. To replicate the demo, you'll need to have the following installed in advance:
- A Python runtime environment
- The appropriate database environment (the demo uses SQLite; switching to MySQL would require a separate installation)
Understanding this helps you correctly identify whether a "code runs fine but won't start" situation is an environment issue rather than a code problem.
Flask is a lightweight web framework in the Python ecosystem, known as a "micro-framework" — it provides only core functionality like routing and request handling, with everything else (databases, form validation, etc.) added via extension libraries as needed. The demo uses SQLite, an embedded relational database that requires no separate server process. Data is stored in a single local file, making it ideal for small projects and prototypes. For dependency management, Python projects typically use pip install to install third-party packages. Version compatibility issues — like the one the AI auto-fixed in the demo — often arise when different libraries require conflicting versions of a shared underlying package. Cursor's Agent mode reads the error log and automatically retries the installation with a specific version, essentially automating what a developer would otherwise do manually: reading documentation and debugging step by step.
Wrap-Up
Cursor dramatically shortens the distance between "natural language description" and "runnable project," making it especially accessible for beginners. Understanding the three chat modes, choosing the right model, and making use of auto-run and auto-fix features will get you up and running quickly. That said, it's not a silver bullet — basic dev environment setup and validating the generated output still require a baseline level of understanding from the user. AI lowers the barrier to coding, but it doesn't make "knowing what you're doing" optional.
Related articles

Gaussian Process Bandit Optimization: Exploration Strategies and Inference Regret Guarantees
Cumulative regret guarantees in Bayesian optimization fail to reflect final recommendation quality. This article examines a new study that provides inference regret guarantees for Gaussian process bandit optimization through exploration query strategies and fill distance analysis, validated on hyperparameter optimization and control tasks.
The Most Detailed Codex Guide on Bilibili: From Installation to Real-World Practice
The most detailed Codex guide on Bilibili: from app store installation to daily work mode configuration, with a real coffee shop project demonstrating file organization, data extraction, dashboard creation, and other practical tasks. Learn to use Plan Mode and desktop pets to leverage Codex efficiently.

Appearance Compensation in Volume Rendering: Why RGB Accuracy Cannot Guarantee Density Correctness
Volume rendering research reveals that volumetric data perfectly reproducing external RGB views may still contain density errors: appearance compensation can double central density and keep external rays unchanged even when L2 error exceeds 14.52%. Density recovery depends on appearance capacity, spatial resolution, and measurement design.