DeepSeek Harness Step-by-Step Guide: Building Plugin-Based AI Agents
DeepSeek Harness tutorial: environment setup, client installation, and three plugin install methods.
The article introduces the positioning and onboarding path of DeepSeek Harness, DeepSeek's official open-source AI Agent framework. Harness uses the MIT license, and its core design is that "everything is a plugin" — model integration, tool calling, memory management, and Agent runtime logic can all be assembled and replaced. Installation has two steps: set up Node.js 22 or above, then install the Harness client, with both recommended to go on the D drive to avoid filling up C. The key difference from the web version is the client's ability to read and write local folders. Three plugin install methods are given: let the AI install it via chat (uses Tokens), install from the plugin marketplace (no credits, recommended), and install via command-line code. Finally, it offers a learning path from environment setup to hands-on plugin use.
Why DeepSeek Harness Is Worth Your Attention
DeepSeekAd Harness, the open-source AI Agent framework released by DeepSeek, has already accumulated hundreds of thousands of stars and tens of thousands of forks on GitHub, ranking among the most-watched open-source AI Agent projects in the world. It uses the MIT open-source license, so the framework can be freely used and extended, and it supports flexibly connecting different models.
Unlike a plain chat assistant, Harness is positioned as an agent framework that gives AI genuine execution, extension, and collaboration capabilities. According to the author of this tutorial series on Bilibili, after testing he found that the Harness client, paired with a set of excellent plugins, dramatically expands the boundaries of what it can do.
Core Design: Everything is a Plugin
Harness's most defining feature is that "everything can be a plugin." From LLM integration and tool calling to memory management and the Agent's runtime logic, the entire system can be assembled, replaced, and extended through plugins.
This means you're no longer just using an AI tool with fixed functionality — you can build a complete AI agent system of your own based on your needs. Practical directions listed in this tutorial include:
- Code development and office automation
- File processing and multi-Agent collaboration
- Extending professional capabilities via Skills and MCP
- Letting Harness read Bilibili content and connect to a knowledge base for knowledge management
- Generating videos and organizing knowledge directories
- Connecting to chat apps for conversations
- And the community's popular "AI fish-keeping"玩法 — from raising big fat fish to training agents with different personalities
What the MIT license means
MIT is one of the most permissive open-source licenses. Its core requirement is simply to retain copyright and license notices, and it places almost no restrictions on commercial use, modification, redistribution, or private deployment. For users, this means you can confidently integrate Harness into internal company systems, or develop on top of it and release a closed-source product without worrying about contagious open-source obligations (unlike GPL-type licenses). For enterprise technology selection, the MIT license reduces legal review costs, and it's also an important reason the project has quickly built up a community of plugins — plugin authors don't have to agonize over license compatibility.
Installation Step One: Set Up the Node.js Environment
Installation has two major steps. The first is installing Node.js, because many AI tools are built on the Node.js environment — including installing tools like Cloud Codex, which also requires Node.js first.
The author gives two things to watch out for:
- Version choice: Choose Node.js version 22 or above; don't pick anything below 22.
- Install location: It's recommended to change the install path to the D drive. Installing on the C drive takes up space on one hand, and on the other generates a large number of cache files that can fill up the C drive.
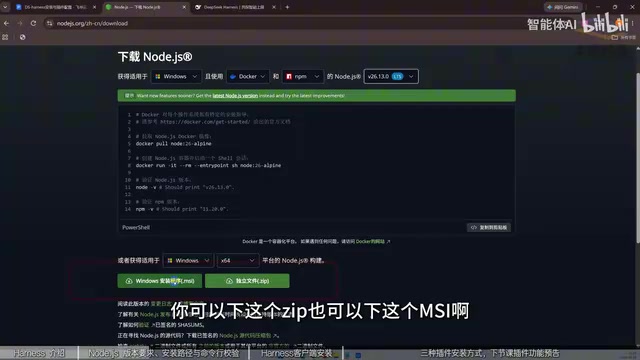
When downloading, you can choose either the .zip package or the .msi installer. The author recommends .msi because you can just click to install, whereas .zip still needs to be extracted.
After installation, verify the environment is working. Open the command line (if you can't find the entry point, type CMD), and enter node -v (note the space between node and -v). If a version number appears and it's greater than or equal to 20, the environment is set up correctly.
Why AI tools commonly depend on Node.js
Node.js is a JavaScript runtime built on the Chrome V8 engine that lets JavaScript run outside the browser in the local operating system. The reason many AI command-line tools, Agent frameworks, and MCP servers choose Node.js is that its npm ecosystem has a huge number of ready-made libraries, and cross-platform packaging is relatively simple — developers can distribute with a single command. Many Harness plugins and MCP servers are themselves published as npm packages, and installation actually runs npx or npm install. Therefore, a Node.js version that's too old will cause some new syntax or dependencies to fail to resolve — which is the fundamental reason the tutorial requires 22 or above.
Installation Step Two: Install the Harness Client
Click the link provided in the tutorial to go to the download page, which offers client files for the corresponding system. Windows users should download the Windows version. Again, don't put the install location on the C drive — change it to the D drive, then click Install Now, and open it once installed to enter the DeepSeek Harness interface.
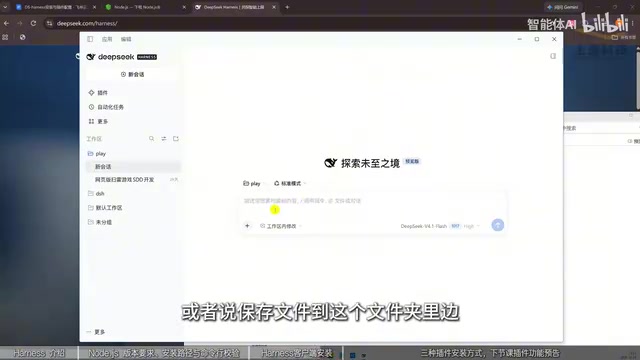
The interface looks similar to the web-based chat window, but there's one key difference: it can add local folders, read and modify folder contents, or save files into that folder — things the online web version can't do. The interface also lets you select several DeepSeek models.
Comparing Three Ways to Install Plugins
Harness's real power lies in its plugin ecosystem. Click the plugins tab to add plugins, and the tutorial gives three methods:
Method One: Let the AI install it itself
Once you know the plugin's name, just send its GitHub link to the chat window and let it install itself. The downside is that it consumes Tokens and credits.
Method Two: Install from the plugin marketplace (recommended)
This doesn't consume credits. Click "Add Plugin," enter the plugin name (for example, the DSH market marketplace), then click install, and once detected, click Launch Now to enter the plugin marketplace. The marketplace entry is under "More" → "Settings." Once installed, you can search and filter plugins there — the marketplace may have tens of thousands of plugins. Examples the author mentions include a little goldfish widget and a desktop pet.
Method Three: Install via command line
This method is a bit more abstract. Take the "most powerful DeepSeek Harness vision plugin ever" as an example: native DeepSeek can't read local images or recognize image content, but with this plugin installed it gains image recognition — it can tell how many people are in an image and who's wearing what. To install, find a button like "Install with" at the bottom of the plugin's webpage, copy that code, and paste it into the command line to execute.
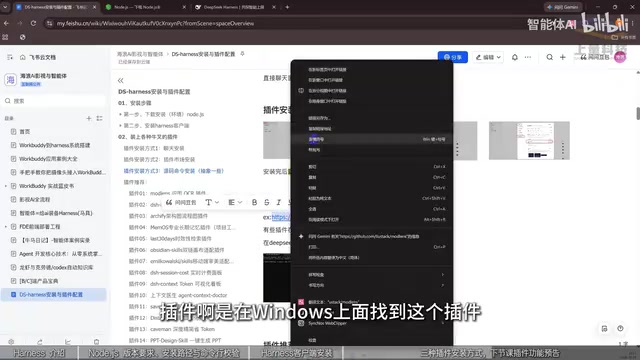
The author also offers a practical tip: if you don't know what plugins exist, just ask DeepSeek for a list of popular and useful plugins, then pick the ones you need.
What MCP and Skills are
MCP (Model Context Protocol) is an open protocol for exposing external tools and data sources to AI models through a standardized interface. You can think of it as the "USB port of the AI world": the model doesn't need to write separate adapter code for each tool — as long as it connects to an MCP server, it can call capabilities like browsers, databases, and file systems. Skills, on the other hand, lean more toward packaged capability bundles or prompt workflows that make an Agent perform more consistently on specific tasks. The two are often confused — MCP solves "what the AI can connect to," while Skills solve "how the AI knows to do it." Harness's plugin system combines these two layers, and understanding this helps you judge whether a given need calls for a plugin, an MCP service, or writing your own Skill.
Suggested Learning Path
The author of this tutorial emphasizes that the goal isn't just to install and use things simply, but to understand how AI Agents operate and to master how to build, tune, and extend agents. He spent three months reorganizing his knowledge system from basic architecture to advanced features and from the plugin ecosystem to hands-on applications, and designed a large number of practical case studies.
For absolute beginners, the safest path is to proceed in the order "environment setup → client installation → three plugin installation methods → hands-on with common plugins"; for more advanced users, the focus should be on plugin development, Skills and MCP extensions, and multi-Agent collaboration.
Related articles

Did the Iran War Accidentally Accelerate the Clean Energy Transition? An Energy Expert's Deep Dive
Columbia professor Jason Bordoff analyzes how the Iran war unexpectedly accelerated the global clean energy transition: the Strait of Hormuz crisis, diesel price shocks, China's strategic reserves, and why energy security drives green tech adoption more than climate goals.
Gemini Audio Classification in Practice: Real-Time Emotion and Topic Recognition
Build a real-time audio classification app with Streamlit and Gemini audio decision model, demonstrating emotion, sentiment, whisper detection, and topic recognition, plus its technical path and current limitations.
Immortality of Consciousness: How Scientists Aim to Let the Brain Outlive Life
MIT Technology Review roundtable on 'mind immortality': scientists explore brain preservation and consciousness continuation, confronting identity and ethical dilemmas.