DeepSeek Harness Step-by-Step Guide: From Installation and Setup to Plugin Practice

A systematic walkthrough of DeepSeek Harness installation, setup, and three plugin installation methods, plus the engineering value of its plugin architecture.
Based on a Bilibili tutorial, this article covers the full workflow of DeepSeek's open-source AI Agent framework Harness. Built around "Everything is a Plugin," it lets model integration, tool invocation, memory, and runtime logic be composed and replaced via plugins under the MIT license. Installation requires Node.js 22+ and a non-C-drive path; the client's key advantage is local folder read/write. Plugins install conversationally, via marketplace, or via command line, and the real value lies in the workflows these combinations enable.
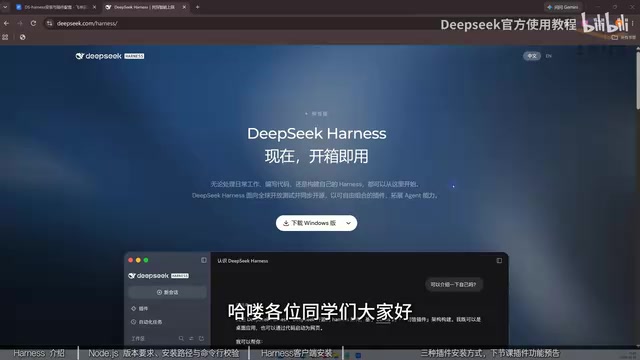
DeepSeek's officially released open-source AI Agent framework Harness is drawing growing attention from developers. According to a tutorial from a Bilibili creator, the project has accumulated hundreds of thousands of stars and tens of thousands of forks on GitHub, placing it among the world's most-watched open-source AI Agent projects. Based on that tutorial, this article systematically lays out the complete workflow from download and installation to environment setup and plugin ecosystem usage, while weaving in reflections on bringing AI Agents into production engineering.
Why DeepSeek Harness Is Worth Your Attention
DeepSeekAd Harness is more than just an AI assistant — it's an intelligent agent runtime framework that gives AI genuine execution, extension, and collaboration capabilities. Its core design philosophy is "Everything is a Plugin": from LLM integration, tool invocation, and memory management to Agent runtime logic, the entire system can be composed, replaced, and extended through plugins.
This means you're no longer limited to AI tools with fixed functionality — you can build a bespoke AI agent system tailored to your own needs. Code development, automated office work, file processing, multi-agent collaboration, and even connecting Skills and MCP to extend specialized capabilities can all be realized within this framework. The framework itself uses the MIT open-source license, allowing free use and extension, and supports flexible integration of different models.
According to the creator, DeepSeek launched the Harness client in October. Previously, DeepSeek models were known for their cost-effectiveness but lacked a companion client; with the Harness client and quality plugins, the boundaries of what's possible have expanded substantially.
AI Agent refers to an AI system that can perceive its environment, plan autonomously, and invoke tools to execute multi-step tasks. Unlike chatbots that can only respond passively, it has a "think–act–observe" loop. The industry commonly breaks an Agent's core components into four parts: model, tools, memory, and planning. Harness's plugin-based design is precisely a decoupling of these parts.
MCP (Model Context Protocol) is an open protocol proposed by Anthropic to standardize how LLMs connect to external data sources and tools — think of it as "the USB interface of the AI world." Frameworks that support MCP can connect to databases, file systems, third-party APIs, and other capabilities in a unified way, avoiding the need to write adapter code for each tool individually.
Skills generally refer to encapsulated, reusable capability units, usually existing as prompts, scripts, or combinations of tools. Agents can load them on demand to complete domain-specific tasks.
Pre-Installation Preparation: Node.js Environment Setup
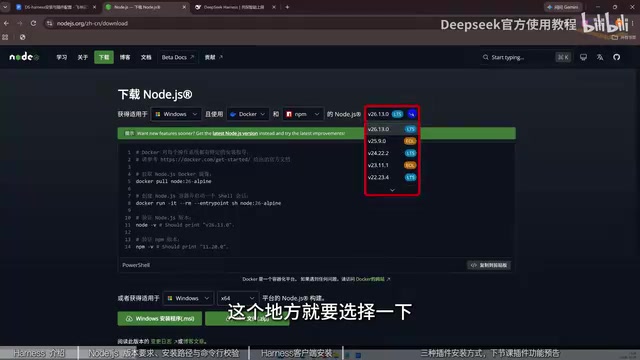
Installation has two main steps. The first is installing the Node.js environment, since many AI tools run on Node.js. The tutorial specifically advises choosing Node.js version 22 or above — not anything below 22.
When downloading from the Node.js website, the site automatically adapts the version to your operating system. The download options include ZIP and MSI formats: MSI can be installed with a direct click, while ZIP needs to be extracted. The tutorial recommends changing the install path to the D drive rather than the C drive for two reasons: first, the installation itself takes up space; second, running the tool generates a large number of cache files, which can easily fill up the C drive.
After installation, you need to verify that the environment is configured successfully. Open the command line (type CMD if you can't find it) and enter node -v (note the space between node and -v). If a version number appears and it's roughly 20 or above, the environment is ready.
Installing the Harness Client and Local File Access
Once the environment is ready, visit the Harness client download page and select the installer for your system. Using Windows as an example, the tutorial downloads the file and opens it with a right-click. Again, it recommends changing the install location from the C drive to the D drive, then clicking Install Now. When finished, you can open the DeepSeek Harness interface.
The interface resembles a web-based chat window, but the key difference is that you can add local folders. Once added, Harness can read, modify, and save the contents of that folder — something the online version cannot do. In the model selection area, several DeepSeek models are available to choose from.
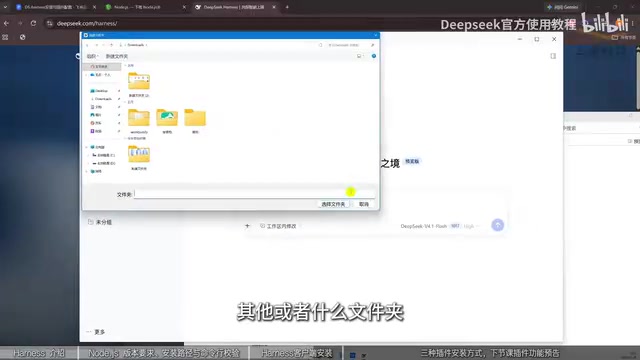
Local folder access involves two concepts: file system permissions and sandboxing. Desktop clients typically run under the current user's identity and thus have read/write permissions, allowing them to directly operate on specified directories; web versions, constrained by the browser security model, cannot arbitrarily access the local disk. For security reasons, mature Agent clients generally limit accessible scope to directories the user has explicitly authorized, and may request secondary confirmation for high-risk operations such as deletion or script execution. In use, avoid adding the system drive root or folders containing sensitive credentials to the workspace.
Three Ways to Install Plugins
Plugins are where Harness truly shines. The tutorial lists three plugin installation methods, each with its own use cases.
Method 1: Conversational Installation
The most direct approach is to send a plugin's GitHub link to Harness in the chat window and let it install the plugin itself. This is simple to operate but consumes tokens and credits.
Method 2: Plugin Marketplace Installation
The approach that doesn't consume credits is through the plugin marketplace. Click "Add Plugin," enter the plugin name (for example, DSH market), and click Install and Launch to enter the plugin marketplace. The marketplace entrance is located in "Settings" under "More." It contains hundreds of thousands of plugins to search and filter, along with a recommendation list — such as a goldfish pendant or desktop pet — that can be installed with a click.
Method 3: Command-Line Installation
Some plugins offer command-line installation. The tutorial uses a vision plugin as an example — this plugin gives DeepSeek the ability to see images, which it natively cannot do with local images, allowing it to identify the number of people in an image, clothing characteristics, and more. Find the install command on the plugin page, copy it, and paste it into the command line to execute. This method may feel a bit abstract to some users, so the first two methods can be prioritized.
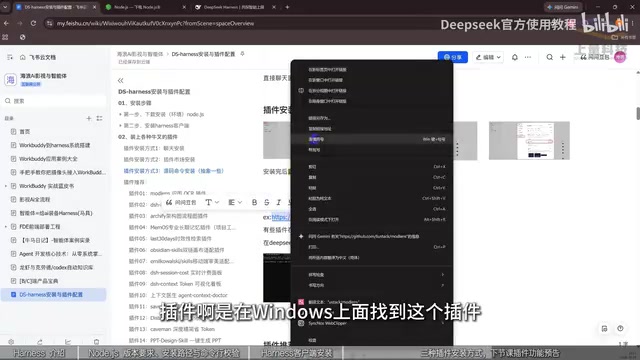
If you don't know what plugins are available, you can simply ask DeepSeek to recommend a list of popular and useful plugins, then pick the ones you need.
The Possibilities of the Plugin Ecosystem
The tutorial demonstrates various ways to play after extending with plugins: having Harness read Bilibili content and output it to a knowledge base for management, generating videos, organizing knowledge directories, connecting to chat software for conversations, and the so-called "AI fish farming" — from raising big fat fish to training intelligent agents with different personalities. These scenarios show that Harness's value lies not in any single feature but in the workflows formed through plugin combinations.
From an engineering perspective, this "everything is a plugin" architecture lowers the barrier to extension and lets an Agent's capability boundaries expand continuously as the ecosystem grows. For developers hoping to dive deep into the AI Agent field, understanding its runtime logic and mastering how to build and tune agents offers more long-term value than simply learning to install and use it.
Multi-agent collaboration refers to having multiple agents with different responsibilities work together to complete complex tasks. Common patterns include supervisor–executor hierarchies, serial pipelines, and debate-style cross-validation. A plugin-based framework allows each Agent to independently configure its model, tools, and memory, thereby customizing capabilities by role.
In production engineering, context management and observability also deserve attention: the former determines how an Agent trades off historical information within a limited context window, while the latter refers to recording and tracing call chains, token consumption, and failure causes. Without these two capabilities, the more plugins there are, the harder system behavior becomes to debug and reproduce.
Conclusion
Installing DeepSeek Harness isn't complicated: with a Node.js 22+ environment, a non-C-drive install path, and client-side local folder permissions, you'll have the three key points down and can start exploring the plugin ecosystem. The three plugin installation methods cover needs ranging from zero-cost to automation, and the practical applications that follow depend on how you combine these capabilities.
One-line Summary
A systematic walkthrough of DeepSeek Harness installation, setup, and three plugin installation methods, plus a look at the engineering value of its plugin-based architecture.
Paragraph Summary
Based on a Bilibili tutorial, this article gives a complete introduction to using DeepSeek's open-source AI Agent framework Harness. The framework's core design is "Everything is a Plugin": model integration, tool invocation, memory management, and runtime logic can all be composed and replaced via plugins, and it's open-sourced under the MIT license. The installation section emphasizes two points: Node.js must be version 22 or above, and the install path should be placed on a non-C drive to avoid cache filling up the system drive. The key difference between the client and the web version is its ability to read and write local folders. Plugins can be installed in three ways — conversational, plugin marketplace, and command line — corresponding to automation, zero-cost, and specific-plugin scenarios respectively. The article concludes that Harness's value lies in forming workflows through plugin combinations, and that developers should focus more on the logic of building and tuning agents.
Related articles
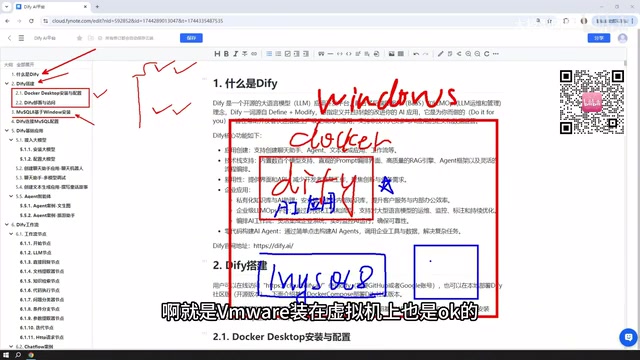
Dify Workflow in Practice: A Guide to Local Deployment and Private Knowledge Base Agents
Based on a Bilibili Dify course: Windows Docker local deployment, MySQL connection setup, five app types and workflow node cases, external LLM integration choices, and the complete path to publishing apps as sites or APIs.
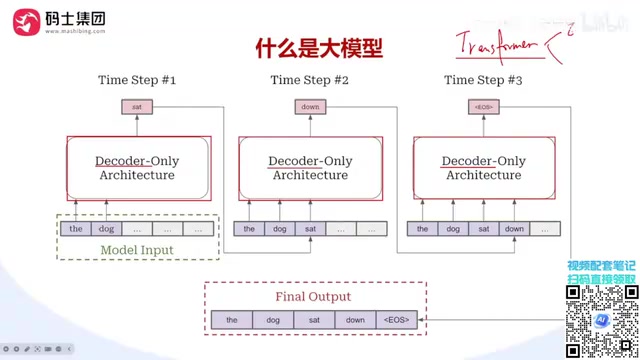
A Complete Guide to Distributed LLM Training: DP/TP/PP/SP Explained
Starting from the single-GPU memory bottleneck, this guide systematically explains DP data parallelism, TP tensor parallelism, PP pipeline parallelism, and SP sequence parallelism in distributed LLM training, covering their splitting dimensions, communication costs, and hybrid parallelism selection logic.

MCP Beginner's Guide: The Standardized Protocol for LLMs to Connect to External Tools
Based on open course content from Bilibili, this article explains the core definition and value of the MCP protocol: why large models need a standardized tool connection protocol, how MCP can encapsulate and reuse traditional software interfaces, and the conceptual distinction between MCP and Skill, offering beginner guidance for Agent developers.